No, this isn’t a cooking blog. But SketchUp and a 3D printer just might help you improve in the kitchen.
Every year in early summer, we’re part a group of about 20 families that head out for a few days to beautiful Cacapon State Park in West Virginia. And every year we put on some sort of dessert contest: cheesecake, brownies, pies. This past year the contest was cookies.
I never enter these things because there are some serious bakers in our group, and the competition is too stiff. But this year I thought I’d at least give it a shot, with help from my 3D printer.
Here’s the park’s logo:

So I set about making a cookie cutter model based on this logo.
Image Import and Trace
To bring the logo image into SketchUp, I used File / Import, and imported as an image (not a texture).
On top of that image, I did some tracing, mostly using the 2 Point Arc tool, as well as a few lines.
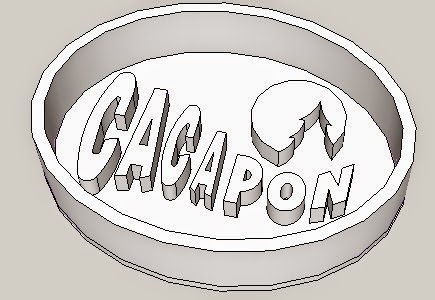
I put the whole thing inside an oval-shaped border, and came up with this initial model. The letters are 4 mm tall, and the cutout border is 10 mm high.
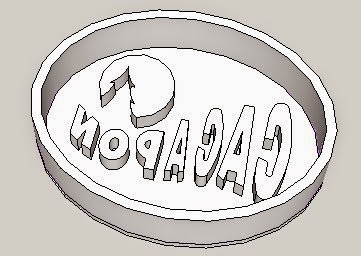
And at the last minute I remembered that the cookie impression will be a mirror image, so I used the Scale tool to flip the letters the other way.
I converted my SketchUp model to an STL file for printing, using the SketchUp STL extension.
I printed out the model on my Afinia H-Series printer, which took about an hour. I didn’t bother removing the raft (the supports at the bottom of the cutter) since that part of the cutter wouldn’t touch any dough.

First Baking Attempt
I tried using this cutter with sugar cookie dough. Two problems: One, it’s very hard to extricate the cutter from sticky dough, and little bits of dough get stuck between the letters. (Non-stick spray helped with this.) And the next problem is that even for those pre-baked cookies that looked good on the baking sheet, once they heated up, the dough flattened out a bit and the letters became too faint to read. Oh well. We had some great-tasting, blob-shaped cookie rejects. (Good thing I have five kids – none of these rejects remained after 10 minutes.)
So thanks to Google, I discovered that the best cookie for impressions is shortbread – there’s no leavening agent, so nothing rises or spreads. (I guess that should have been obvious.) I found this simple recipe from King Arthur Flour, and added a bit of lemon extract (yum!). I also used salted Plugra butter – I tried a few iterations with different brands and this was by far the best. Who’d have thought butter quality would make such an enormous difference. (I guess serious bakers know this stuff.)
So I tried the cutter again. Again, it was too hard to get the cutter away from the dough.
Second Baking Attempt
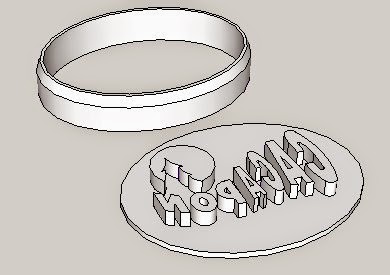
Then the light bulb popped on! I realized that the cookies needed two cutters – one for the oval shape, one for the letters. So I split up the SketchUp model into two separate parts.
And here are the two parts printed (with their rafts still attached):

Each cookie was made in two steps: first cut the oval shape, then imprint on top. With just a bit of water at the top of the dough, the dough almost never stuck to the letters.
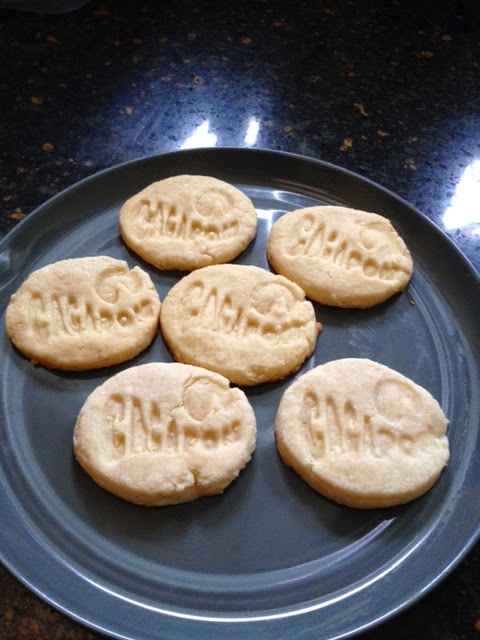
Here are some of the final results – some turned out better than others, but all are pretty easy to read.
They tasted amazing (in my humble opinion), and though they didn’t win, I did garner a few votes. But everyone said I’d get the tech award, if there was one. And there’s always next year….

