Part 1 of this series on paper houses showed how to use SketchUp to create and unfold a simple house, which can be printed, folded, colored, and assembled.
Part 2 showed how to create the same house painted in SketchUp, with the help of a graphic editor.
This post, as well as the next one, show how to model the entire house in SketchUp. And paint it using Photo Match. I love this method – it’s a bit complicated for the youngest kids. But learning Photo Match is a huge boost for spatial reasoning, and for thinking generally in 3D.
Model the Mouse and Details in SketchUp
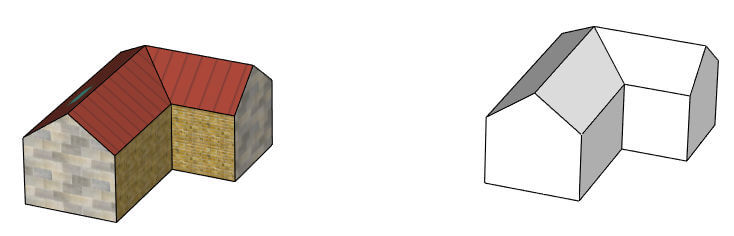
Here’s where I’m starting – our familiar simple house, painted with basic materials.

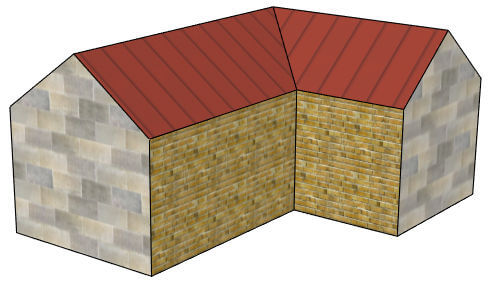
The house that will be printed and folded needs to be painted from scratch. (Recall from Part 2 that if you create new faces within faces, the Flatten extension won’t work correctly.)
So make a copy of the house, and change all of the copied faces to the default material.
On the house with materials, add windows and doors (and skylights!) using SketchUp’s drawing tools. All of the details I added below are made with 2D shapes like arcs and rectangles.
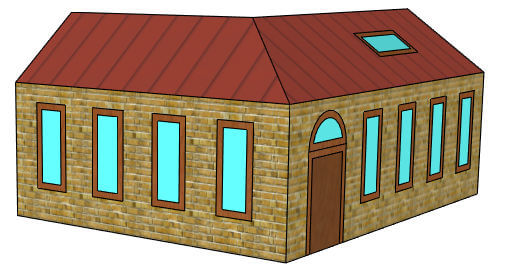
For address numbers, I used the 3D Text tool, set to be filled but not extruded.

Get Images for Photo Match
Photo Match is a tool for painting two or more faces at once, based on a photo. These photos are usually real-world pictures taken of existing buildings on a project site, but there’s no reason we can’t use Photo Match for a toy house.
The viewing angle is what matters for a good Photo Match image. You should be facing one corner at about a 45-degree angle, so that each face you’re looking at is completely in view. Here’s the angle I’m using for the inside corner of the house:

I took a screen capture of the house, while the house filled the entire SketchUp window. But you can also use one of the File / Export / 2D Graphic options to save your image.
Here’s the viewing angle I used for the outside corner, and I took a second screen capture.

Next, in Part 4, we’ll use these two images to paint the blank model.

