In Part 2 of this series, I showed how to import an image of a tree and make a face-camera component. In that example, all of the work was done within the model itself.
But if you work often with landscape elements, you might want to build yourself a library of tree or shrub models for easy import. The most efficient way to do this: save each tree in its own file, stored in a library you can easily access.
In this post, I’ll demonstrate how to set up one such tree model, and show how this tree works when imported.
First, I need to download a tree image with a transparent background. That’s easy – a Google Image search for “PNG tree” in Google Images was covered in Part 2.
Here’s my blank SketchUp file, with axes displayed.
Use File / Import, search for PNG files (or all image types), and bring in the tree as an image (as opposed to a texture).
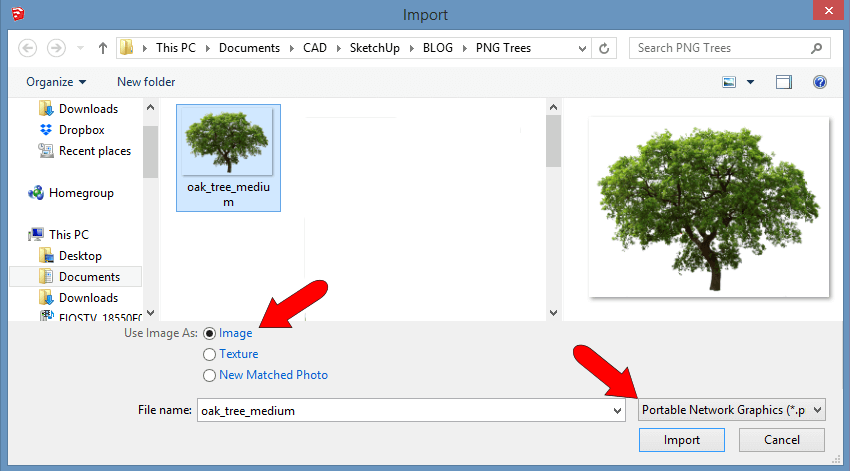
(Note that I could also bring in this tree as a texture, and use to paint a face. I’d just have to have the face there in advance, ready for painting. Either way works, both methods involve more or less the same steps.)
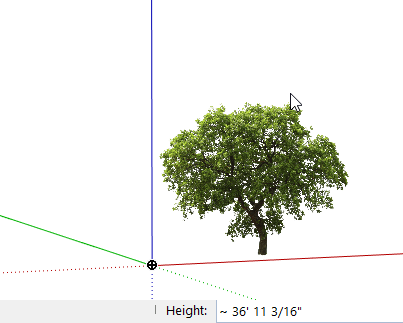
So that the tree will have the correct orientation, it should be oriented this way: along the red axis, with the blue axis pointing up. (If you orient the image along the green axis, it will always face away from you – it will always look like a cardboard cutout.) Before you complete the image, move your mouse toward the top of the image and look at the Height field. Make sure your tree is a reasonable size before clicking to complete.
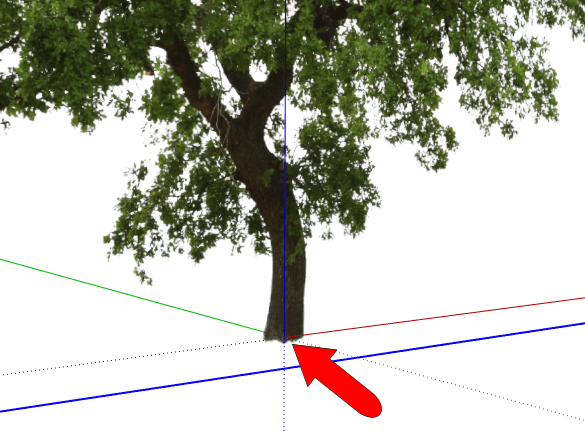
This isn’t essential but I like to do it anyway. I use the Tools / Axes tool to relocate the origin to the bottom of the tree trunk. This way when the tree is imported, the cursor is already at this point. If you change your axes, be sure to keep the red, green, and blue axes pointing the same way they were before.
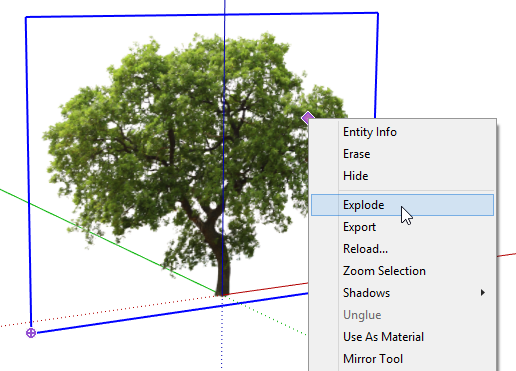
Images in SketchUp aren’t very usable as objects – in almost all cases they need to be exploded (right-click menu).
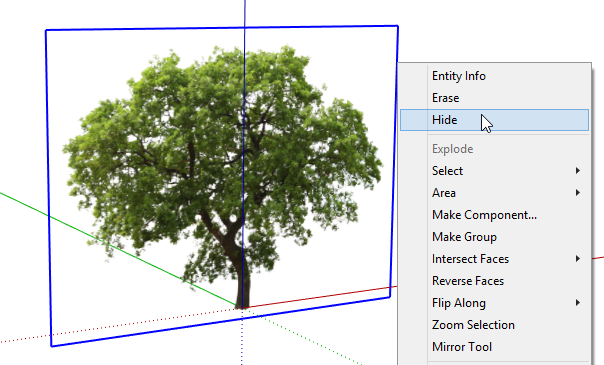
Now the tree is a regular SketchUp face, painted with the image. To make it look more like a picture and less like a face, the rectangle edges need to be hidden. To do this, select all four edges and choose Hide from the right-click menu.
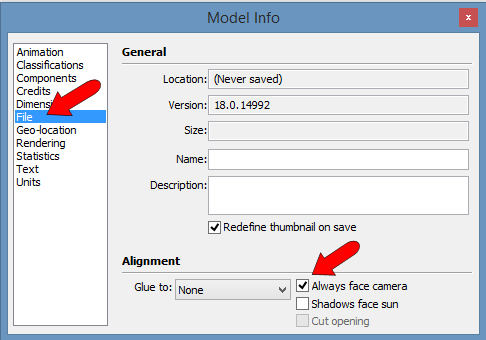
Last step before saving: Go to Window / Model Info, and open the File page. Make sure Always Face Camera is checked.
Now save and close the tree model.
Open a model into which you want to import the tree.
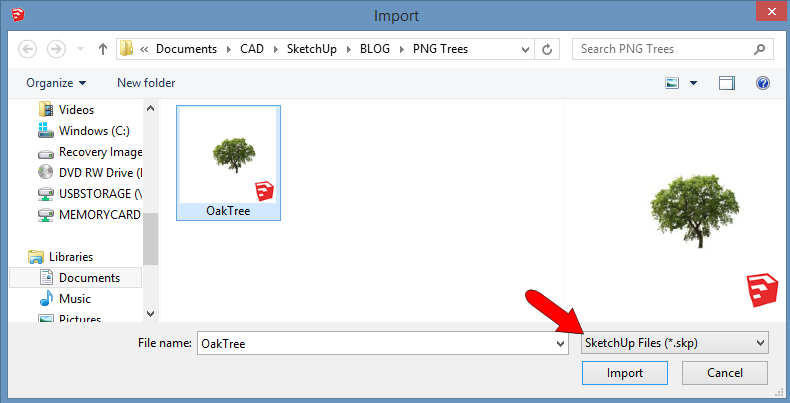
Use File / Import again, but this time look for SketchUp files (not image files). Find the tree and bring it in.
Since my tree has its origin at the bottom of the trunk, that’s the point by which I bring the tree into the model.
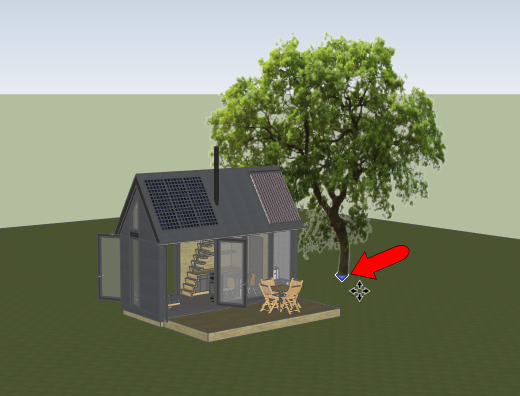
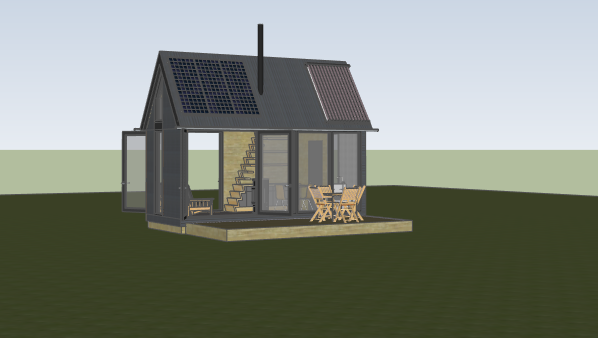
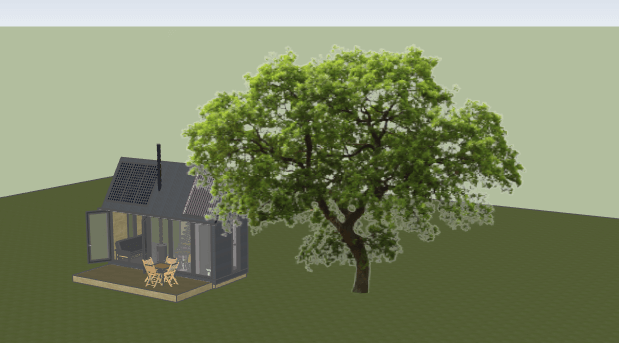
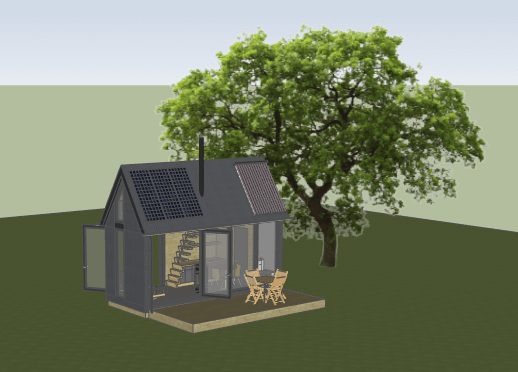
Wherever I place this model, it always faces me.
In the next post (the last one on trees), I’ll show how to handle the weirdness that occurs when you turn on shadows. Stay tuned….

