In Part 1 of this series, Bonnie showed the importance of using SketchUp‘s Layer0 for all loose geometry, and placing components and groups on other layers. In this post, I’ll demonstrate how layers can take you beyond basic organization. And in Part 3, I’ll combine scenes and layers for seamless control of object visibility.
Layer Organization Case Studies
The first example below shows how models can be effective without being overloaded with layers. The second example shows the other side of the coin: why having lots of layers can be great for displaying exactly what you need.
A well-organized set of layers can:
- Greatly improve model performance and speed – hidden objects don’t slow SketchUp down
- Display different conditions, or seasons, or views of a model
- Enable you to work more easily around your model, by hiding objects that hinder view and access
- Make it easy to locate objects
(And if you have a model with poor organization, it’s never too late to reorganize – a series we plan to post in the future.)
Case Study 1
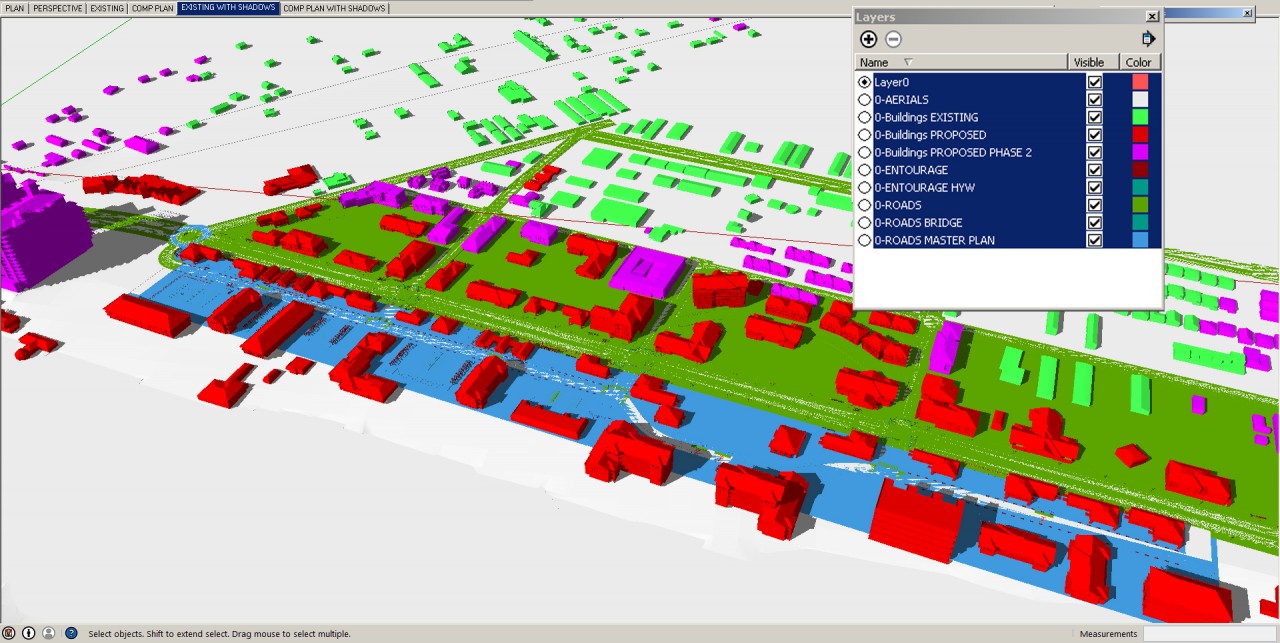
Here’s a detailed master plan concept. Even without vegetation, the model can be slow-performing.
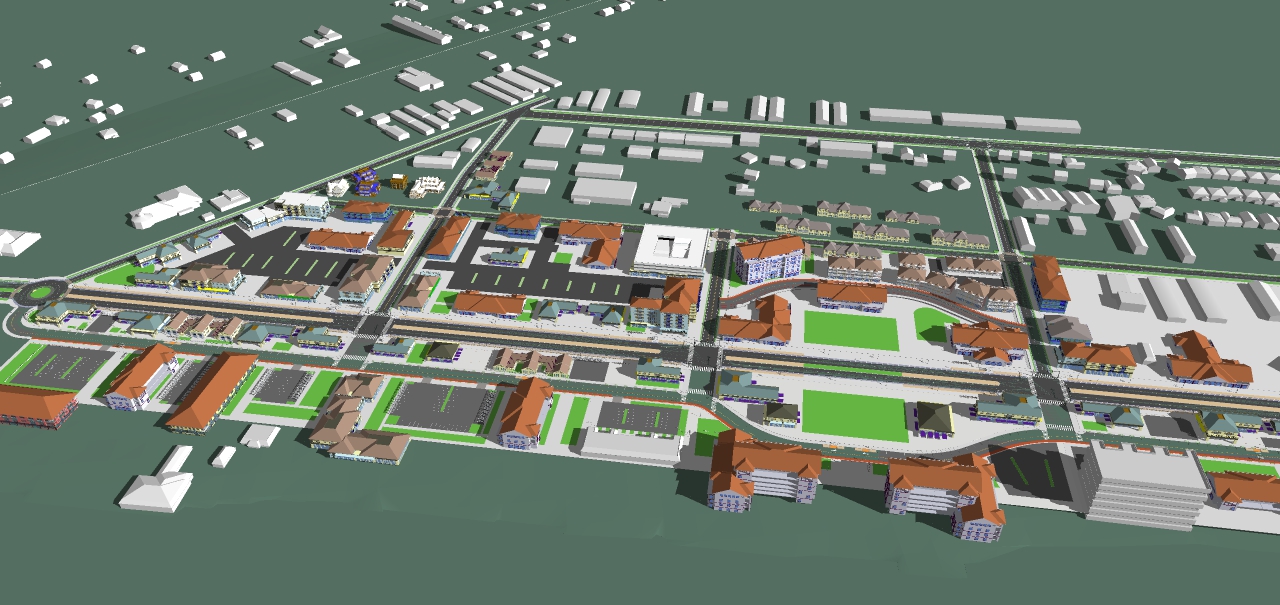
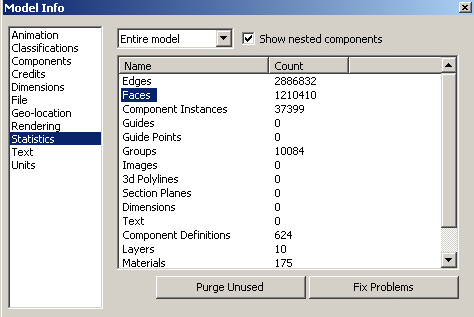
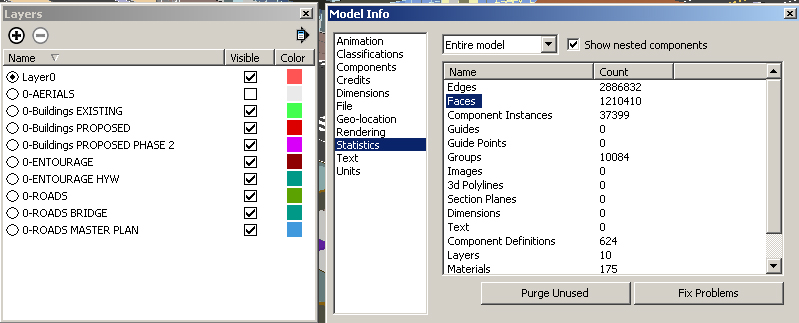
This model has over 1.2 million (!) faces, and almost 3 million edges. SketchUp can really drag with a model this huge.
But you don’t need an equally huge number of layers to effectively organize a model like this. In addition to Layer0, I added only 9 layers.
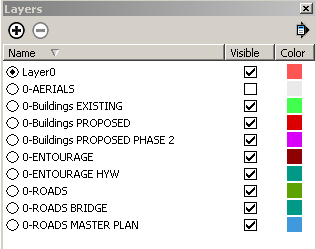
(A quick note about layer naming: This model was imported from another program, and imported layers came in as well. When creating new layers in SketchUp, I usually add a “0” or another numeral at the beginning of a layer name. This makes it easy for me to differentiate my SketchUp layers from the imported layers. When sorted alphabetically, the SketchUp layers appear first – sorting order shows numbers before letters.)
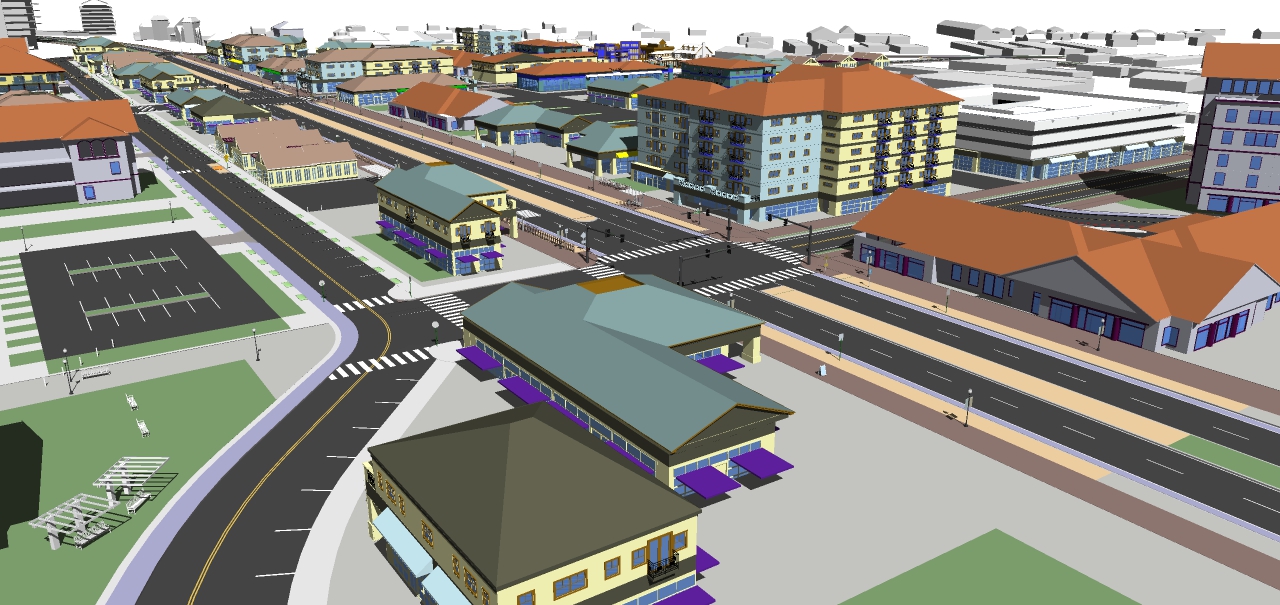
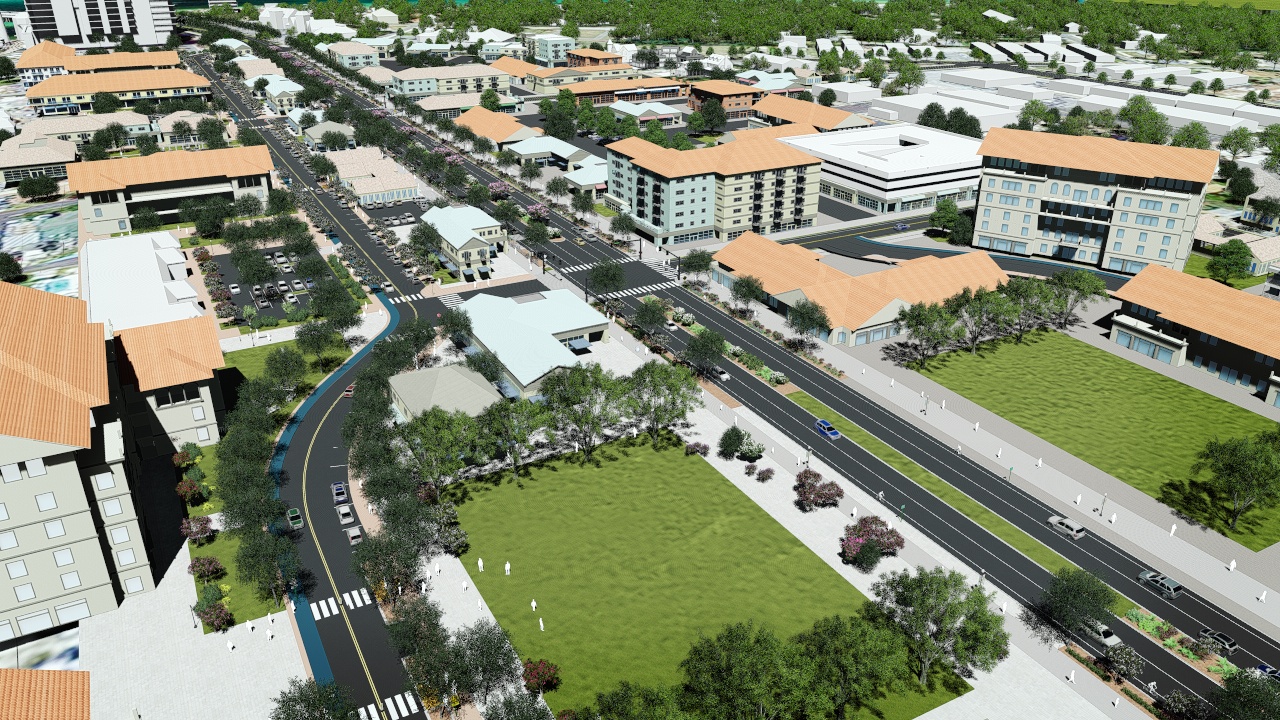
Objects on hidden layers aren’t graphically processed by SketchUp. So toggling off certain layers (by unchecking the Visible box), such as entourage or buildings, makes everything perform faster. You only really need all layers displayed at certain stages of a project: assessing, exporting images, or rendering.
In this view, I’ve turned off all entourage. It looks like a ghost town, but it’s easy to navigate around.
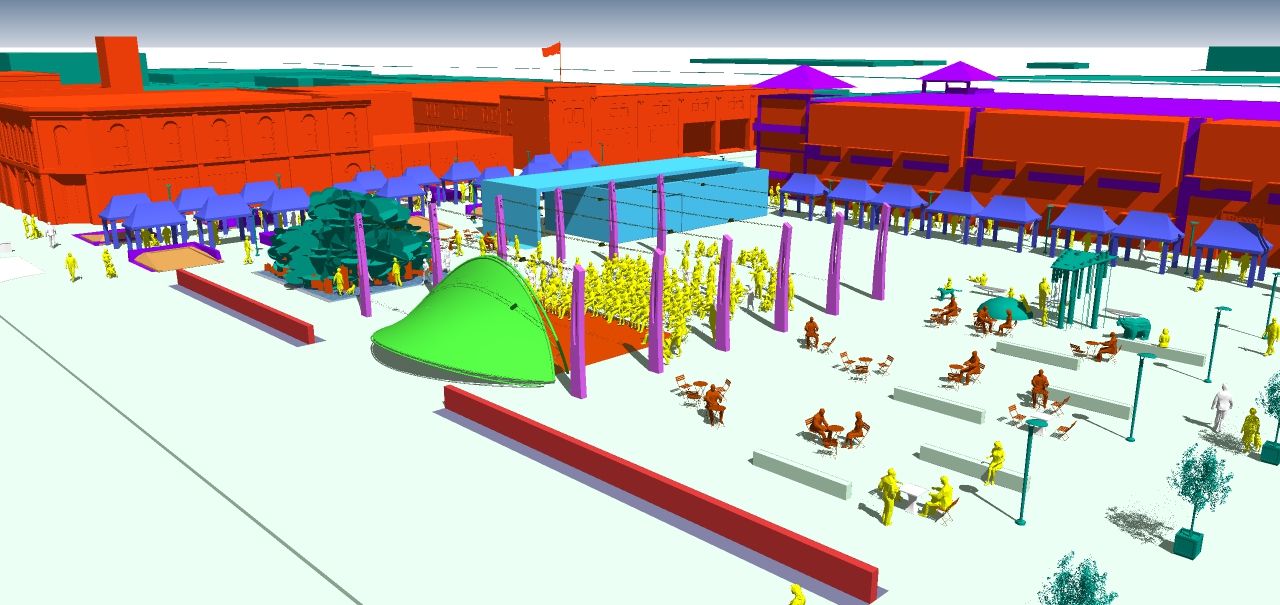
Each layer is assigned a default color, which you can change by clicking the layer’s color swatch. The layer structure is made clear with the Color By Layer option, which you can find by clicking the big arrow at the top right corner of the Layers window. This displays each components and group based on the layer it “resides” on. This option also becomes a useful planning graphic, with the named layers serving as an impromptu legend.
This model’s final rendered view in Lumion shows all layers, including Lumion’s own entourage. (I use Lumion layers for further organization – more on that in the future.)
Case Study 2
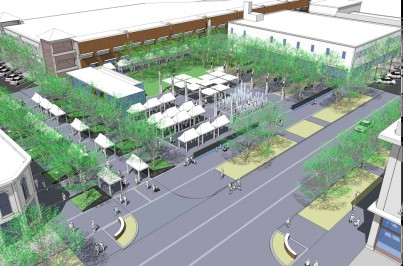
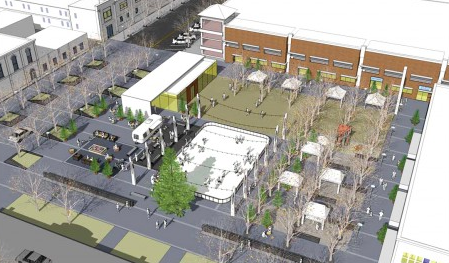
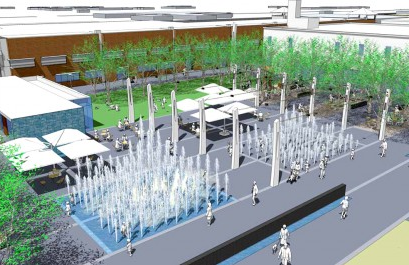
This model of an urban plaza has many more layers than the previous example. Over 50 layers house this model’s objects, entourage elements, and site features.
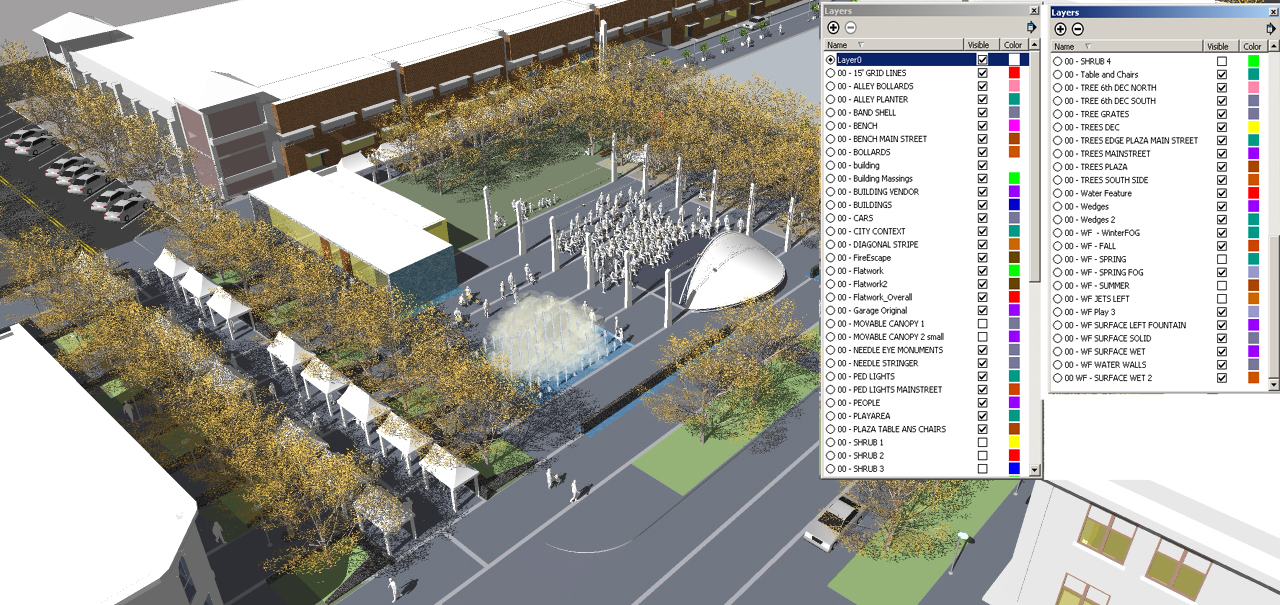
The purpose behind all these layers is to demonstrate that the project is a flexible urban ecosystem, designed to accommodate festivals, music, food trucks, ice-rinks, and more. Canopies, people, cars, tables and chairs, water feature options, booths, ice-rink, fire pits, building facades all have their own layers, and are therefore easily reconfigured, moved, and edited. The result is a large, detailed model that can be shown in multiple configurations.
Layers and Animation
It’s also easy to create an animation in SketchUp, to demonstrate a model’s many layers. This animation was completed in SketchUp using the Page Utilities 2 extensions from Smustard. This extension enables custom scene transitions in SketchUp – a cool way to “drill down” into the details.
Next up, in Part 3, I’ll combine scenes with layers, to create easy-to-navigate models and animations.


Permalink
I really appreciate these postings. Helps reinforce learning and acts as a reminder of what’s possible and how to implement.