Building SketchUp models in context, a.k.a. geo-location, requires reference information. Whether working on bridges, residences, commercial development, or parks, including the surrounding area is crucial for accuracy.
This post is about Skelion, available in the Extension Warehouse. If you haven’t yet installed an extension from there, see our post on how to do it.
Add Location: Drawbacks
I always keep the Google Earth toolbar displayed – these tools enable you to import low-resolution aerials and terrain context. You can find this toolbar via View / Toolbars / Location (PC) or View / Customize Toolbar (Mac).
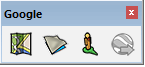
The Add Location tool is what you use to bring in terrain from Google Earth. But this tool has a maximum import size of one square mile. If you need to bring in a larger area, you can import multiple locations. But then you can lose accuracy – the edges of the imported areas don’t always line up as they should. And even if the accuracy were 100%, who wants to spend time stitching together pieces of Earth?
Also, the land that comes in via Add Location is pretty decent for 3D terrain modeling. But if you need a finer level of detail you might want to look elsewhere.
Enter Skelion
Skelion is a complex and powerful tool used mainly (but not only) for creating solar panel system design. But for the purposes of this tutorial, we only need one of its features: the ability to import into SketchUp large terrain maps of almost any size.
Skelion can be found here in the Extension Warehouse. A free version (demo) is available, but continued use requires a $200 purchase. Not cheap, but if you’re working on large-site projects, it’ll pay for itself, particularly now that Google Earth Pro is free. (See my post on using Google Earth Pro to obtain high-resolution aerial images.)
First, set a reference location for Skelion: In SketchUp, choose File / Geo-location / Add Location. In the Google Earth map that opens, navigate to the location, select the region you want to import, then click Grab to bring the location into SketchUp..
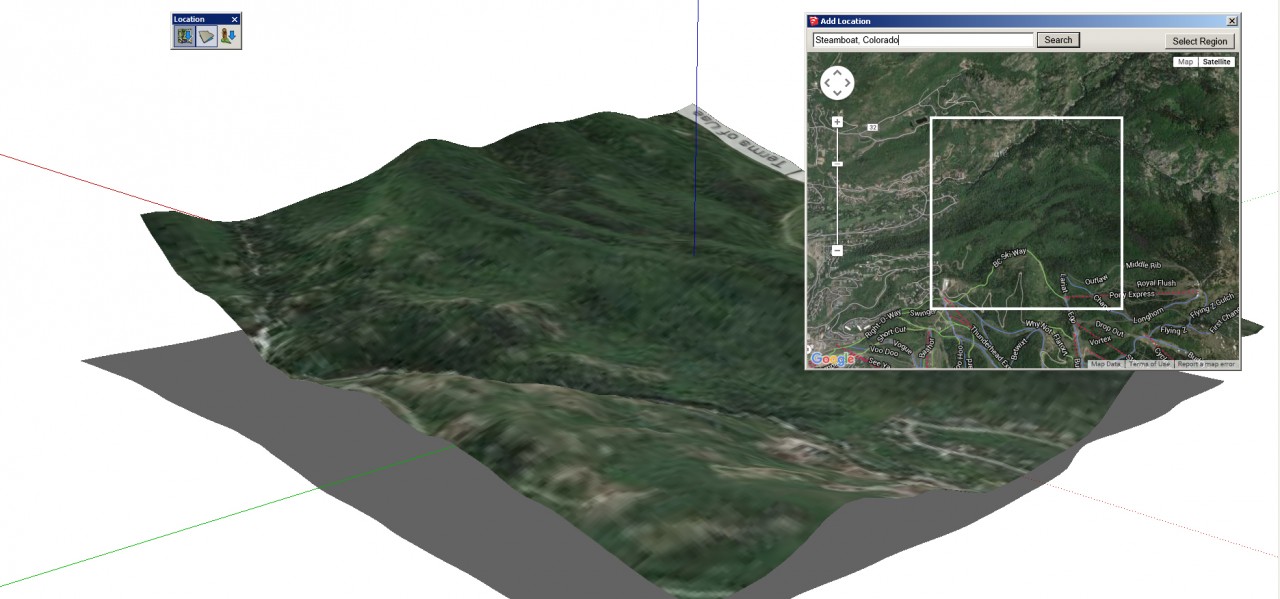
Next, on the Skelion toolbar, click Relief. This opens a new map – not an aerial map, but rather a standard road map, making it easier to find a specific location. The map will be centered on the location you just imported from Google Earth.
The Skelion relief map functions the same way as the Add Location tool: You select the region, grab it, and import it.
Select the area you want, which can be up to hundreds of square miles if needed. The larger the area, the longer the processing time might be, but you’ll also save time avoiding the multiple imports that would be required by SketchUp’s Add Location tool.
A loading screen will appear while Skelion accesses the NASA server (cool, eh?) for terrain information.
That’s a Lot of Terrain
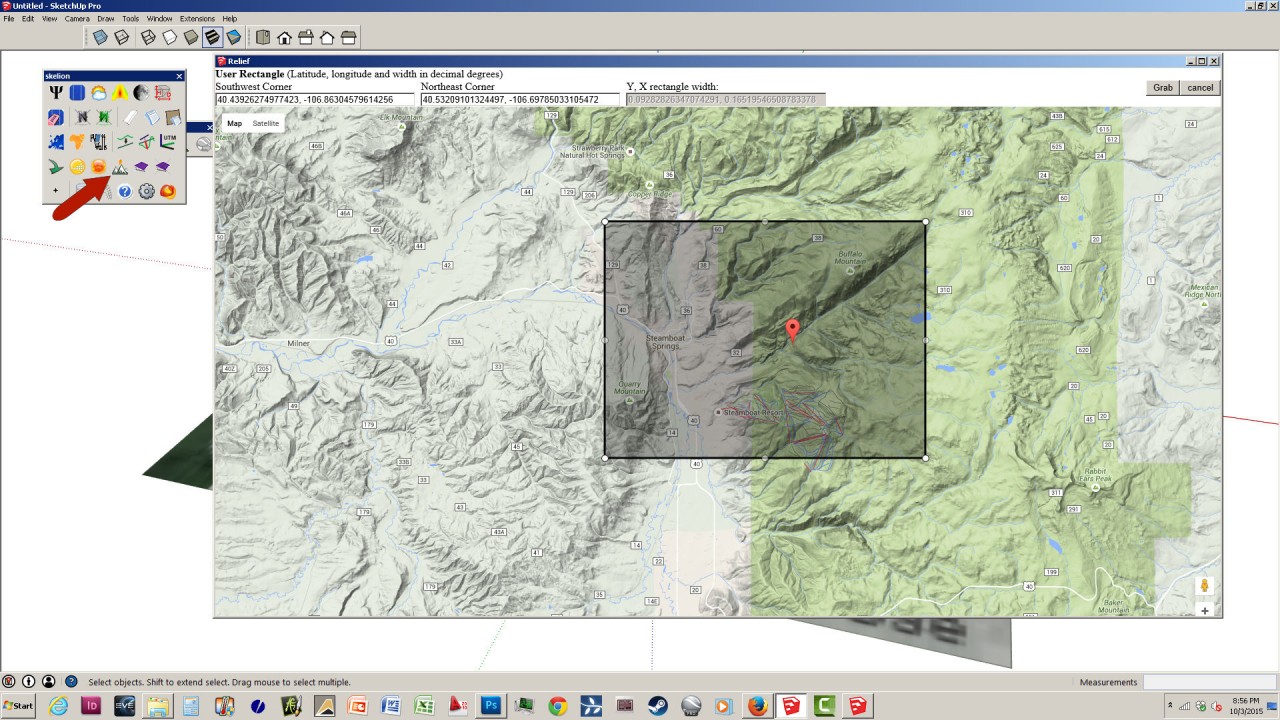
The result: a larger terrain area. Check out the size difference between Skelion’s terrain (in white) and the one you got from Add Location (in green). To see the 3D terrain view in SketchUp, choose File / Geo-location / Show Terrain.
Using the Contour Maker extension, available for free from the SketchUcation Plugin Store, it’s easy to add contour intervals to your new terrain.

Next, in Part 2, I’ll show how to “wrap” the terrain with a high-resolution aerial image.


Permalink
Hi Daniel,
This is a great post and certainly a tool I’d like to use. However, when looking it up (via the Extension Warehouse or the Skelion website), it mentions that this tool is a solar plugin to design renewable energy installations. I don’t see anything about contouring. Am I missing something? Thanks so much