In the school where my twins go, each third grader is assigned a US state. After spending a few months learning about their state, the students write a report, give a little speech, and present a diorama. If you don’t know what a diorama is, picture a shoebox filled with cute, stand-up, informative things:

If you’re a parent, you probably dread the word “diorama.” It almost always means parent homework, forcing you to use glue stick and scissors and tape and sometimes (shudder) glitter.
But this year, I had the upper hand.
As the only mom in the grade with a 3D printer, I got to actually have fun with this project. (Plus it gives me something to blog about.)
In this three-part series, I’ll detail the three prints I made:
You’ll also have to wait for Part 3 to see the final dioramas!
Imported Bear STL File
My son’s assigned state was New York. Apparently black bears are common there, at least (I hope) in rural areas. So I looked for a bear on Thingiverse. The best model I could find was actually a brown bear, but who can tell the difference when looking at a 3″ tall plastic model?

Here is the bear’s STL file, imported into SketchUp. (To do this, you need the SketchUp STL Extension, which is detailed in this post.) 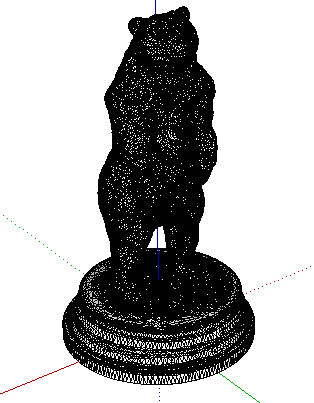
Each face is a tiny triangle, so there are a zillion edges everywhere. Which makes this look indeed like a black bear.
Here’s how the model looks after I soften the edges (select everything, right-click and choose Soften/Smooth Edges). More like a polar bear now.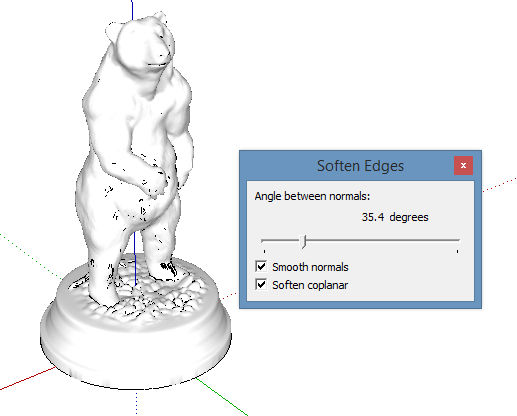
Modifying the Model
The model is fantastic, but I don’t need that big, round stand supporting the feet. I need some support though, so I’ll cut out most of the stand but not all. To do this, I’ll add a rectangle that passes through the stand, and erase everything that falls below that rectangle.
Here’s that rectangle out in blank space – this is easiest to do in Top view. 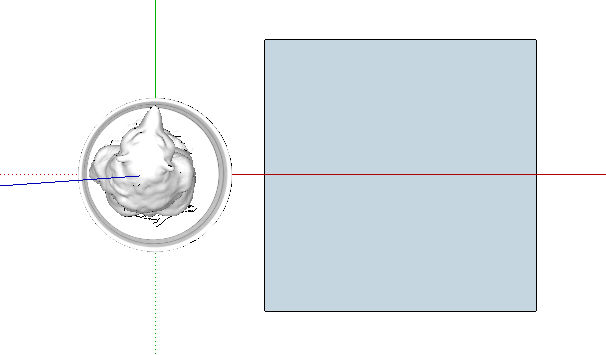
I moved the rectangle straight up to the height I wanted, then I slid it over into the stand. 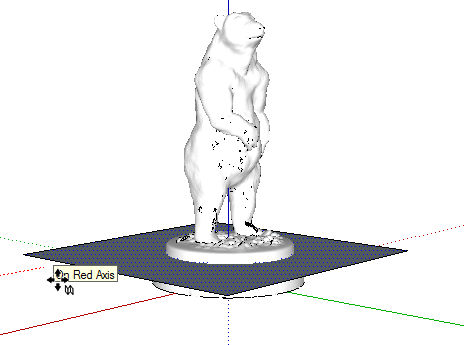
To get edges where the rectangle meets the stand, I right-clicked on the rectangle and chose Intersect Faces / With Model. Zooming in, we can see edges all along the rectangle intersection, but a bunch of faces also managed to get turned inside-out. This is a weird feature of the Intersect tool – it doesn’t always do what you want. It’s easier to see when showing hidden edges (View / Hidden Geometry).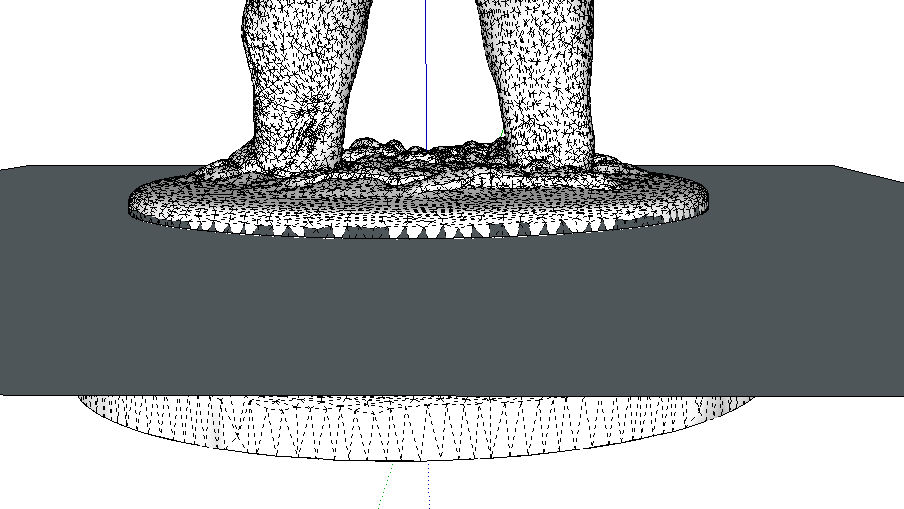
After the rectangle is erased, and all of the edges and faces below it are erased, I’m left with a bunch of holes all around the bottom of the stand. It’s annoying that these disappear, and I’m not sure how to prevent it.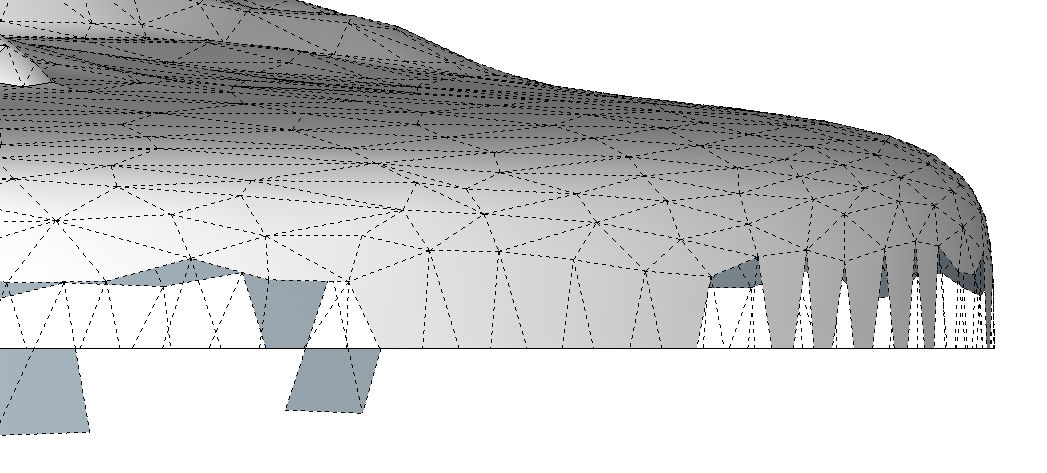
Replacing all of these missing faces was tedious, but it only took maybe five minutes. It’s a matter of using the Line tool to trace any edge of a missing face.
(And had I known about the Zorro extension at the time, I would have used that instead – it’s great for slicing away chunks of your model.)
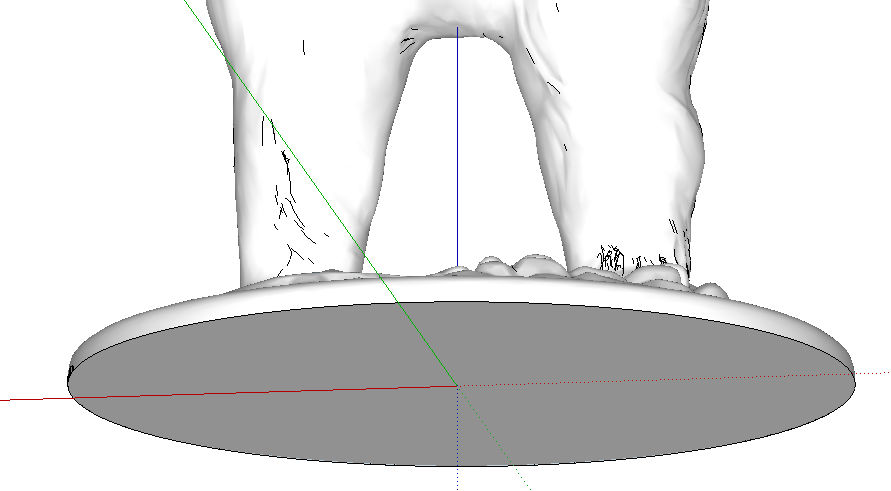
Here’s the finished stand – the bottom face is filled in, no faces are missing. And although it’s not necessary for 3D printing, I centered the stand at the origin.
Exported Bear STL File
I used the Tape Measure tool to sized the bear to be about 3″ high. Then I exported this model back into STL format.
Here’s the bear STL loaded into the software of my Afinia H-Series printer: 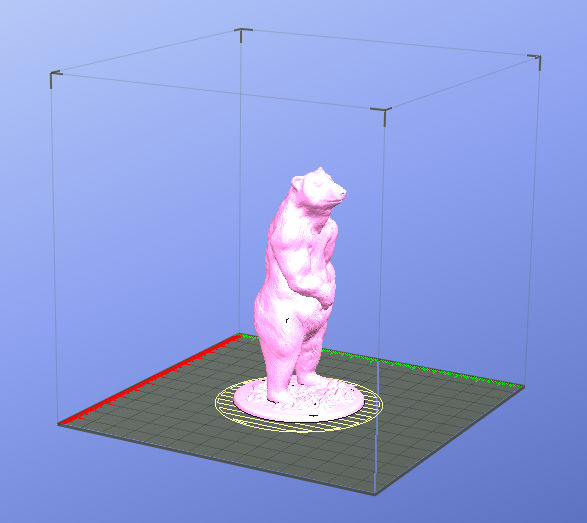
Here’s the print – it’s hard to see all of the detail in black plastic, but it looks great in person.
It looked great in the diorama as well, which I’ll show in Part 3.
Next up: in Part 2, a 3D printed Saguaro cactus for the great state of Arizona.

