In Part 1 of this series, I showed how to create the curved, horizontal cross beam for the 3D pergola. And in in Part 2 I showed how to make the vertical supports.
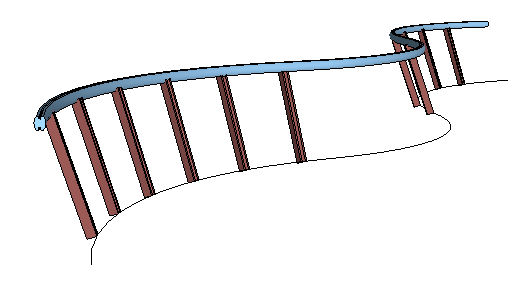
In this part, we’ll finish up the pergola by adding the tilted cross-beams along the horizontal beam.
Design the Beam
Draw the shape of this beam like this. You can use FredoScale for tapering, or just use the Offset tool for the cutout, trimming away extra edges.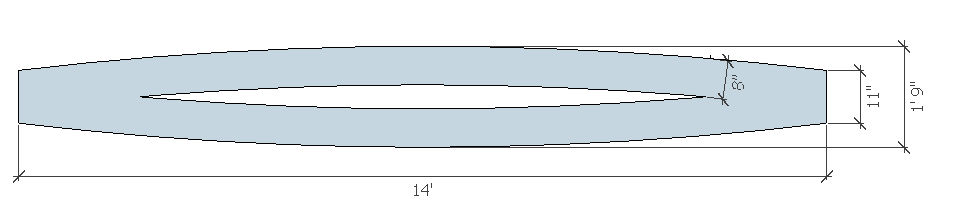
Give the beam some thickness and make it a component. 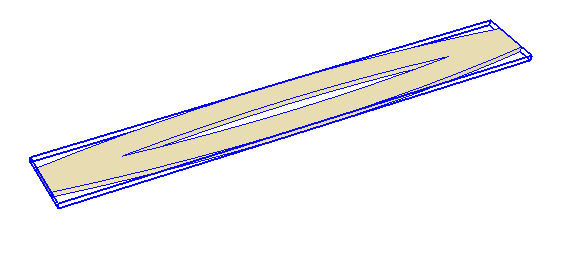
Before continuing, open the component for editing, and check the component’s axes. If you drew your face as I did, oriented horizontally, the axes won’t be correct. You’ll have to rotate the entire beam so that the green axis is perpendicular to the pergola path, as shown below. 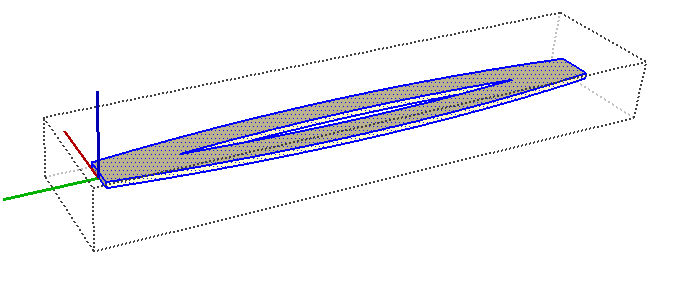
Copy the Beam along the Path
Close the component, and use Path Copy to arrange beams along the three arcs (one arc at a time), keeping them on the ground for now. I’m using a spacing of 4 feet. Leave the original beam component in place – we’re not quite finished with it. And if you have any beams that overlap or are too close together, erase one of them.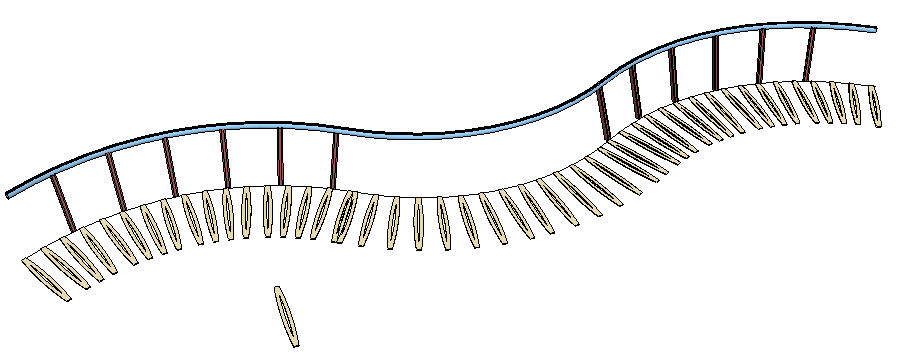
To fix the placement of the beams, switch to plan view (Camera / Standard Views / Top). Choose Camera / Parallel Projection to turn off perspective view. In this view, we can see that each component needs to be moved along its green axis, so that it will reach the curved horizontal beam. 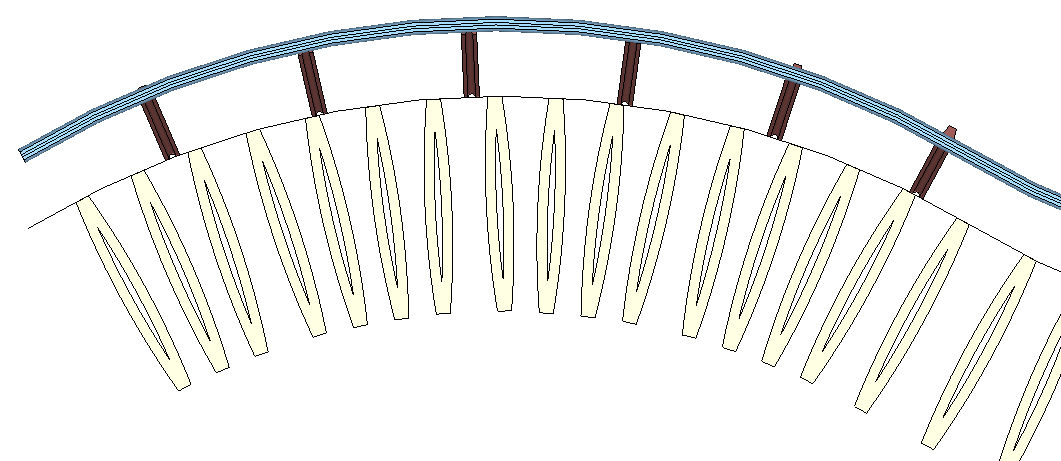
Open the original beam component for editing. Select the whole thing and move it along its green axis, while also keeping an eye on the curved array of beams. Stop moving when most of the pergola beams look like they’re in the right spot. (You’ll never get them all to be perfect in this step). 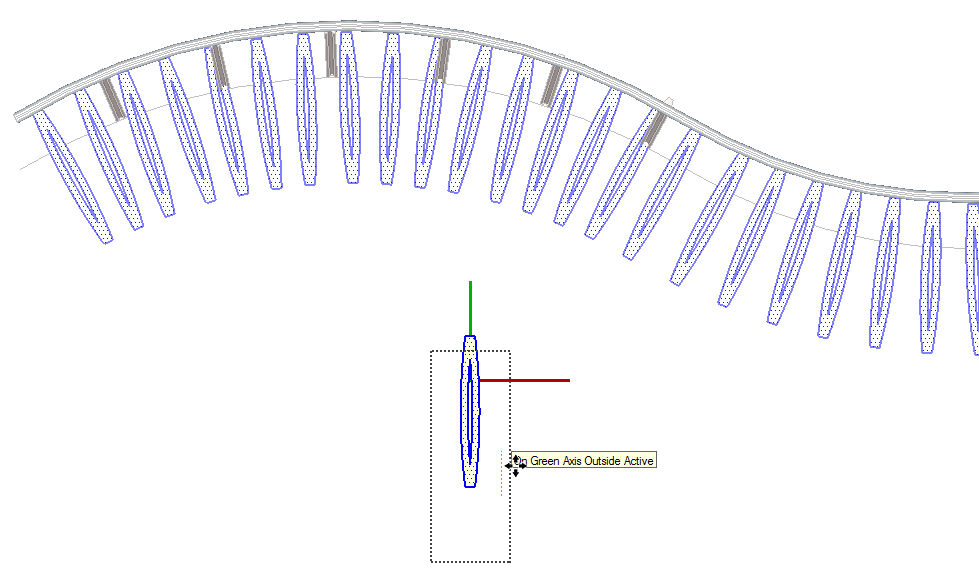
Now you can close and erase the original beam component.
Move the Beams Up
All of the beams now need to move up from the ground. To select them all, assuming you have Selection Toys installed, right-click on any beam and choose Instances / Select All. 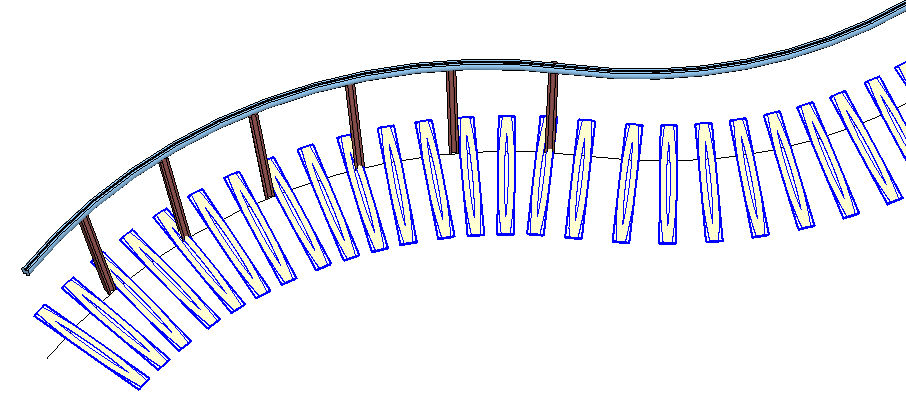
(If you don’t have Selection Toys installed, you can select all beams from the “In Model” collection of the Components window. Or just use selection windows.)
Activate Move, press the Up arrow to lock the blue direction, and move up the entire set of beams. 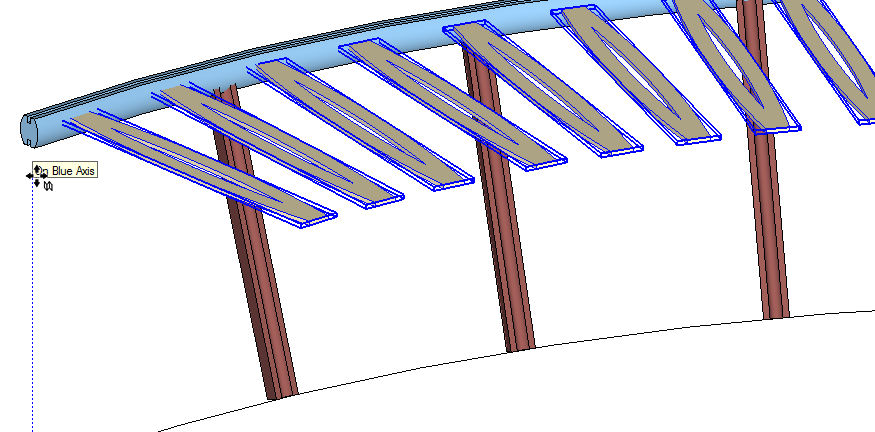
Fine-Tuning
Check again in plan view – some beams will need to be nudged in one direction or another, like the one shown below. 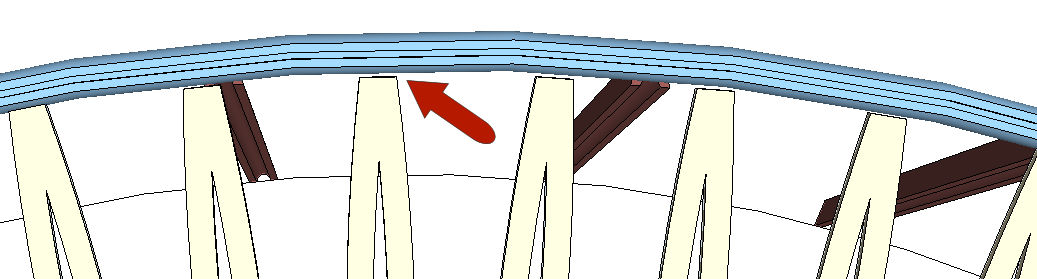
Final step: tilt the beams. You can do this by opening one for editing, activating Rotate, orienting the protractor along the beam, and spinning it around just a bit. 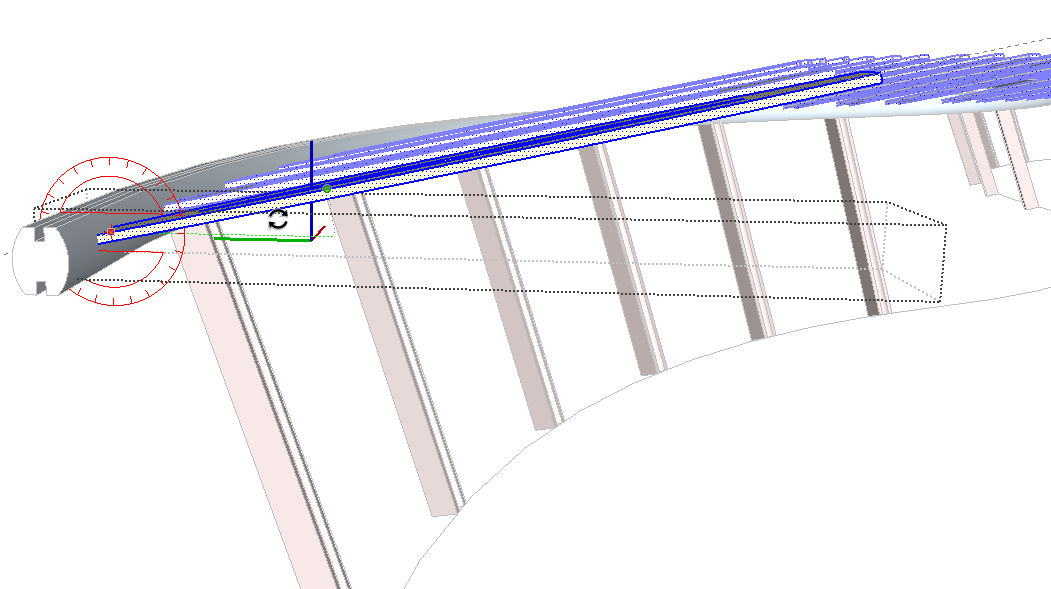
And that’s it!
If you found any of this confusing, or if you just have a few minutes to spare, check out my video showing how I did the steps in this post.


Permalink
hi! just wanted to ask… what materials do you think are suitable (and sustainable) for the pergola?
Permalink
I have to say that what materials to use are not my area of expertise 🙂 I can show how to apply them in SketchUp but for sustainability you’d have to ask someone who does more landscape work.