Look at this lovely, sun-filled room (rendered from SketchUp by the free Twilight Hobby rendering extension:
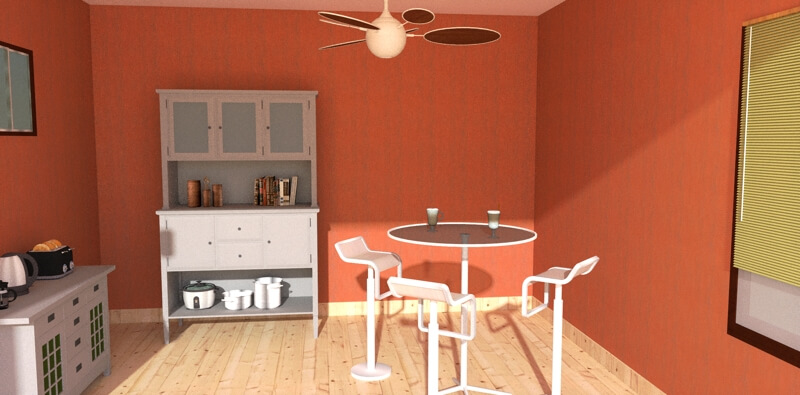
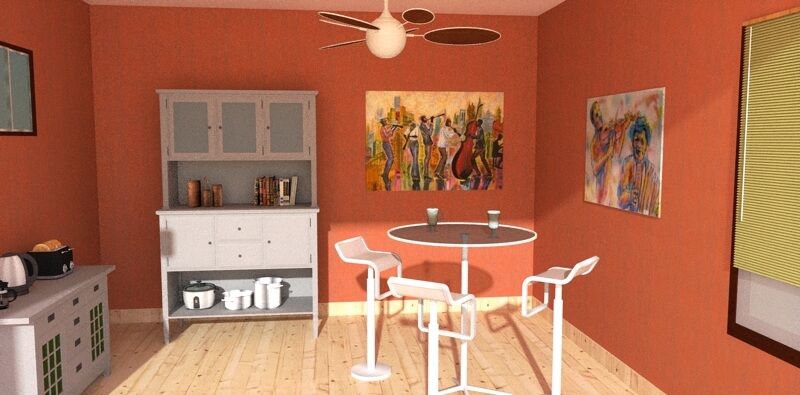
It’s missing something, right? How about a couple of fun paintings or posters on the walls:
It’s pretty easy to bring images into SketchUp, to use as textures or stand-alone images. But there are also correct and incorrect ways to do this, and this four-part series will show the best practices for interior design objects like wall art.
Specifically, I’ll get into the use of components and their alignment properties.
Import the Image
Here’s the SketchUp model of the art-less room.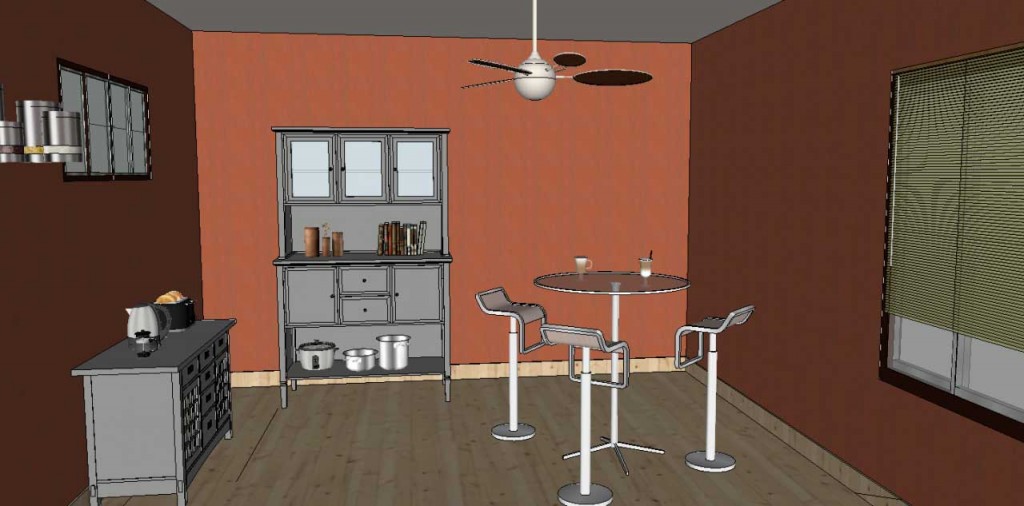
And here’s the picture I want to bring in as wall art – a painting called “The Band” by New Orleans artist Adrian Fulton. This piece measures 4′ wide.
I saved this image from its website by right-clicking on it and choosing Save Image As.
In SketchUp, choose File / Import. Make sure to look for image files (as opposed to SketchUp or other 3D formats). Also choose the Use as image option, so the image will come in as a stand-alone object, rather than a repeating texture.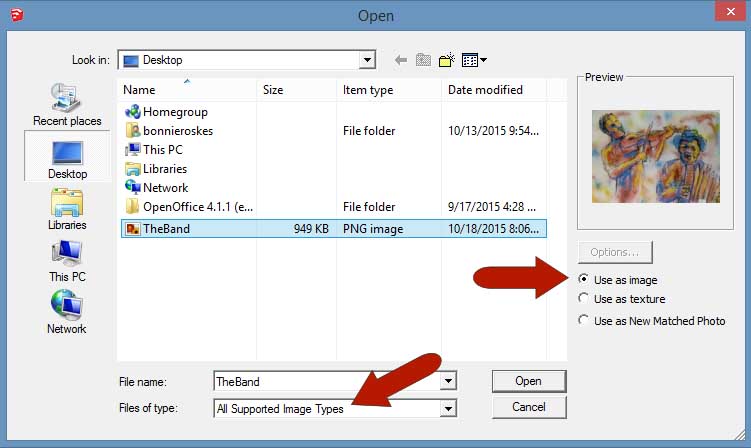
The entire room is already a group (as it should be), so an imported image won’t stick to it. I’m placing the lower left corner first, and moving my cursor almost directly to the right, to size the image by width. (If the cursor were higher, the measurement would be the image’s height.)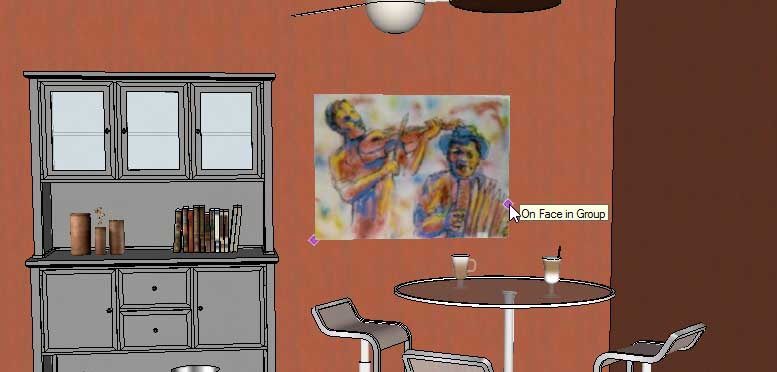
The measurement field lists the current width:
To change the width to 4′ I just type that value and press Enter.
Make the Picture a Component
I could leave the image as it was imported: a stand-alone image that works somewhat like a group or component. This makes for a decent looking poster. But a SketchUp image isn’t very useful. Images are 2D, they can be hard to select and move, they have no alignment capability. So I’m exploding it, which changes the image to a painted rectangle.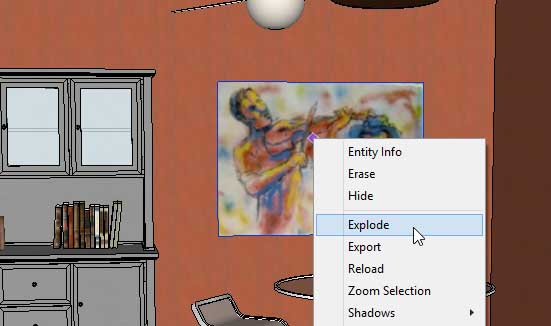
To make the painting a bit more realistic, I’m pulling it out from the wall to give it some thickness, about 1″.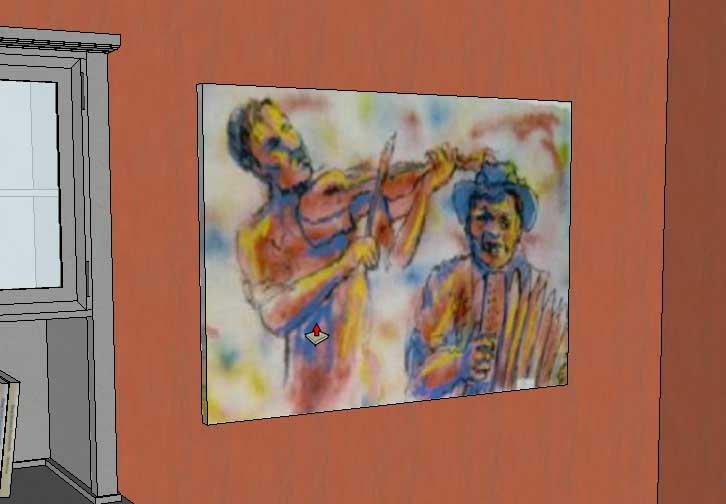
And the last step: I’m selecting the entire painting and making it a component. (You can find Make Component on the right-click menu or the Edit menu.) I’m naming my component “Band Poster.” Here’s why you want a painting to be a component – look in the Create Component window. Under Alignment, you can set a painting like this to Glue to something. (This type of component could also cut an opening, but that’s an option more relevant to windows or doors.) I’m choosing the Any option for gluing, which means the painting will align to any type of face: vertical, horizontal, sloped. 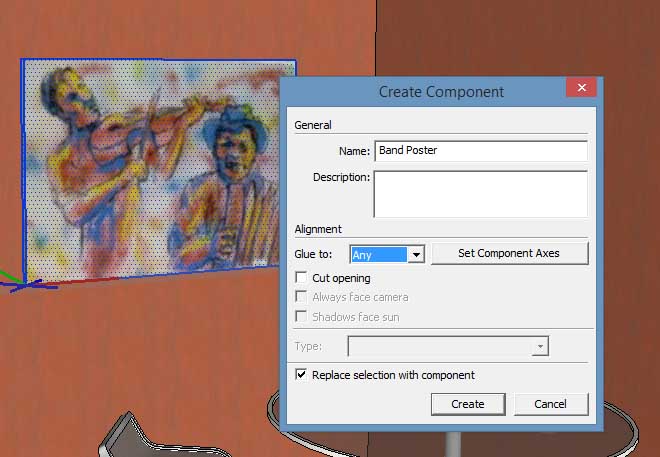
But here’s the problem, which will be fixed in Part 2. Aligning a component requires that you pay attention to a component’s axes – the axes affect what aligns to what. The default component axes are as shown above, attached to the front, lower left corner of the painting. The red axis goes off to the right, blue goes up, green goes into the wall. This reflects the way the painting is physically modeled, but these axes won’t give you the alignment you want. Stay tuned for Part 2 to find out why.

