Interior Design

Importing Images: Part 2 - Adjusting Textures

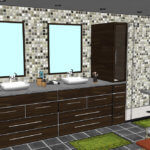
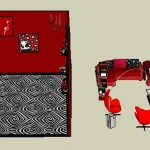
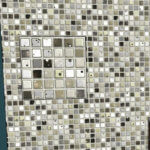
In Part 1 of this series, I showed how to import a digital image to paint a wall. Here’s the model – a bathroom with a tiled wall. Bigger Tiles The initial sizing was done assuming each tile was 2″ x 2″. But then I find out that they are actually 4″ tiles. No problem. […]

Importing Images: Part 1 - Creating Textures

In the few months we’ve been posting to this blog, we’ve covered all levels of SketchUp users. And so far, we’ve found that we get the most views on posts that cover SketchUp basics. So here’s a short tutorial on a topic I get asked about all the time – how to use a digital […]

The Rumpled Blanket: Part 3 - Project Your Own Texture

In Part 1 of this series, we learned how to project and sample a material to apply it to an organic face (a blanket). And in Part 2 we used a similar technique of a temporary face to do the same thing. In this post, I’ll show how to apply your own texture to the […]

The Rumpled Blanket: Part 2 - Easy Projecting

In Part 1 of this series we started with a model of a bed covered with a rumpled blanket. When this blanket is painted with a texture, it comes in as a jumbled mess. To fix it, we learned how to project a texture, sample the texture, and apply the projected texture to the rest of the blanket. […]

The Rumpled Blanket: Part 1 - Projecting a Texture

This three-part series focuses on how to paint organic surfaces by projecting a texture. Specifically, we’ll see how to paint the rumpled blanket on this bed model: If you want to follow along at home, click the 3D Warehouse logo on the image above. That’ll take you to the page where you can download this model.   […]

Sketchup Groups and Materials Kitchen Render 010011

The previous three parts of this series focused on how to combine layers and scenes to present and view two (or more) design options for the same space. (See Part 1, Part 2, and Part 3.) This last post focuses on a similar scenario – comparing material options for one part of a model. This requires the use […]

SketchUp Layer Setup RedRender10007

In Part 1 of this series, I showed how to create layers and place objects on them. In Part 2, I showed how to use copied objects to create an alternate room design. In this part, I’ll demonstrate the final step in this example: how to combine layers and scenes for easy viewing of both design options. Option 1 Layer […]

SketchUp Layer Options 19

In Part 1 of this series, I started with this room design: I want to compare this room layout to another design. The first step, which I showed in Part 1, was setting up layers – one layer for each design. In this part, I’ll show how to use the layers to display the two different designs. […]

SketchUp Layer Setup RedRender10007

Which room layout do you like better? This . . .   . . . or this?     In this four-part series, I’ll show how to combine SketchUp layers and scenes to explore different options for room design. It’s a useful technique for interior/kitchen/bath designers, remodelers, contractors, or any regular Joe (or Josephine) looking to change a room layout […]