In Part 1 of this series, I showed how to use the Skelion extension to import terrain into SketchUp. This produces a much larger terrain area than what you could import using SketchUp’s Add Location tool, which imports data from Google Earth.
While Add Location limits you to one square mile of imported terrain, Skelion is able to bring in tens, even hundreds, of square miles. But the Skelion terrain map does not come in with an aerial image, or an actual map draped onto the surface. You get just the terrain. Fortunately Google Earth Pro, which is now free, allows you to download and import aerials and maps up to 4k in resolution. I use these types of aerials to create detailed context models in Lumion. (More on that in the future.)
The process is relatively simple, though there are a lot of steps. In the process described below, I’ll show how to draft a large surface used for importing a high-res aerial into SketchUp. Once placed, the aerial will be scaled and projected onto the Skelion terrain. (This all sounds intimidating but it’s really not so bad.)
If you want to work through these steps yourself, go back to Part 1 and use that information to create a SketchUp model that has both Google Earth and Skelion terrain.
Setup
First, open the Preferences (PC: Window / Preferences, Mac: SketchUp / Preferences) to the OpenGL page. Make sure that Use maximum texture size is checked, to provide the highest resolution for the aerial.
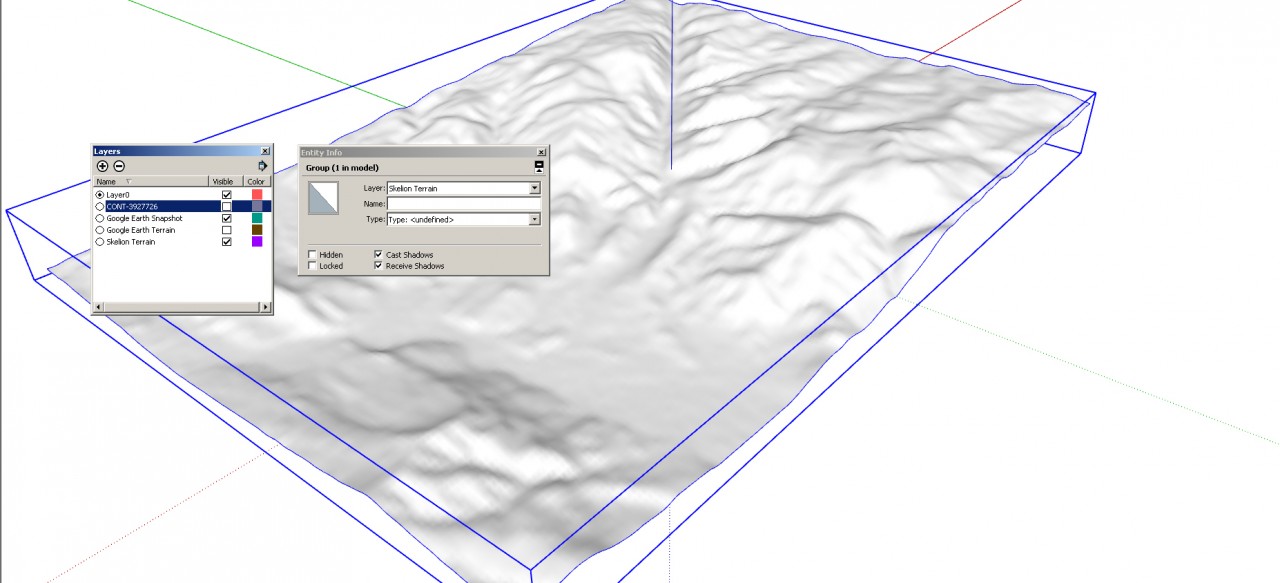
Then open your Layers window. Turn off the “Google Earth Terrain” layer (the 3D terrain) and display the “Google Earth Snapshot” layer (the 2D terrain).
Create a new layer (click the “plus” icon) and name it “Skelion Terrain.”
Right-click on the Skelion terrain and choose Entity Info. Use this window to place the terrain on its layer.
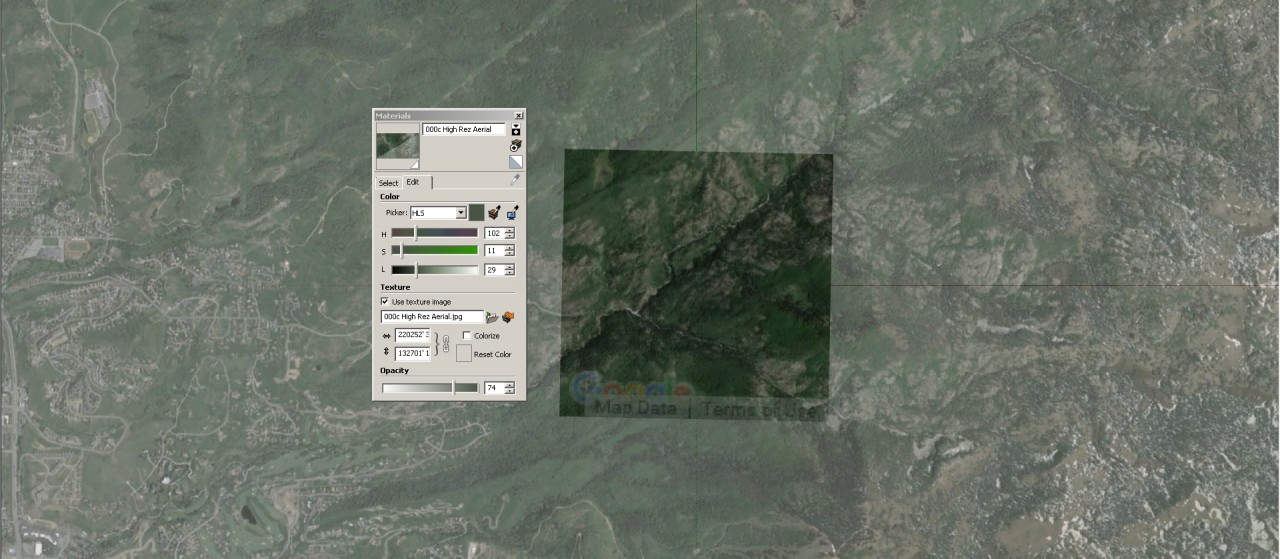
Get the Google Earth Pro Aerial
Switch to plan view (Camera / Standard Views / Top). With the Rectangle tool, draw a face larger than the Skelion terrain area.
Place this rectangle under the Skelion terrain.
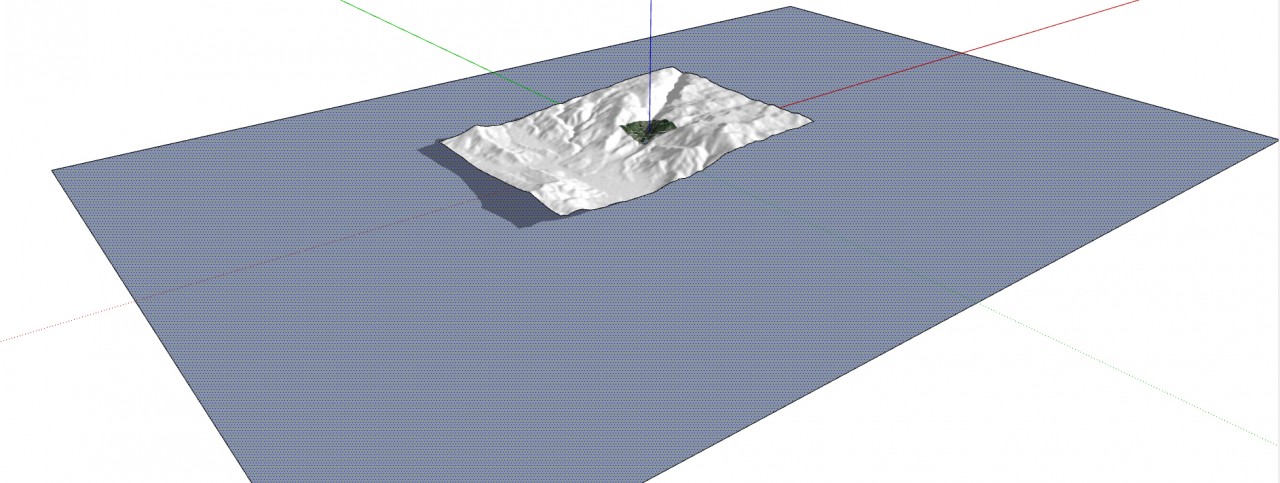
In the Layers window, hide the “Skelion Terrain” layer. All you should see now is the new rectangle and the Google Earth 2D snapshot.
Open Google Earth Pro and navigate to the location of the aerial image in your model. Set up the view to more or less match the Skelion terrain. The center of this view should match the original terrain imported into SketchUp from Google Earth.
Export the image (File/ Save Images), using the maximum resolution available.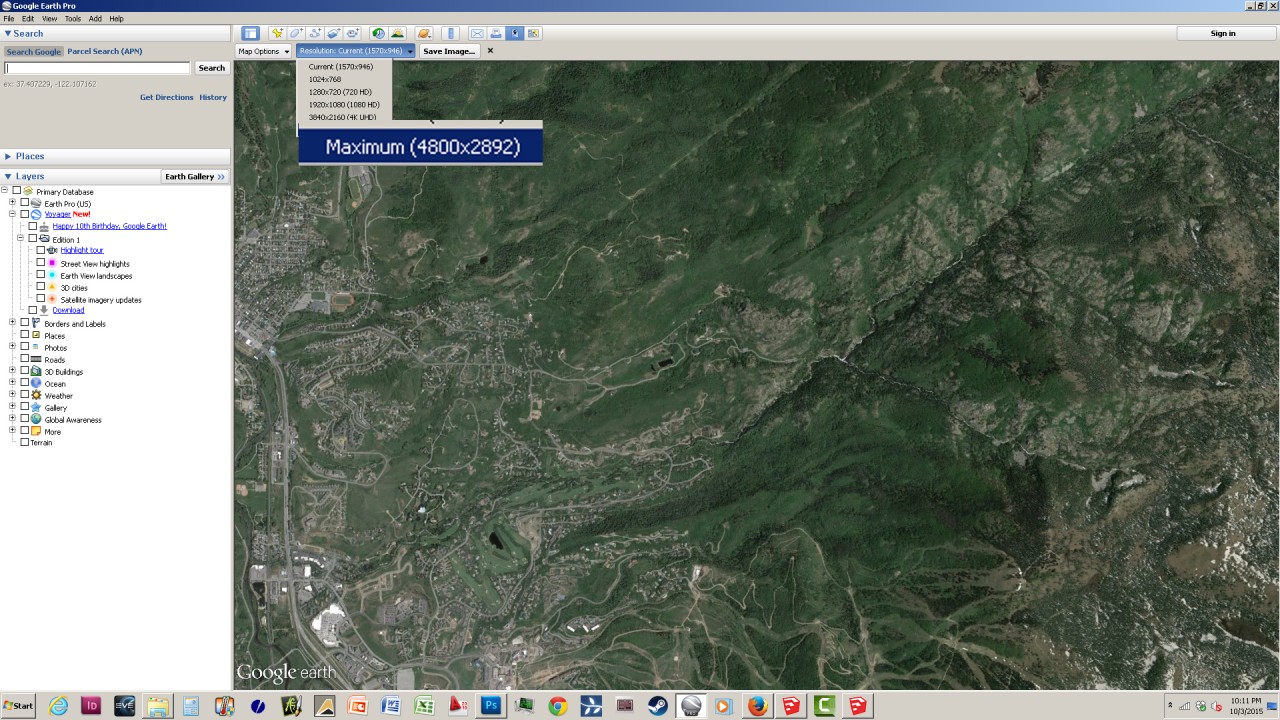
Import the Aerial into SketchUp
In SketchUp, choose File / Import and set the import file type to JPG. Browse to the high-res image you saved from Google Earth Pro, and import it as a texture (not an image).
Find the bottom left corner of the large rectangle. Double-click to paint the image onto this face – the image should fit the extents of the rectangle.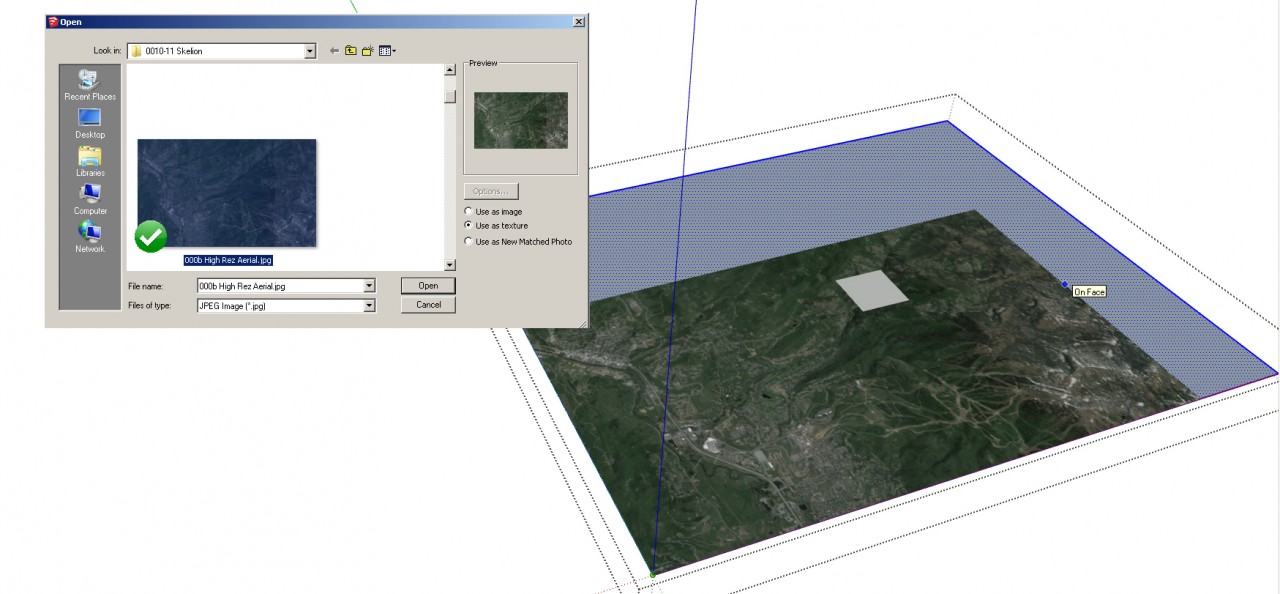
Select-double-click the newly-painted rectangle, then right-click on it and choose Make Group.
Scale and Move the Aerial
To bring the aerial to the correct size and location, we’ll use the Google Earth snapshot. Scaling this way isn’t 100% perfect, but it comes pretty close.
With the Paint Bucket sampling tool (PC: the eye dropper on the Materials window, Mac: hold the Cmd key while Paint is active), click the Google Earth snapshot. This makes the snapshot’s image the active material. Open the Edit tab of the Materials / Colors window, and reduce the Opacity to make the image translucent.
Go back to Top view, and choose Camera / Parallel Projection. This establishes a true, orthographic plan view.
It’s a good idea to save this plan view as a scene. In case you accidentally orbit out of plan view, you can click the scene tab to return. Open the Scenes window and click the “plus” icon.
Use the Move tool to position the rectangle to match the Google Earth snapshot. (You should never move the Google Earth snapshot itself – that’ll freak out SketchUp to no end. That group should be locked anyway to prevent this from happening.) Then use the Scale tool to adjust the size. Again, don’t shoot for 100% accuracy – that’ll be very frustrating. But take the time to match as best you can.
Project the Aerial
Now comes the final, rewarding step! Open the aerial rectangle for editing (right-click on it and choose Edit Group). Right-click on the rectangle face and choose Texture / Projected.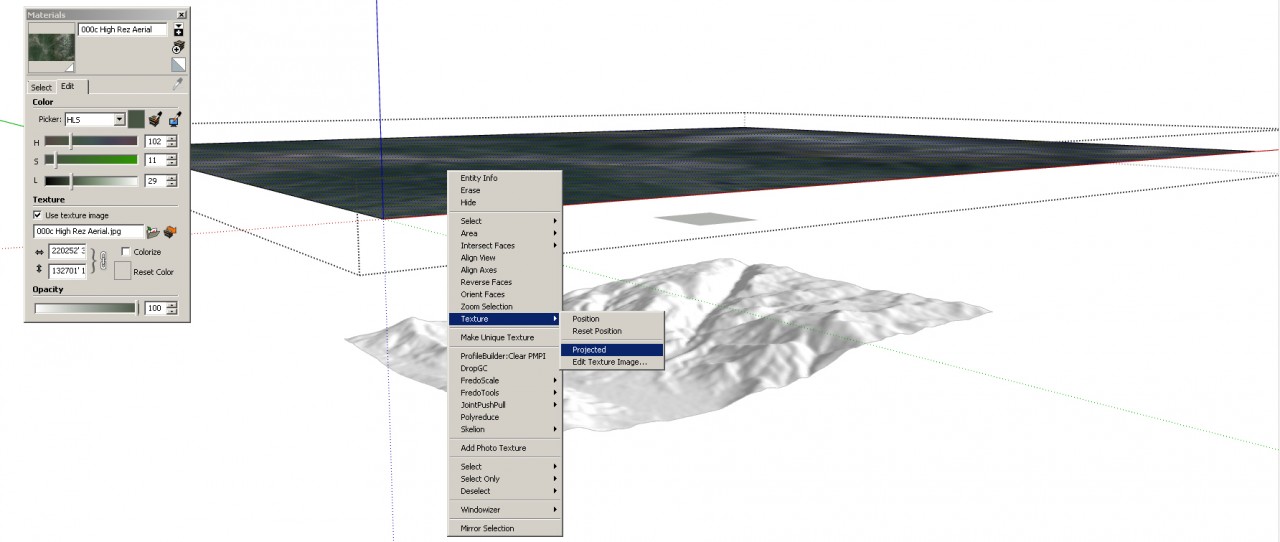
Then close the group.
Make the “Skelion Terrain” layer visible. Edit this group and be sure to Select-triple-click on the surface. This will select all the terrain faces and the hidden edges that compose the terrain. This is necessary for the projected terrain to display correctly.
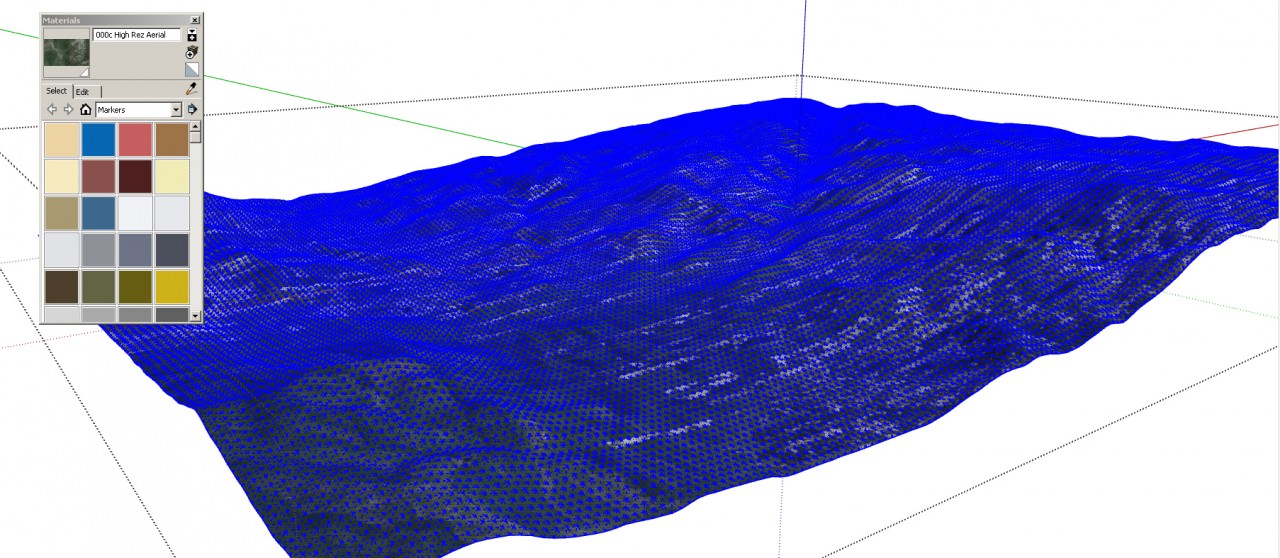
Get the eye dropper back again, and sample the aerial image. Then click the Skelion rectangle to apply the image. The aerial should drape onto the terrain, correctly located and scaled.
To test things out, switch the visibility of the Google Earth terrain and snapshot layers and see if things line up correctly.
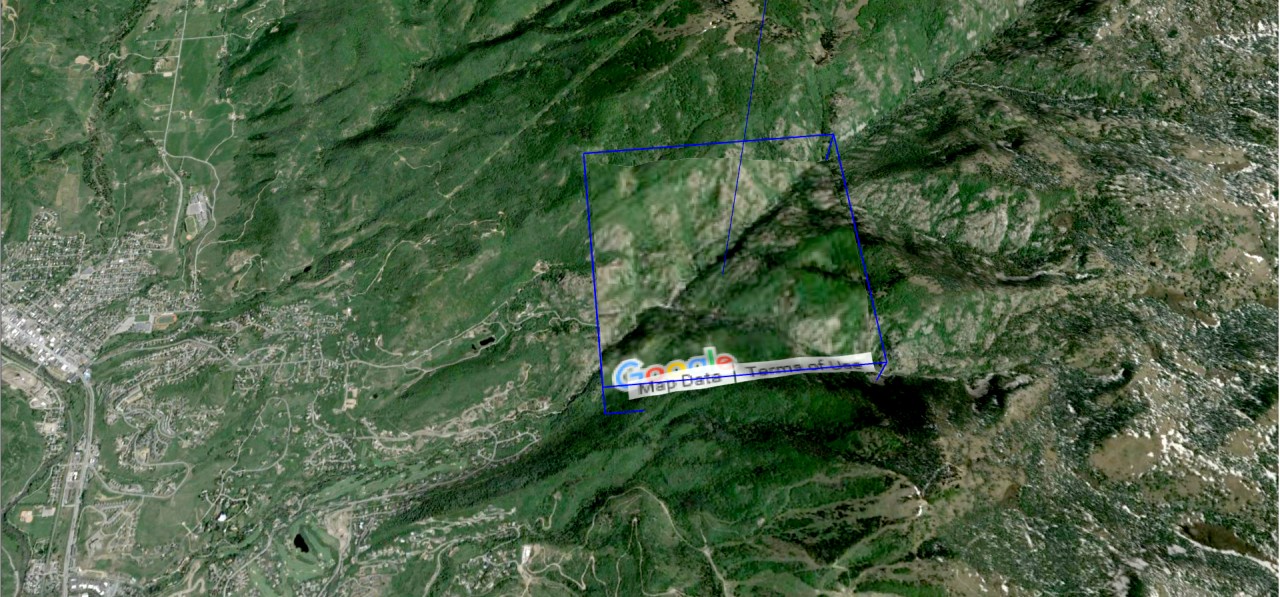
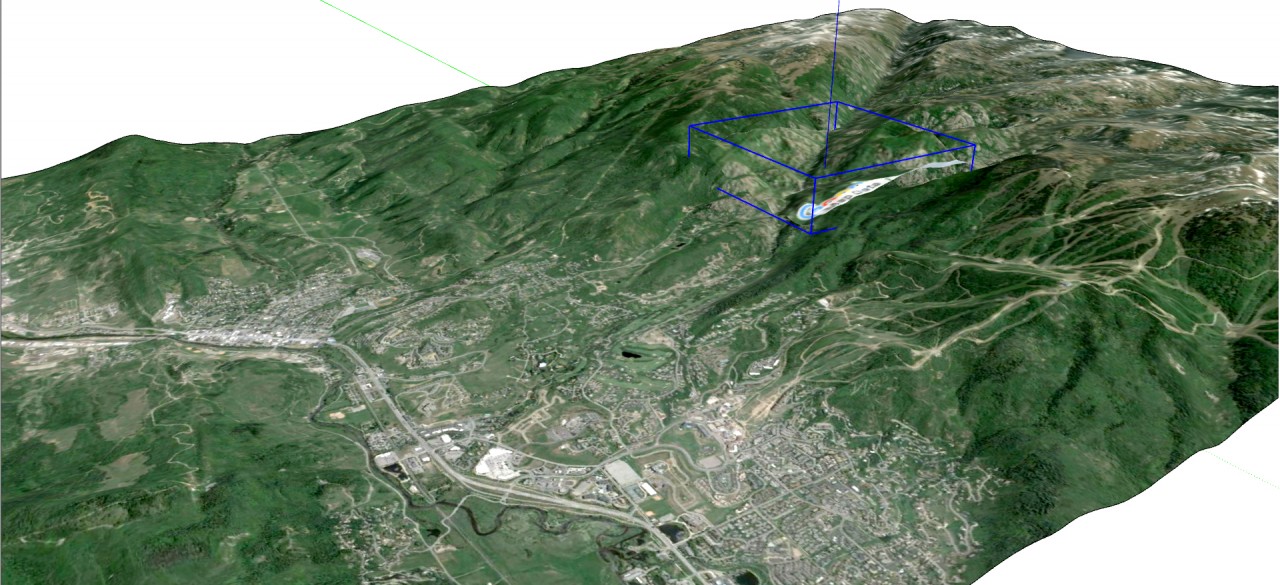
As you can see, a lot of moving parts. But you can get great results in the end.


Permalink
Thank you Daniel. What would we do without you?!
Permalink
https://extensions.sketchup.com/en/content/skelion takes you to: Solar photovoltaic and thermal systems design extension for Sketchup. 🙂
Permalink
Wow….inserting a : and a ) results in a gigantic smiley face!
Permalink
This is the result of the link above:
Skelion
Solar photovoltaic or thermal systems design.
Can you post the correct link? Thanks!
Permalink
Great tutorial…learned a few things. One problem: Google Earth produces a “perspective” skewed image unless I’m zoomed all the way out…couldn’t find a setting to change this behavior.
Permalink
This was the clearest and easiest explanation to follow! And the one most technically correct. Thank you!