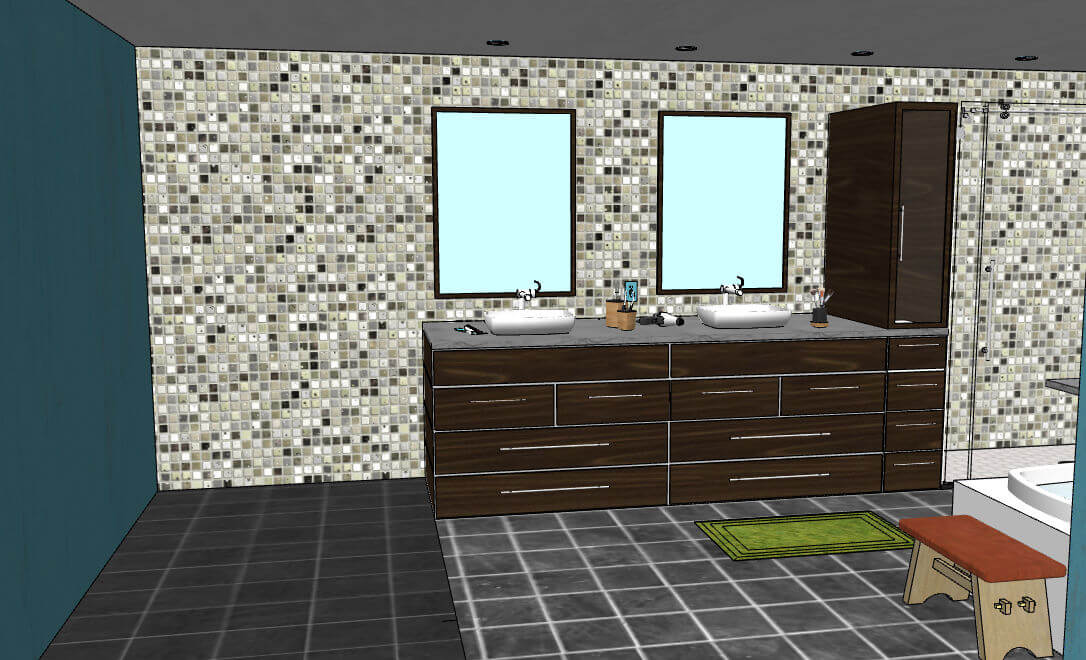
In Part 1 of this series, I showed how to import a digital image to paint a wall. Here’s the model – a bathroom with a tiled wall.
Bigger Tiles
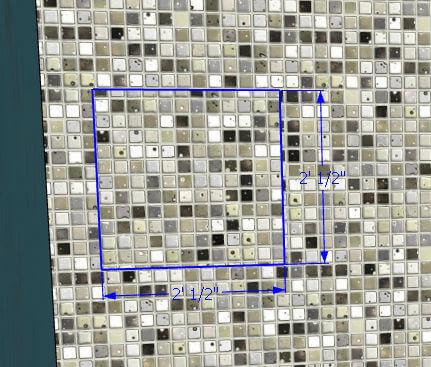
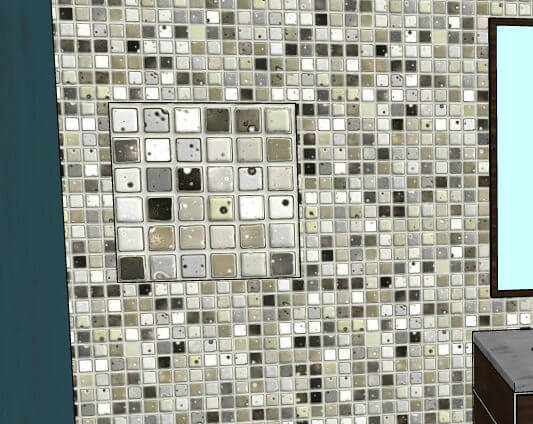
The initial sizing was done assuming each tile was 2″ x 2″. But then I find out that they are actually 4″ tiles. No problem. First a teeny bit of math.
Let’s size according to an array of 6 x 6 tiles. Factoring in a little extra for grout lines, let’s say the size for this array is 24.5″ x 24.5″. Draw a square of this size directly on the tiled wall.
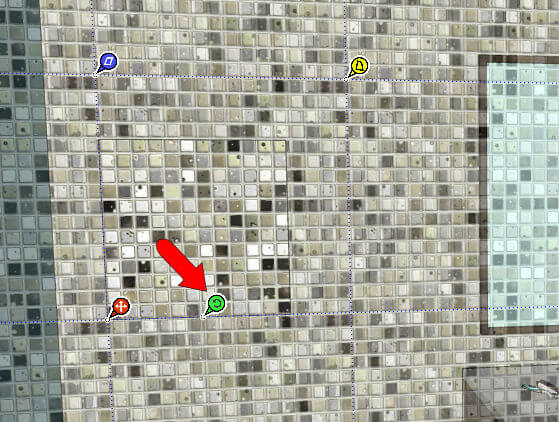
Inside this square, right-click and choose Texture / Position. You’ll see four pins, either all white, or all different colors as shown here. If you see the white pins (a.k.a. Free Pins), right-click and choose Fixed Pins.
The red pin is used for image placement. Drag it over to the lower left corner of the square you drew.

The green pin is used for two things: sizing and rotating. We’re not rotating here (but I’ll show this in Part 3). Before dragging this pin, click on it to “lift” it off the image. Drop it back down so that there are six tiles between the red and green pins.
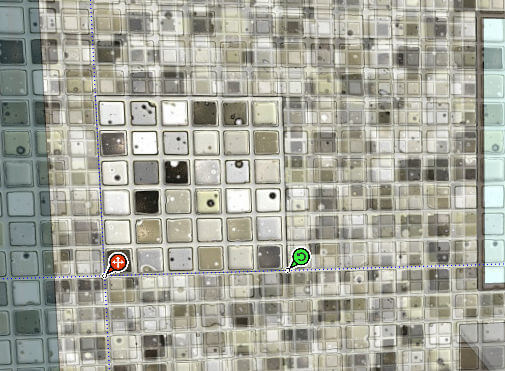
Now drag the green pin to the lower right corner of the square. This places a 6 x 6 array neatly in the square.
(If you wanted to squash or stretch the tiles vertically, to make them rectangular, you’d use the blue pin.)
Right-click on the square and choose Done. Now the image inside the square is great, but what about the rest of the wall? If you erase the edges of the square, the smaller tiles will replace what’s inside. (So don’t do that.)
Sample the Adjusted Material
Here’s where material sampling is needed. On the PC, there’s an eyedropper icon in the Materials window. On the Mac, activate the Paint tool and press the Alt key.
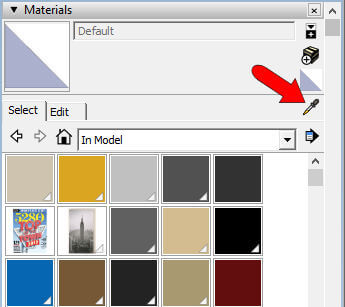
Click the eyedropper on the texture inside the square. Then click anywhere else on the wall to apply the larger tiles. After that, the square is no longer needed.

There’s so much more you can do with texture positioning, and you can also edit more than a material’s size. You can change its color or lightness, edit an image in a graphic editor, and much more. These posts were just to give you a small taste.
Up next – Part 3 of this series, in which I use texture positioning to spice up your Thanksgiving table.


Permalink
That’s a neat trick! Tap the green pin to lift… thanks.