Some of you may remember an awesome SketchUp plugin called Sketchy Physics. You could use it to assign physical properties to SketchUp objects and let those objects interact with one another. And you could add hinges, pistons, sliders – it was incredibly fun and somewhat addictive. Teachers loved it. But Sketchy Physics wasn’t compatible with SketchUp past SketchUp 8, and we were left wondering if it would ever come back.
Well, something even better is now here. MS Physics, available through SketchUcation, is based on the same underlying engine as Sketchy Physics, but it’s easier to use and has many more features.
I started messing around with MS Physics today, using only the very basic features. Here’s an animation of the first model I made: a Jenga game:
Read on to see how I did it.
Get the MS Physics Extension
This is one of SketchUcation’s extensions. If you aren’t familiar with SketchUcation, see my post on finding and installing extensions from SketchUcation’s Plugin Store.
Open the ExtensionStore from within SketchUp, and click the search icon at the bottom. Look for MS Physics, and click the little arrow next to the author’s name to open the description.
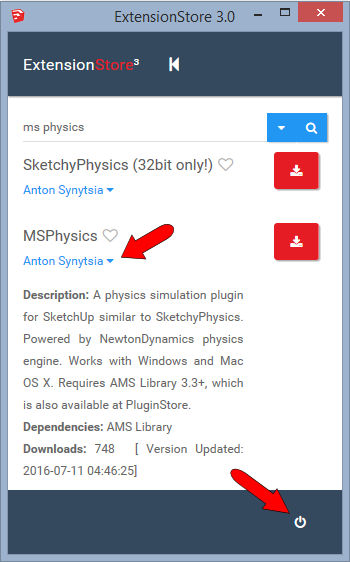
Click the red Install icon to install it.
You’ll also need the accompanying AMS Library plugin, so search for that one and install it as well.
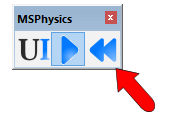
Once it’s installed, you’ll see three MS Physics toolbars – one for replay, one for joints, and the small, three-icon toolbar for UI, running, and stopping.
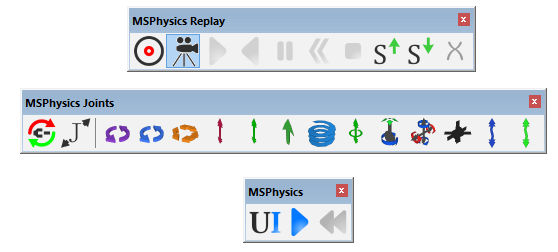
My simple example here doesn’t involve any joints, but I’ll use the other two toolbars.
Build the Jenga Model
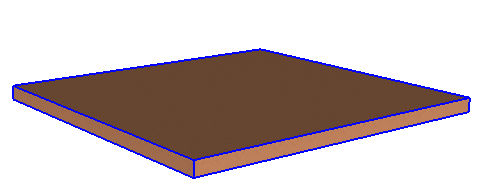
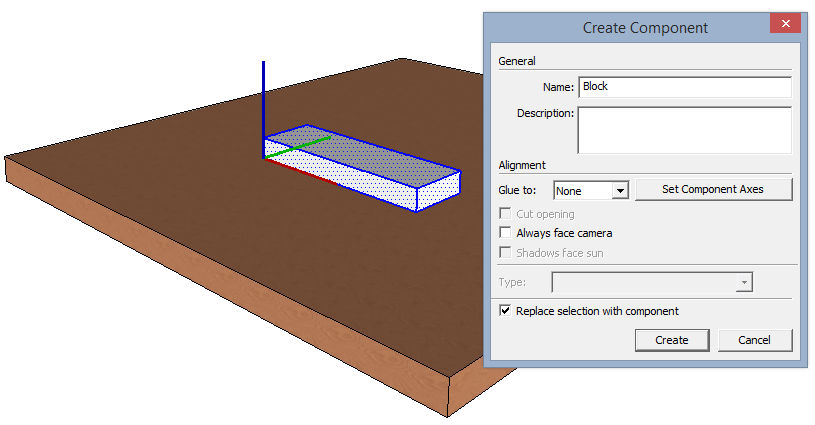
For any object to work in MS Physics, it must be a group or component. I’m starting with a floor, otherwise the Jenga blocks will fall infinitely through space – they need something to rest on. So I drew a thin box and made it a group.
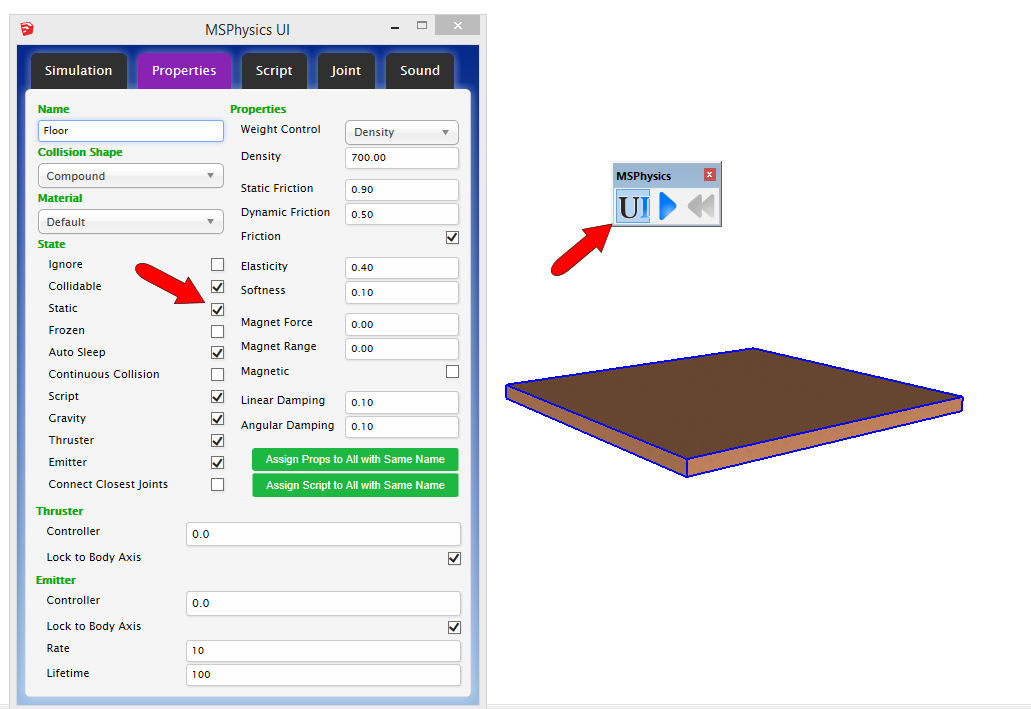
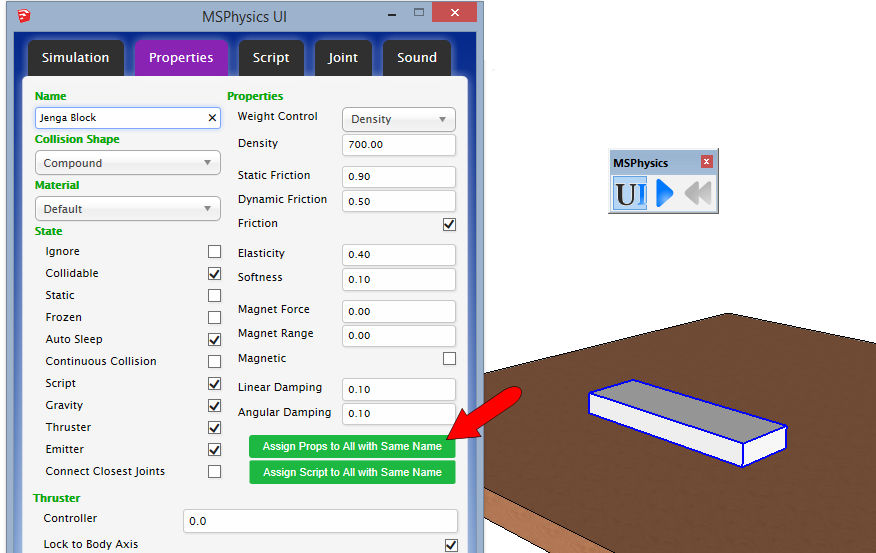
The UI window is where you define physical properties. This window is opened with the first icon on the small toolbar, and the values listed are for the currently selected group or component (the floor). The list of properties here is pretty comprehensive – density, elasticity, friction, etc. But all that’s needed here is the Static property – if this is checked, the floor won’t move.
Next I made one Jenga block and made it a component. This block is three times as long as it is wide.
For the physical properties of this block I used the default values. But the model needs many copies of this block, so I assigned it a name – “Jenga Blocks.” Then I clicked Assign Props to All with Same Name.
I copied the block component to make the Jenga tower. The sets of three blocks are laid out in alternating directions.
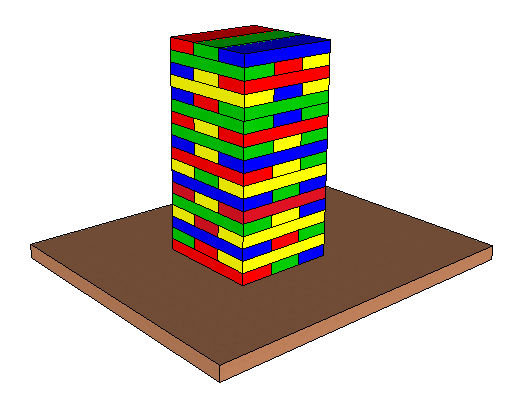
That’s all I needed to do to set up this model.
Run MS Physics
Clicking the Play icon starts the physics simulation. During simulation, your cursor can grab things (or throw or push or fling). So you can use your cursor to drag blocks out from the tower . . .
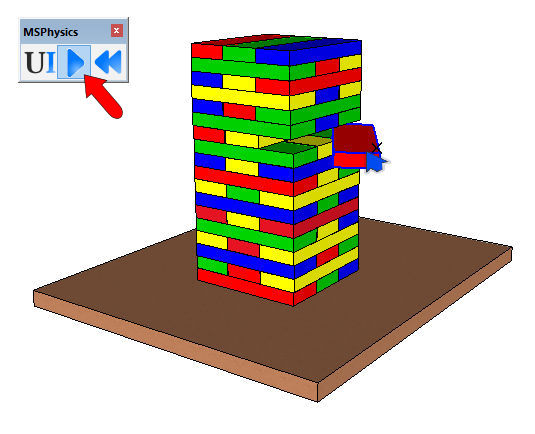
. . . until at some point, the entire tower collapses.
After the simulation, click Reset, or your blocks will keep falling through space until the end of time.
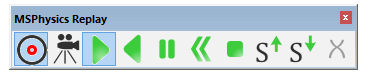
The replay feature of MS Physics is very cool. The first two icons enable recording – the first icon records but ignores camera changes, and the second includes camera changes (if you orbit around while the simulation is running). When you hit Reset, you’ll be asked if you want to save the recording. If you do, you’ll be able to replay it right in SketchUp with the green icons below.
For the little movie I included at the top of this post, I used an MS Physics export feature: Extensions / MS Physics / Export Replay to Images. This produced several hundred image files. I brought those images into Microsoft Movie Maker to produce the short movie.
Endless Possibilities
I plan to do a book on MS Physics at some point down the road, to update and replace the old one I did on Sketchy Physics. In the meantime, search for MS Physics in the 3D Warehouse or YouTube to get some more ideas. There are dozens of amazing examples out there, with more coming all the time.
And try out this incredible piano model – click the “3D Warehouse” logo below to open its download page. When MS Physics is running, this piano actually plays songs when you click on the purple cubes. And you can press the Up arrow to change the instrument.
Here’s the same model in action on YouTube:
Stay tuned (ha ha, piano pun) for more on MS Physics in the future!


Permalink
Great post! Thanks so much!!!
Permalink
Fajna sprawa czekam na więcej
Permalink
Translates as: “Cool thing I look forward to more” (thanks, Google).
Permalink
Hey,
nice post !
for using MSPhysics as a simulation platform for creating children play attraction, my focus was on adjustment of friction parameters.
Unfortunately there is no reflection of any change in friction coefficients in how the model behaves. It´s always same with me !?
Did you try to adjust this in your model to reality !
Permalink
I haven’t really played with MS Physics more than this small model, but I’m planning a book on it in the next few months. I’ll definitely look into how friction works (or doesn’t). As I recall, with Sketchy Physics, I wasn’t able to get much working with friction but that was a while ago.
Permalink
I have followed the instructions to make the Jenga Tower but my tower just falls away. What am I doing wrong?
Permalink
The only thing I can think of is that your floor wasn’t defined to be static (unmoving). Otherwise gravity affects everything and as soon as you start, everything falls through space. Let me know if this doesn’t work.
Permalink
Very good explanation. I was looking for some tips on how to use the joints, in spite of you hadn’t used them, I think your explanation was very useful (mainly about the ‘recorder feature’).
P.S.: Sorry for any grammar mistake.
Permalink
When I start on my book I’ll get more into joints. And I hope to have a few examples for the blog as well 🙂
Permalink
Hello ..thanks for your tutorial. I have a challenge though…..I have this model I have built in sketchup…..It’s a road with buildings, trees and cars on it. I want to make the cars move as part of a simulation project for school…..but it just isn’t working. Is it because the file is large(46MB) or could there any other reason. PLEASE HELP!!!!
https://drive.google.com/open?id=0B4qS55uFs5krM1FVVVVaSXRJVTQ.
This is the link to my model incase you want to take a look. Thanks
Permalink
I don’t think file size would be a factor, as long as your computer can handle it 😉
I tried the link and it didn’t lead to a SketchUp model, try another link? I’m nowhere near an MS Physics expert yet (hope to be soon!) so I’ll take a look but not sure I’ll be able to pick apart the reasons it’s not working.