In a previous series, I showed how to model a few kinds of sails in SketchUp. These aesthetic landscape design elements are shade-providing canopies – very popular these days.
See Part 1: Sail Canopy, Part 2: Canopy Support, and Part 3: Fluid Sail Canopy.
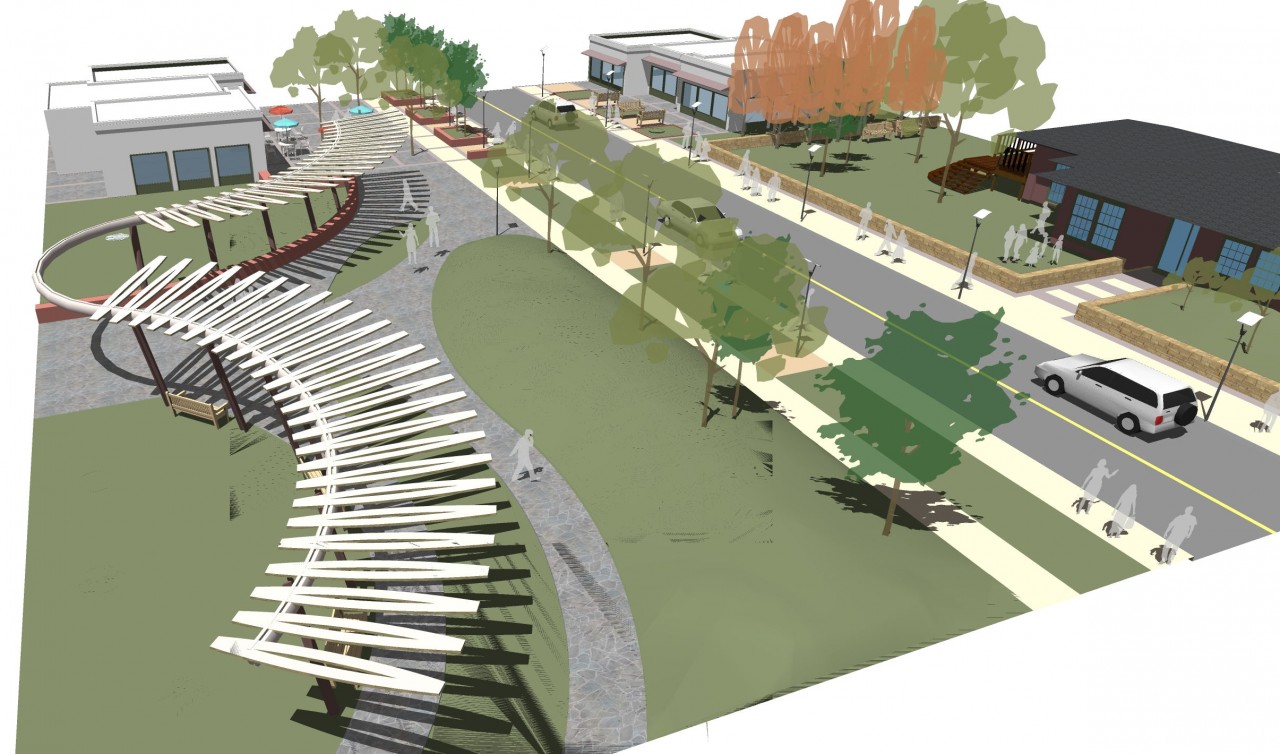
In this three-part series, I’ll show how to create another element of public space design: a park pergola.
What is a Pergola?
The pergola I’m modeling here is composed of three parts: Vertical supports (bottom), curved horizontal beam (middle) and tilted cross beams (top).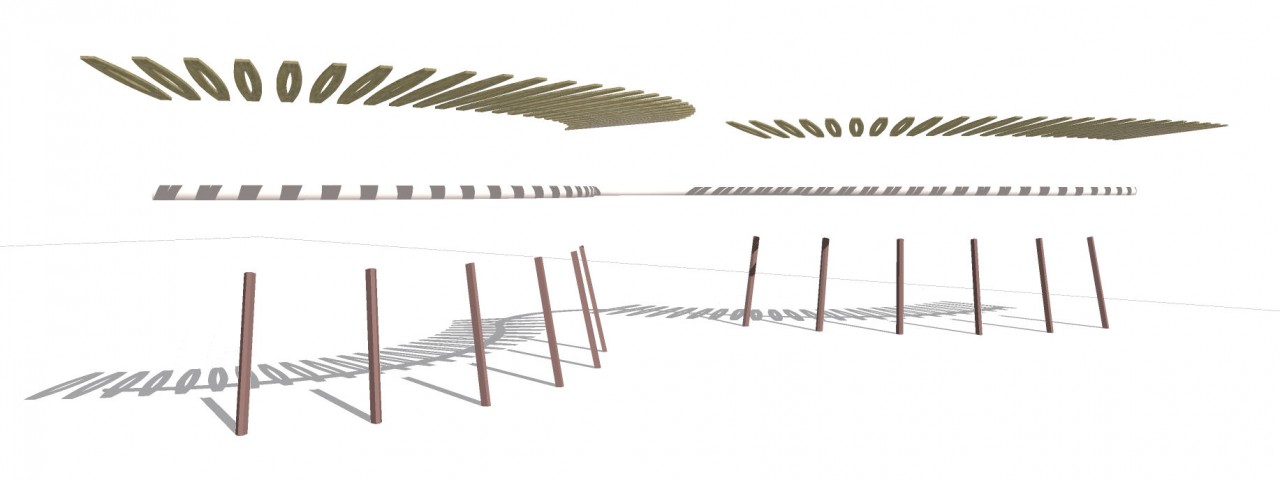
Each individual piece is easy to construct. The only tricky part is joining the parts together.
In this post, I’ll create the horizontal curved beam that follows the pergola path.
In Part 2 I’ll model the vertical supports.
And in Part 3 I’ll finish up, with the horizontal cross beams along the top.
At the end of Part 3, I’ll include a ~4 minute video which shows how to place the tilted cross beams – watching can be easier than explaining with still images.
Extensions I Use
Like with my canopy designs, I use extensions to speed up work flow. The ones I used for this project are:
- Path Copy
- Selection Toys
- Profile Builder 2 (a good deal at $59.99, and 30-day trial version available. You could also use SketchUp’s Follow Me tool instead but it takes a bit more work.)
- Fredo Scale (plus its accompanying library extension)
(The only extension that’s *really* needed for this project is Path Copy. For the others, you could get away with SketchUp’s native tools.)
All of these extensions can be found on the Extension Warehouse. If you haven’t installed extensions from the Warehouse, see our post on how to do it.
Curved Horizontal Beam
So here we go, starting with the first element of the pergola design.
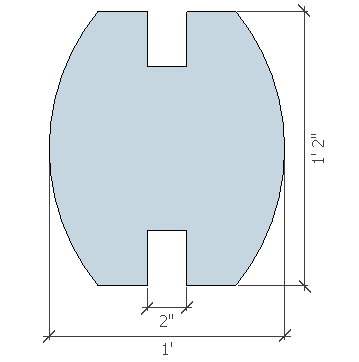
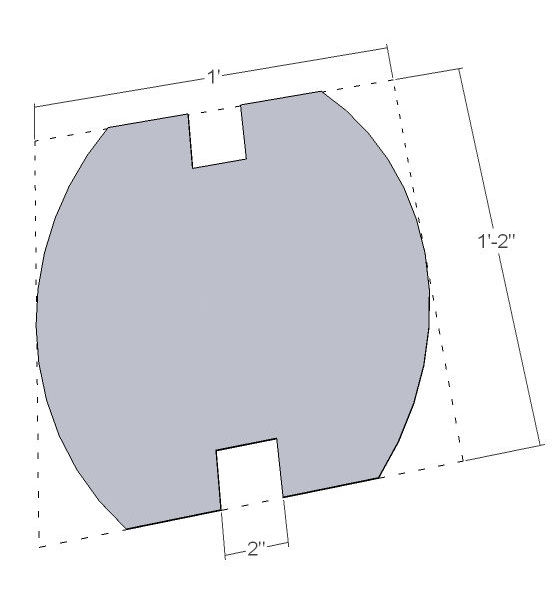
On the “ground” in SketchUp, draw the cross-section face for the curved beam, based on these general dimensions:
Then draw a series of three connected arcs, which will define the pergola’s path. These arcs should be tangent (smoothly connected) to one another. Also, I set the number of sides of each arc to 60, instead of the default 12 sides, so that the profile is smoother.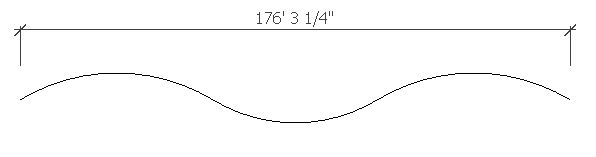
You could easily use these two objects with the Follow Me tool to create the beam, as long as the cross-section face is perpendicular to the path. It’s a bit easier with the Profile Builder extension.
If you have Profile Builder 2, click the first icon to open the extension’s input window.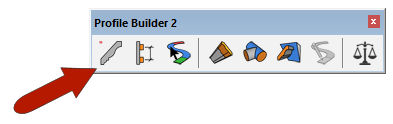
Select the cross-section face. Then in the Profile Builder window, click the “plus” icon to add this face as a new profile.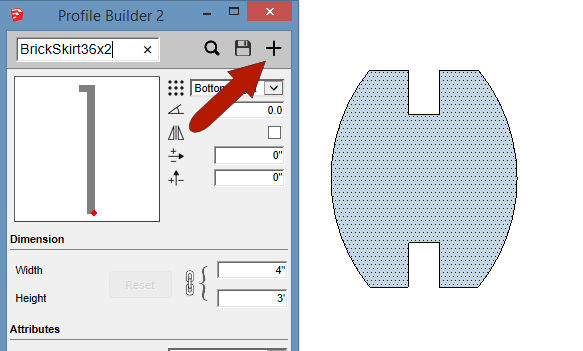
Give your profile a name, which appears along with the profile shape in the Profile Builder 2 window.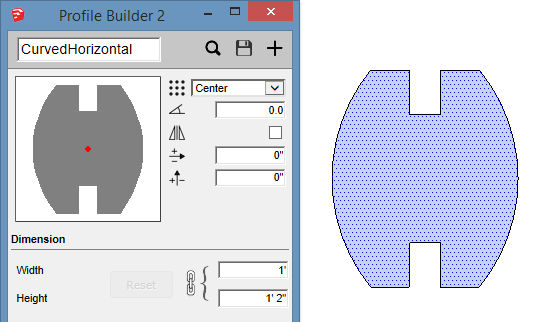
Next, select the three tangent arcs and click Build along Path. 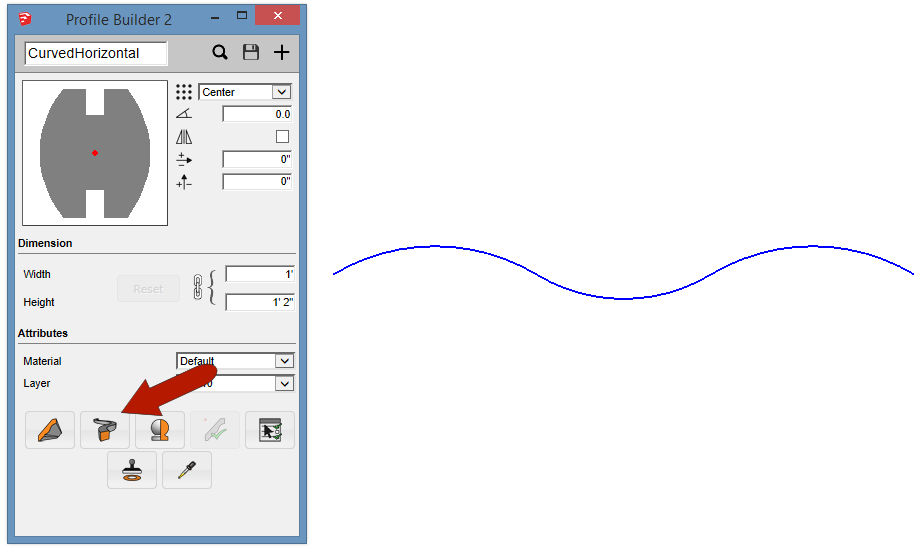
Here is what you should get: your cross-section face, following the path of the three arcs.
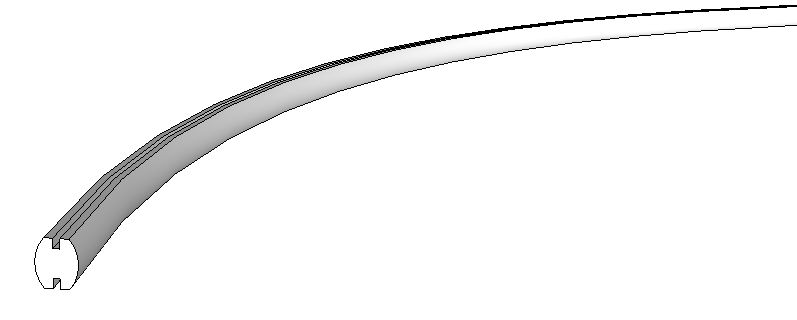
This beam is created as a group, which is good – it can be moved as a single object, and nothing will stick to it, or otherwise affect it.
Next, in Part 2, I’ll show how I create the vertical support beams.


Permalink
I am very happy Dan that you have started to write about this program that I have seen recently on Ten links Daily. It has really come a long way since I first wrote a review on it. Amazing.