This three-part series focuses on how to paint organic surfaces by projecting a texture.
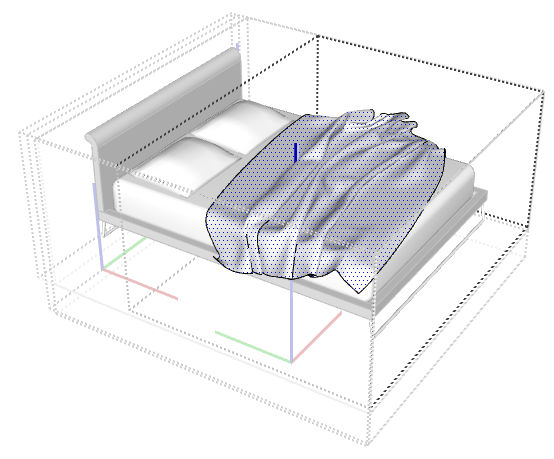
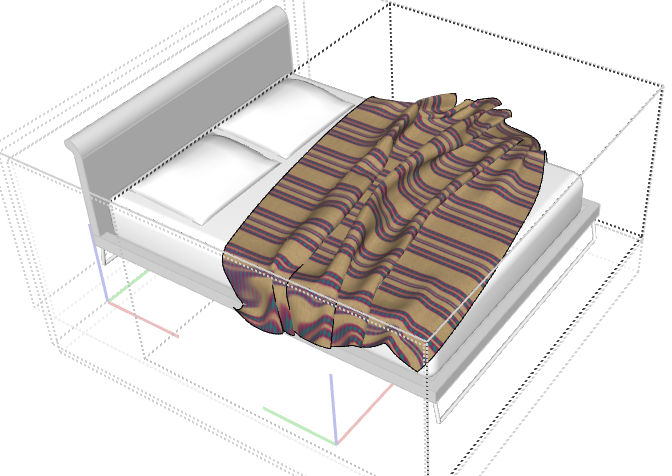
Specifically, we’ll see how to paint the rumpled blanket on this bed model:
If you want to follow along at home, click the 3D Warehouse logo on the image above. That’ll take you to the page where you can download this model.
Projected the Texture
This bed model consists of a series of nested components. So activate Select and “drill down” (double-click) component by component, until you reach the blanket component. You’ll know this component is open for editing when you can select the blanket face.
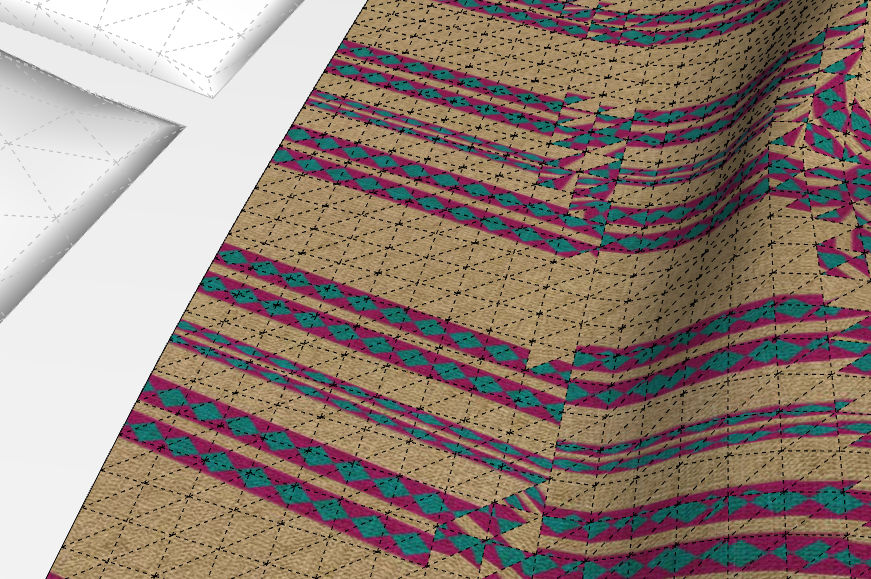
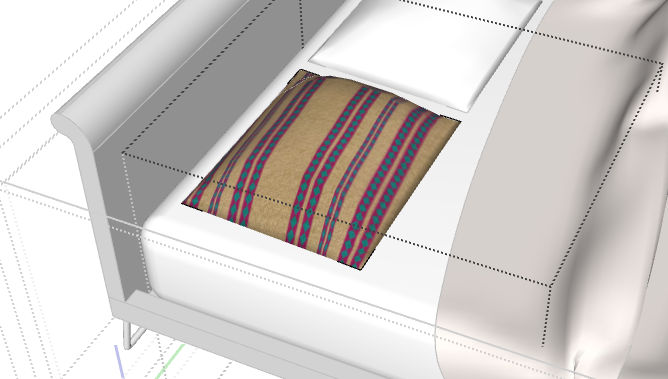
Open the Materials or Colors window and look for a striped pattern. I’m using one from the “Carpets and Fabrics” collection. When you apply this material to the blanket, it’s a jumbled mess everywhere the blanket isn’t lying flat.

In this post, I’ll show how to fix this. In Part 2, I’ll show a trick you can use to avoid this jumbling from the start. And in Part 3, I’ll show how to bring in your own image to use as the blanket material, and how to make edits to the material.
With the blanket still open for editing, choose View / Hidden Geometry to show all of the blanket’s hidden edges. Now you can see each tiny triangular face of the blanket. The reason to display these is that all triangular faces are 2D. And in SketchUp, you can do more with 2D faces than with wavy ones.
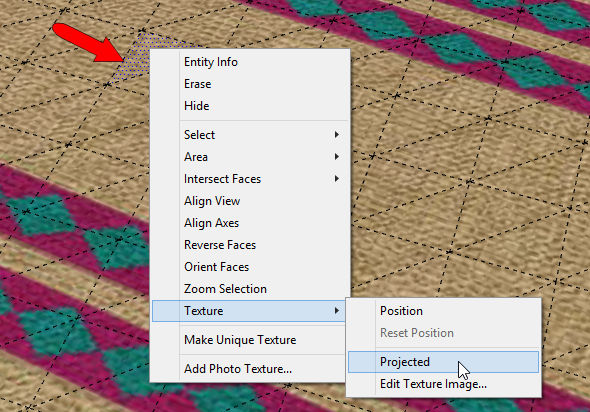
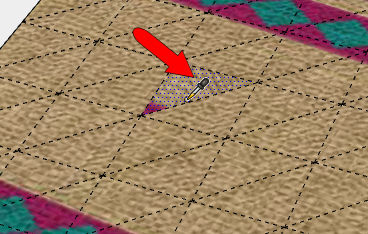
Zoom in closely on any of these small faces. Right-click on the face and choose Texture. The Projected option is not checked, which means the material cannot be “sampled” and applied to other faces. So choose Texture / Projected to turn on this option.
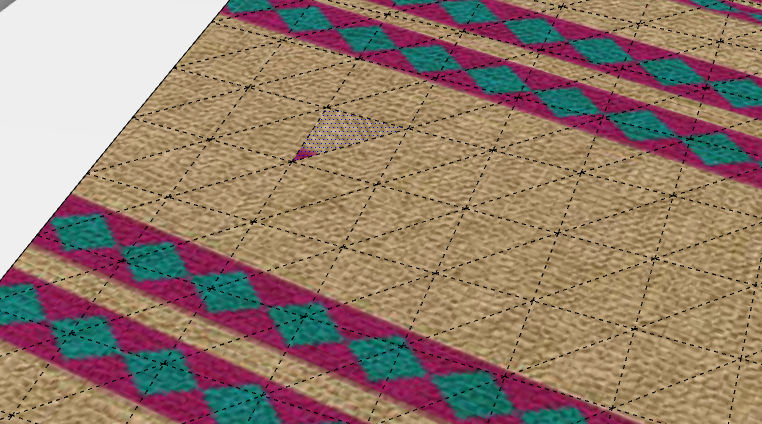
Now this small face has a different part of the material showing.
Sample the Material
If the Paint tool is not still active, activate it. Then press and hold the Alt key (PC) or the Cmd key (Mac), which turns your cursor into an eyedropper. (PC users – you also have an eyedropper icon at the top of the Materials window.) Click the projected face to sample its material.
Now the projected material is the active material. Before clicking anywhere, choose View / Hidden Geometry to turn off the hidden edges.
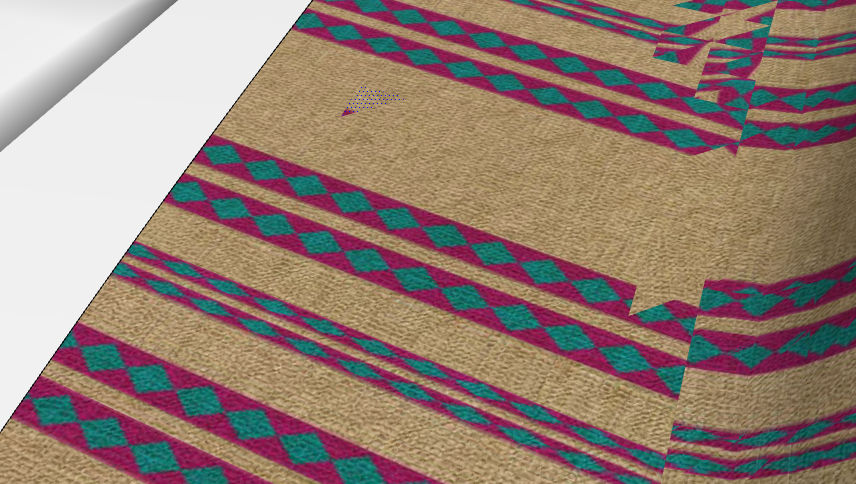
Click anywhere on the blanket. Now the projected material is applied everywhere.
Most of the blanket looks great – everywhere but the two sides. This is because “projected” means the image is projected straight down onto the blanket. The sides of the blanket are nearly perpendicular to the direction of projection, so the material gets distorted here. It’s a small price to pay to get away from the jumbled material, though.
Try the Pillow
We can apply the same technique to the pillow. Open that component for editing, and paint it with the same (or different) material from the Materials or Colors window.
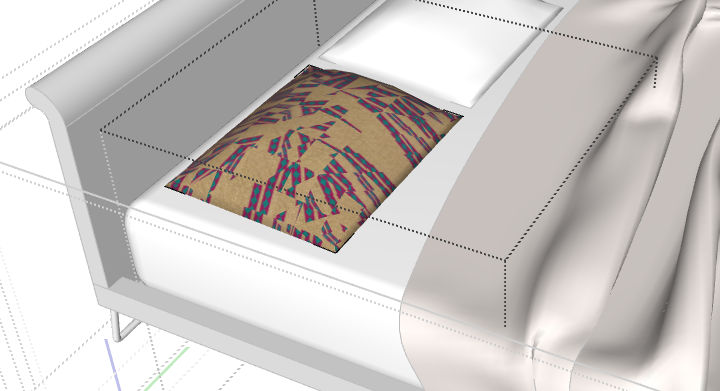
Show the hidden edges, project the material of one small face, sample that material, hide the edges, and paint the rest of the pillow.
These steps are easy to follow, but it’s still a several-part procedure. So stay tuned for Part 2 which will show an easier way to get the same results. And in Part 3, we’ll see how to do even more with this type of organic face painting.


Permalink
Love it…
I’ve had some frustration when doing site materials – say, brick pavers on sloping walkways.
Permalink
Very helpful!
Thanks for this.
Permalink
Found the example bed in 3DW, Modern queen sized bed by Luna S.
Permalink
I just love your tutorials. You’ve really helped me with your consistently useful tips. I find however, that mac is quite different where it comes to materials and textures….I think pc is much more versatile in this department.
Thanks again.
Permalink
You’re right – Mac and PC are only really different when it comes to materials. It’s been that way since the beginning – mac has a different color infrastructure, apparently. I’m not sure one is more versatile though – you can accomplish everything on both platforms, just using different methods.