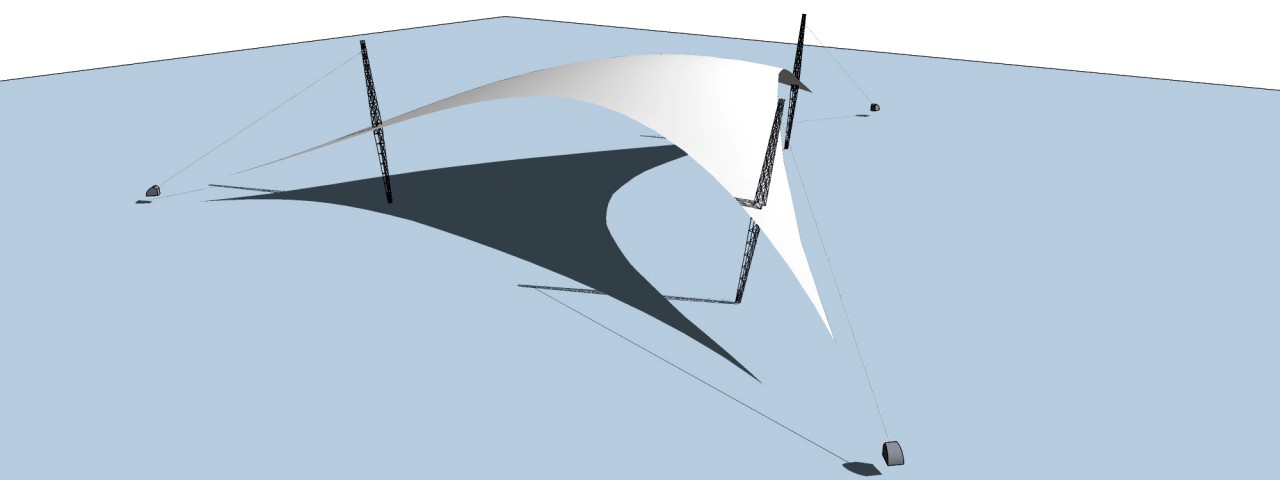
As a landscape architect, I work and design in the urban environment, focusing on the 3 P’s: Parks, Plazas, Pedestrians. My goal is to provide ergonomic and aesthetic design elements, encouraging the use of open spaces. Shaded gathering areas are growing quite popular, and tensile structures such as sail canopies are a beautiful way to provide shade.
For designers, these structures are fun to model in SketchUp. A quick 3D Warehouse search provides some excellent examples.
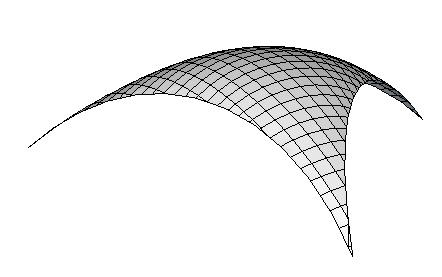
In Part 1 of this series, I’ll show how to create this sail canopy surface:
In Part 2, you’ll see how I created the supports. And in Part 3, I’ll build on the techniques for this model and show how to create something similar: a round, fluid sail canopy.
Even if these types of structures aren’t in your wheelhouse, the techniques and extensions I’ll show are still worth learning – they can serve as a springboard for other creative designs.
Extensions You’ll Need
To model this surface, you’ll need two extensions, both of which are available in the Extension Warehouse. (See this post if you haven’t used the Extension Warehouse before.)
- Soap Skin and Bubble by Josef L. Once installed, you’ll see the Soap Bubble toolbar.
- Selection Toys by ThomThom. Once installed, you’ll see the Selection Toys toolbar.
Border Arcs of the Surface
Activate Circle and before clicking anywhere, type 3 and press Enter, to set the number of sides (for a triangle). Draw a circle with a radius of 145′.
Use the 2-Point Arc tool to draw three interior arcs, each with a 20’ bulge. 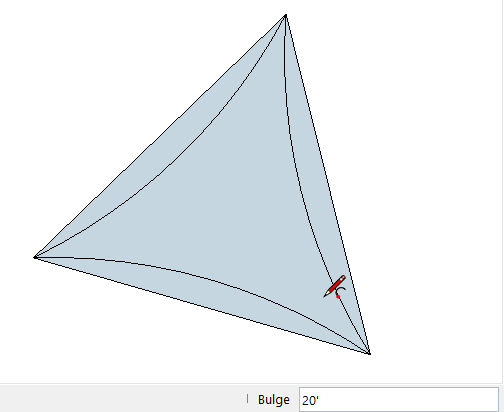
Erase the straight edges of the triangle, and pull the modified triangle up 48′. 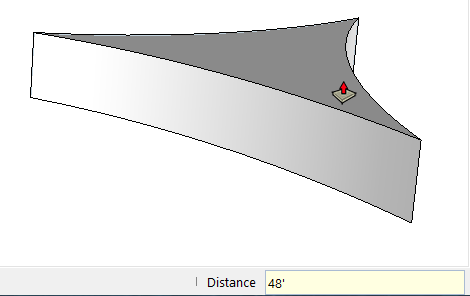
Make this object a group, so that it’ll be easy to erase later. 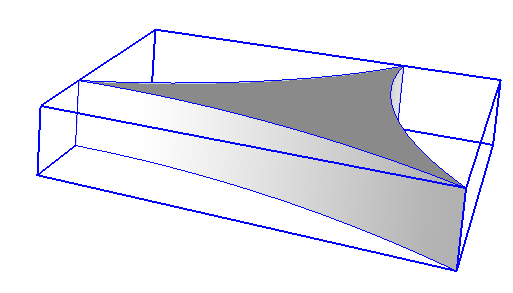
Display hidden edges (View / Hidden Geometry) and draw three new arcs along the three curved walls of the group. (Don’t open the group, just draw them on the outside.) All arcs should meet the top of the group. You can see all three arcs in X-Ray view.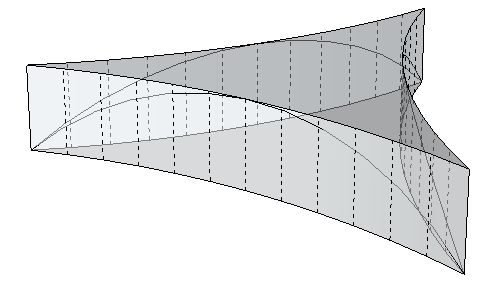
Erase the group, and now you have just the three arcs. The canopy surface will go inside these arcs.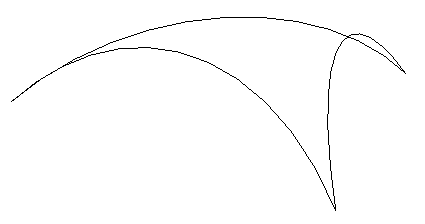
Turn off X-Ray view and turn off hidden geometry.
Soap Skin
Select the three arcs and activate Generate Soap Skin. Set the number of divisions to 30.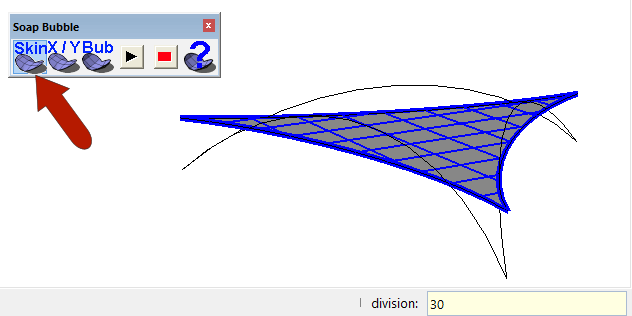
Press Enter again to start the skin generation. After a pretty cool animation, here’s the result. The surface is a little droopy at the center.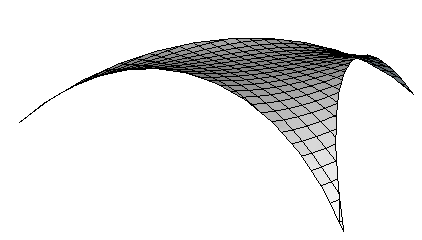
Activate Select (to exit the Soap Skin tool) and select the skin surface, which is a group. Then click Generate Soap Bubble. Enter a pressure value of 5, to inflate the skin.
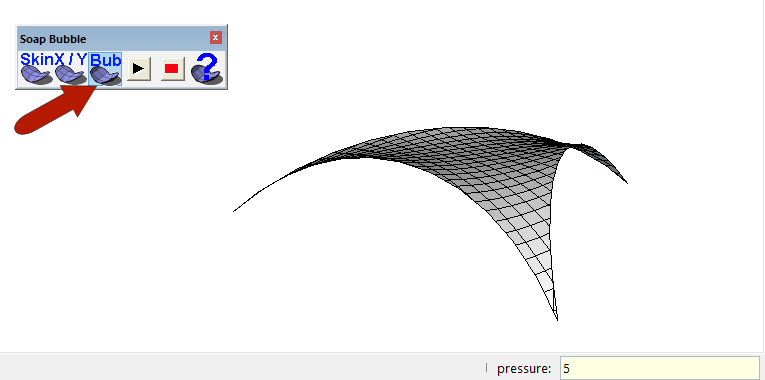
Press Enter again to get things started – it’s very cool to watch the skin puffing up. (If your bubble deflates instead, which would happen if your faces are reversed, try again using a pressure of -5 instead of 5.)
Hide Edges
The last step is to hide the edges of the canopy. Open the group for editing and select the entire thing: all edges and faces. Then use the Selection Toys extension to select just the edges (on the right-click menu, this is Select Only / Edges.)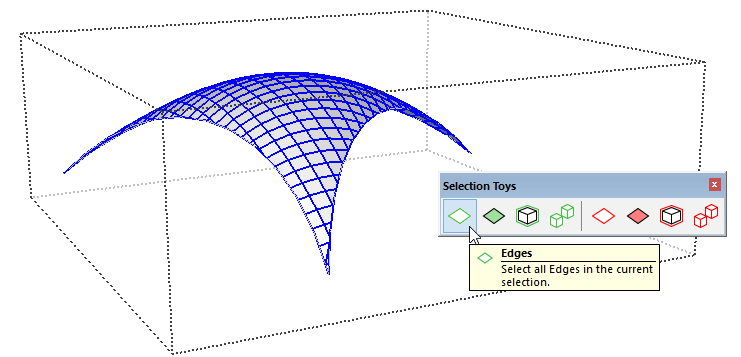
With only edges now selected, choose Edit / Hide. Then close the group. 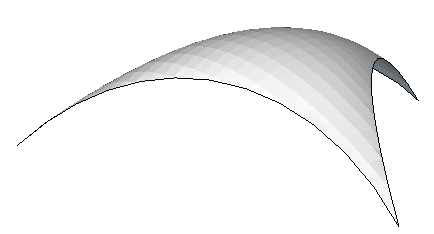
(You could also use the Soften / Smooth Edges tool, but I’ve noticed that this can distort the surface appearance.)
Here’s a little video of the Soap Skin and Bubble extension in action:
Next, in Part 2, I’ll show how to create the supports for this canopy.


Permalink
Fantastic! Thanks Daniel.
Permalink
Great!!!
Why do you choose a circle to draw the triangle instead of a polygon?
Permalink
Lol. Good catch. Did not think about it. They are the same tool really. You would still have to adjust the sides to 3 with the polygon tool. I’m just used to the circle tool.
Permalink
That’s Brilliant Thanks for taking the time to post.