I have a colleague named David Thornburg, who is the Director of Education for Polar3D. (If you’re into 3D printing, check out Polar 3D – their printer works by spinning the circular build plate, rather than with lateral movements.) Recently I ran across a 3D printed seashell project that David posted on the Polar3D blog. He wrote it to be used with Tinkercad, which is a great modeling program for kids. I thought it would be neat to show how the same model could be created (for me, much more quickly) in SketchUp.
Here’s David’s introduction to his project:
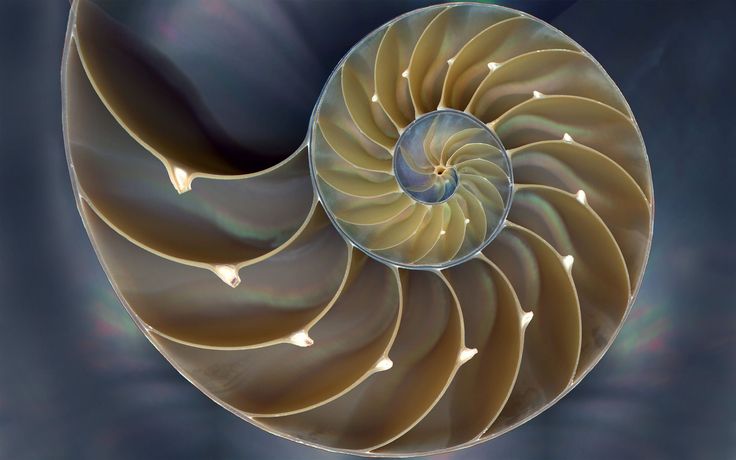
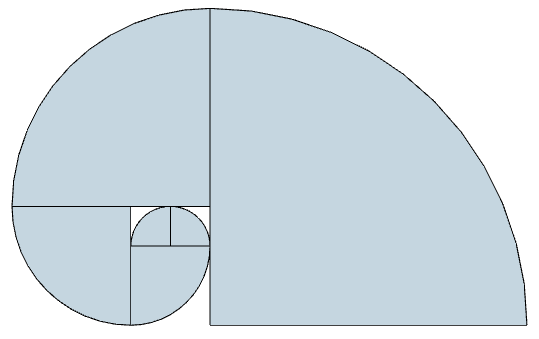
Sea shells are amazing objects to explore. Young children enjoy finding them, exploring their colors and shapes. They even hold large ones to their ears to “hear the ocean.” This project explores the spiral shape of many shells, with special focus on shapes similar to that of the chambered nautilus― a cephalopod whose shell is an equiangular spiral. In this project, you will build 3D-printable shapes of quarter circles with different sizes based on Fibonacci numbers (connecting this activity to math) that, when assembled, produce a spiral similar to that of the chambered nautilus.
Fibonacci numbers are generated from a simple calculation and show up quite commonly in nature. Starting with the numbers 1 and 1, the next number in the series is the sum of the previous two numbers. This gives us 1, 1, 2, 3, 5, 8, 13, 21, and so on. Our project will use quarter circle pieces whose width is based on Fibonacci numbers. We will start with two quarter circles 10 mm across, and add more from there.
Here’s how I built the model in SketchUp, using Fibonacci sequencing.
Start with the Basic Shape
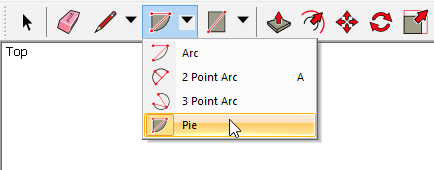
The seashell is based on a quarter circle. So activate the Pie tool.
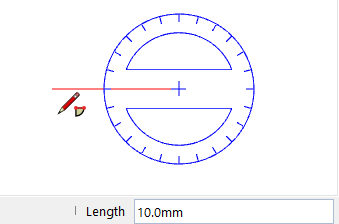
If you’re going to 3D print this project, you need to figure out the print size you want. This will be based on your print surface and how many quarter-circles you’ll print. I’m going to start with a 10mm radius shape.
Click the center, and move the mouse to the left, along the red axis. I’m clicking the second point when the radius reaches 10mm.
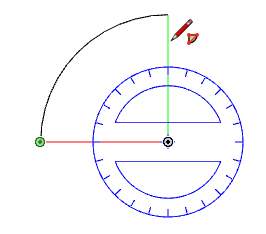
Move the mouse so that the pie is a quarter-circle and click again.
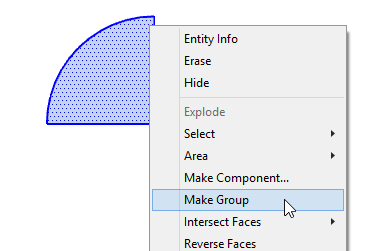
Select the quarter-circle and its edges, then right-click on it and make it a group. This is to make sizing easier, and also prevents copied shapes from sticking to one another.
Make 5 copies of the group. (Use the Move tool with the Ctrl or Option key to make one copy, then type 5x and press Enter.)

Resize the Shapes
The first two shapes will remain the same size – both with a 10 mm radius. But the third one needs to be larger. How much larger? Fibonacci numbers are always the sum of the previous two numbers. So 10 mm + 10 mm = 20 mm.
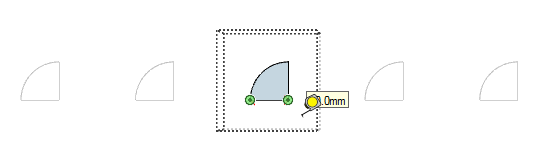
To resize the third shape, open its group for editing. (Right-click on it and choose Edit Group.) Activate the Tape Measure, and tap the Ctrl or Option key to remove the “plus” sign from the cursor, otherwise you’ll end up creating a guide line. Click two points along its radius, and the popup tells you that the length is 10 mm.
To increase the radius to 20 mm, type 20 and press Enter. You’ll be asked if you want the group resized; click Yes.
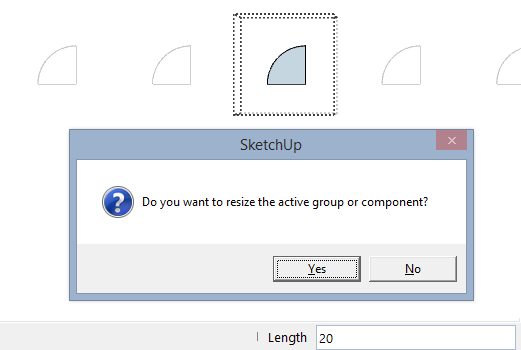
The shape is now twice as large, and you can close the group (right-click in blank space and choose Close Group).

(Without using groups, resizing these shapes would be much harder. Read my post on using this method with geometric tiles.)
Continue resizing the remaining shapes. The next one should have a 30 mm radius (10 + 20). Then 50 (20 + 30). The last one: 80 (30 + 50). It’s fine if the shapes overlap – because they are groups, they won’t interfere with one another. 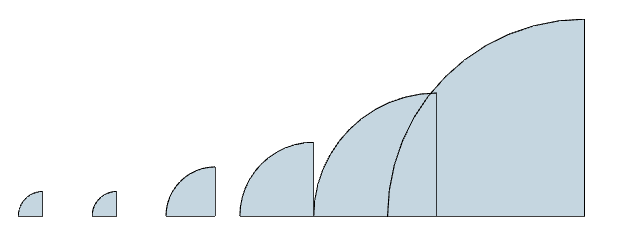
Join the Shapes Together
For this part, the Move tool can be active the whole time. Move the cursor to the second shape, and click on one of the red “plus” signs. This brings up the protractor, which you can use to spin the shape this way: 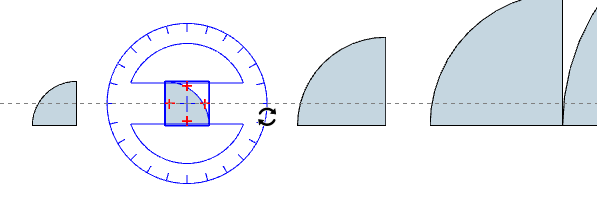
Move the second shape to join the first one. 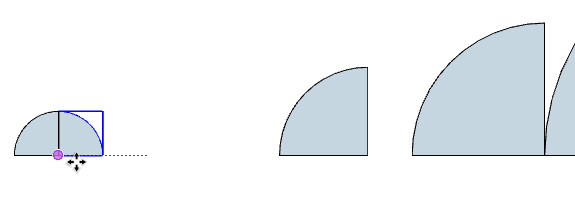
Then turn the third shape like this:
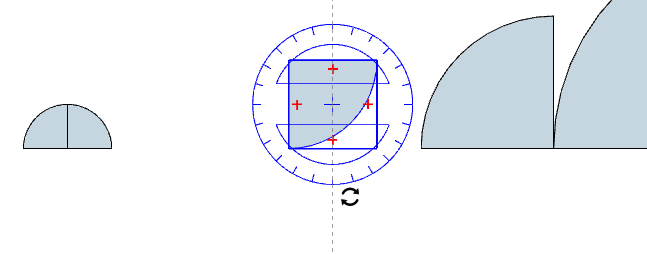
And join it to the first two.
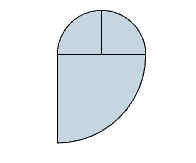
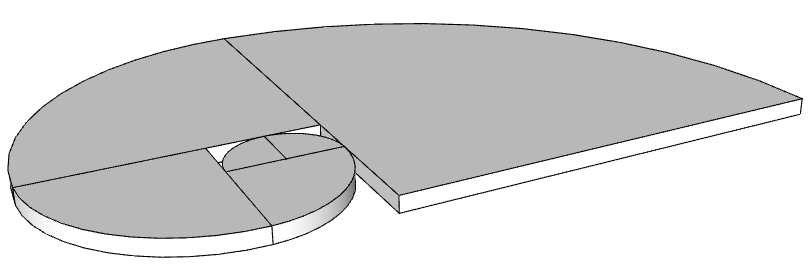
Keep going until all of the shapes are together, like this:
If you’re going to print, open each group for editing and pull up each shape a few mm. All of the shapes should have the same height.
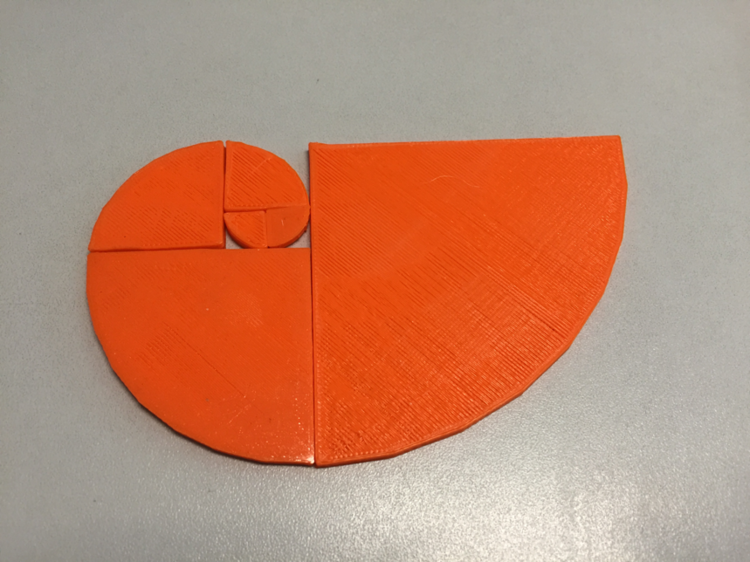
Here’s how David’s model looked after printing each shape separately:
This is a great little project for a math or technology class – I hope you enjoy it!

