You might think that a post on SketchUp‘s Push/Pull tool would seem very basic. But while Push/Pull is probably SketchUp’s most-used tool, there are some features you might not know about.
I’ll talk about a few common options – these are easy to perform and can save you modeling time.
Double-Clicking
After you Push/Pull your initial surface, you can double-click on the next set of surface to extrude them by the same distance. This can come in handy, for example, when modeling identical objects.
Use Another Face
You can use an existing face to define where a push or pull should go.
Set Push/Pull Distance
Say you don’t have an exact value to use as a push or pull distance, but you know that distance is between two points already in your model. If you select your Push/Pull face in advance, you can activate Push/Pull and then click those two points. Example: if I need to add another step to a set of stairs.
Add Faces
Many people complain about Push/Pull’ing and hitting an offset limit. In other words, you’re trying to extrude a face and get stuck by another face. This happens because of SketchUp’s snapping options – its inference system. SketchUp is simply snapping the extruded face to the height of the adjacent faces.
You can get around this in two ways. You can use the existing faces method, as shown above. Or you can add faces.
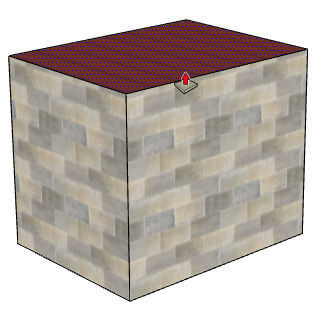
With a regular Push/Pull, this box . . .
. . . just becomes taller.
But if you tap the Ctrl or Option key, which adds a little (+) to your cursor, you’ll create a whole new set of faces.
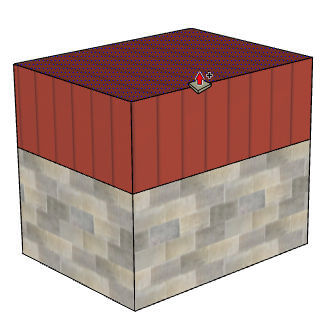
If you run into an offset limit, adding the Ctrl / Option key will override it.
Be careful with this feature – because it makes a copy of faces, you’ll end up with interior faces.This can trip you up if you’re expecting solid volumes with no breaks (particularly for 3D Printing).
Quick Work
Look how quickly you can make stairs. In this video, I pulled the first step to a 6″ height. Then I double-clicked on a few more faces to repeat that height.
After a few steps, you need too many double-clicks for this work efficiently. So then you reset the Push/Pull distance to the highest step. You get the 6″ height back by entering it, or using the “click two points” method above.
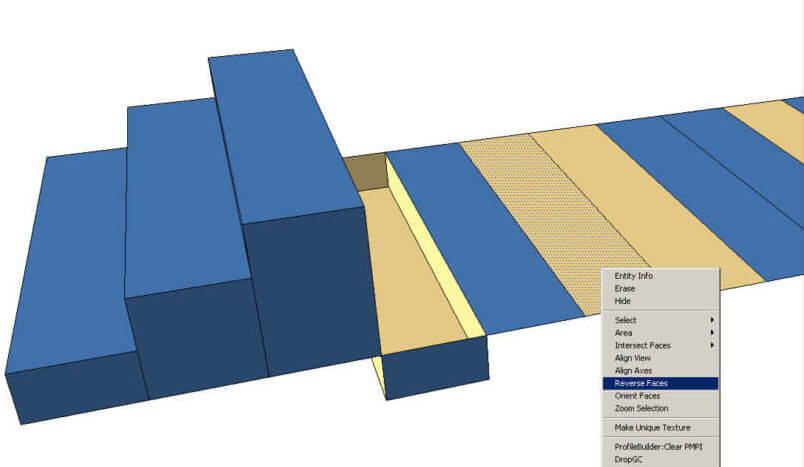
Front vs. Back Faces
Push/Pull can surprise you by going the wrong way.
SketchUp surfaces are two-faced – they have a front and back. If you pull up a front face, the direction will be as you expect. But if you repeat the operation on a back face, you’ll go backwards. And since you can’t always tell what’s front and back (if your faces are painted), the backward pull might be a little unexpected.
There is an extension to fix back-facing faces: Automatic Face Reverser. It’s on SketchUpcation and requires their Plugin Store. (See our post on installing from SketchUcation.)
To be honest, I don’t usually reorient faces. I take my shot with double-clicking and if that doesn’t work then I try another option. Correct face oriention is a cleaner way to work, though.
Up next – Joint Push Pull – the extension that allows you to extrude multiple faces at the same time.


Permalink
Thank you for this lovely synopsis – the pictures are very helpful, too!
The anomalous behaviour of Push-Pull isn’t explained too well by Sketchup – or at least, I couldn’t easily find a description as good as yours. Your description has probably saved me hours of head scratching.
Many thanks!