One of SketchUp’s best features is styles, giving you the ability to produce excellent graphic images and non-photorealistic (NPR) renderings. I almost always use SketchUp’s native graphic styles for client presentations, though I do have to produce “fancy” renderings from time to time (these days I’m into Lumion).
For a basic presentation, just turn on shadows (menu: View / Shadows) for some depth, and export the view (File / Export / 2D Graphic). That’s what I did to get this image:
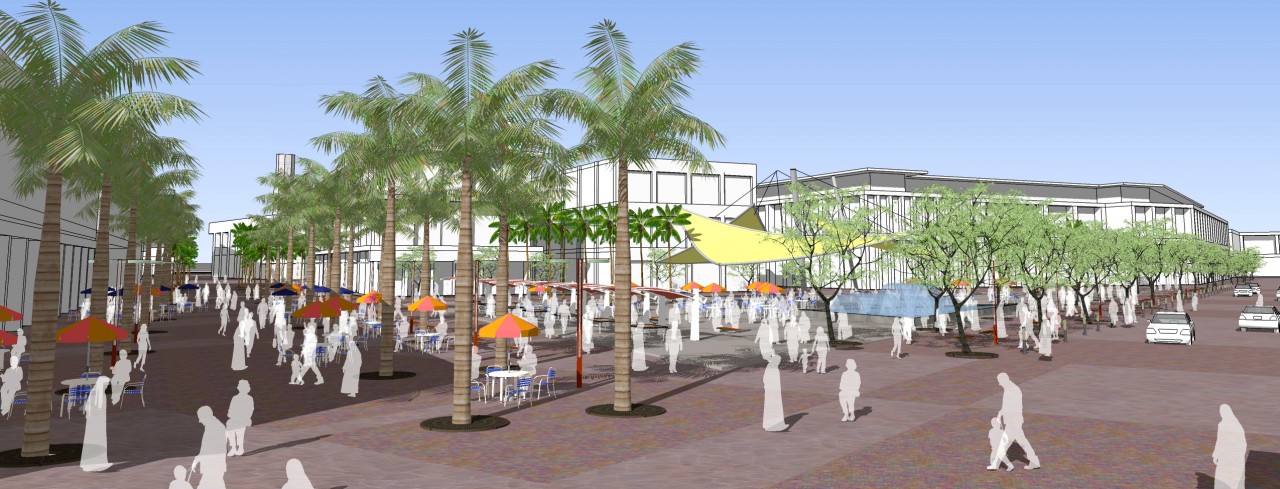
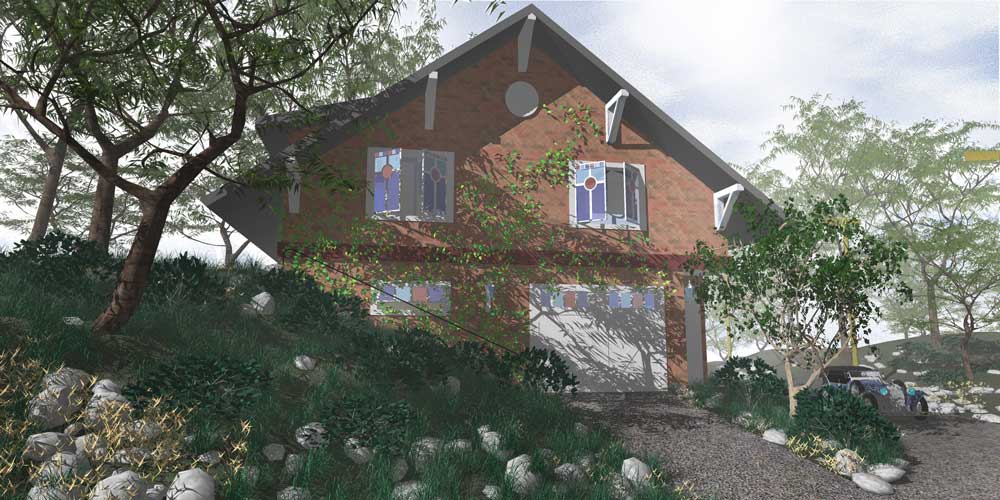
And this one, too, all done in SketchUp alone, no post-production:
The SketchUp style of graphic output is becoming as ubiquitous as the now-familiar, traditional 2D CAD line drawings we’ve all seen for the past 40 years, pioneered by AutoCAD. Just as we got used to those, so too we’re becoming accustomed to the SketchUp style of real-time, 3D NPR views. Sure, you can argue that SketchUp’s graphics are flat, or boring, or overused. In many design firms, it’s become trendy to criticize SketchUp’s cartoon-like style, perhaps because of the deluge of SketchUp images on the web, many from (gasp!) amateurs. But it’s the popular kids who get dissed the most, right?
In my experience, clients don’t care about graphic style as much as we designers think they do. Most clients are happy just to be getting 3D views; even though 3D isn’t new, it still wows ’em in most industries. Some clients do ask for photo-real renderings, so it’s certainly worth learning a rendering app or two – they’re generally not too difficult (check out Rendering Made Simple and Modeling from a Hand Drawn Plan, available if you sign up for free on my site). But in most cases, you can produce excellent graphics in SketchUp alone, saving you lots of rendering time.
Incidentally, if NPR interests you, then SketchUpArtists.org is a site you MUST check out – the best you’ll find out there on NPR SketchUp rendering. In addition to rendering tutorials on various applications, they also offer free downloads of popular styles you can install and use in SketchUp. It’s an amazing, veteran site whose content is updated regularly.
SketchUp Styles and Graphics: the Basics
There are three places to look in SketchUp for control of model appearance: The Styles toolbar, the View menu, and the Styles window. And just to confuse you further, there’s a lot of overlap between these three UI elements. Here’s how they work:
Styles Toolbar
On the PC, choose View / Toolbars and check Styles. On the Mac, choose View / Customize Toolbar and drag the Styles toolbar onto the main toolbar.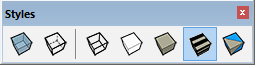
Keep this toolbar available if you switch styles often (or if you *should* switch often). For example, if your model is heavy on textures, which can affect model performance, you can make a quick change from Shaded with Textures to simply Shaded (base colors) or Monochrome (default front and back face colors). There are also icons for Wireframe, X-ray, and Back Edges, all of which can make a big difference in how things look and perform.
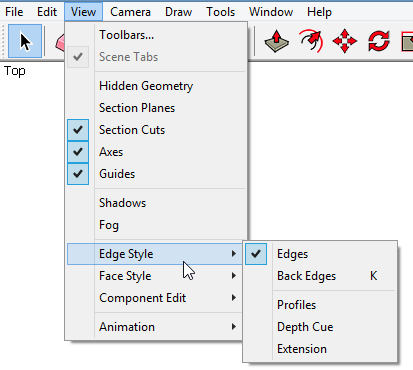
View Menu
This menu has submenus for Face Style – the same options found in the Styles toolbar. And it also has options for Edge Style; you can turn off edges, display profiles, depth cue, etc.
Styles Window
On the Mac, or PC before SketchUp 2016, choose Window / Styles to open this window. PC for SketchUp 2016: If you don’t see this window in your tray, choose Window / Default Tray / Styles.
This window has all of the above options and many more. As an example, open the Edit tab, and from the five “cube” icons at the top, click the one on the far left which opens the Edge settings. There are a few options here, such as Jitter, that lend a hand-drawn look to your edges.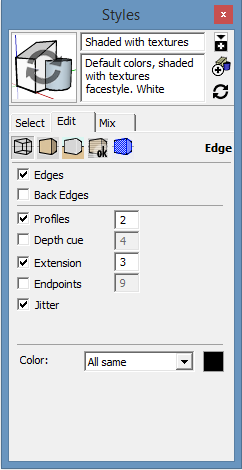
You’ll find similar options for adjusting the look of faces, background, watermarks, and more. And if you go back to the Select tab, you can peruse dozens of pre-installed styles. But before you start messing with styles, I advise saving your model first, just in case you get stuck adjusting a setting and not able to reset it to default.
BTW, If you’re a frequent style-switcher, you can benefit hugely from setting up a few shortcuts. For example, I have a shortcut set up for turning off edges, another for turning off materials (speeds up performance).
Styles that I Use
My typical SketchUp style may be bland, but hey, I like it. It’s quick, gets the point across, and works great for concept images.
First, I turn off edges and make sure all the other edge options are off.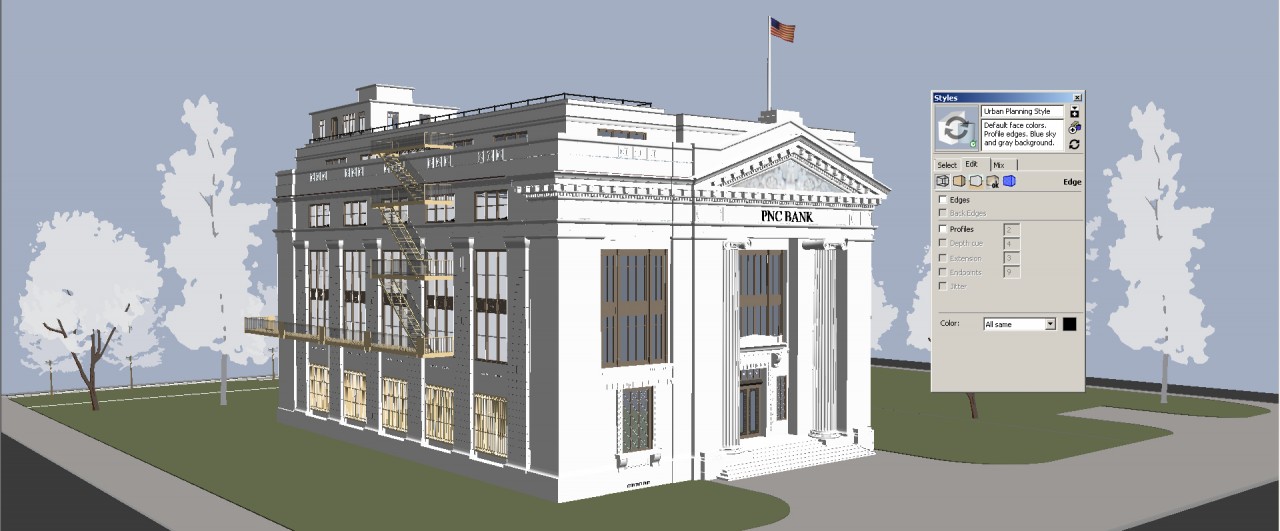
I like to use detailed entourage, particularly vegetation, to produce an effect of dappled light. Similarly, I take the time to properly texturize and color the model. For concept models, I rely on SketchUp’s native colors and materials.
I then turn shadows on (View / Shadows), and use the Shadows window to adjust the Light and Dark sliders to get a good contrast. I set Light almost all the way to the right, Dark to the left. I also play with the Time and Date settings to get the desired lighting.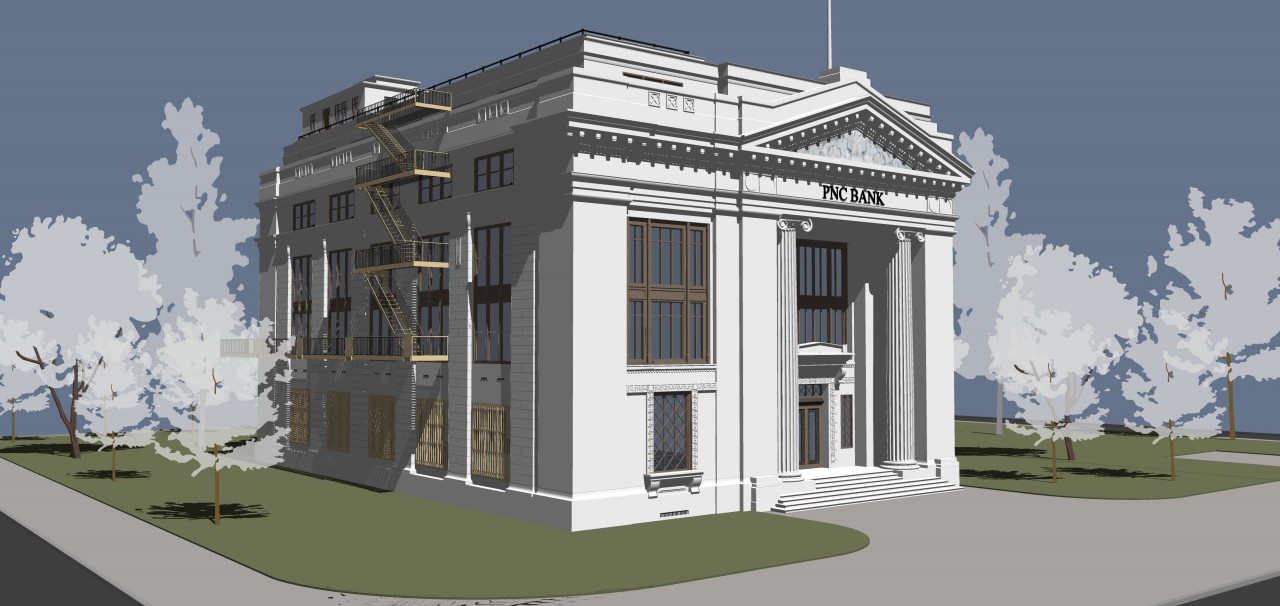
To get a better sense of how styles can transform your SketchUp models, stay tuned for Part 2 of this series. I’ll explore the Styles window a bit more, and show how to use a few fun styles.


Permalink
I always get the feeling that NPR has enormous variations that will take a lifetime to explore.