Google Earth Pro
Google Earth Pro
is now free. Aside from a plethora of cool tools and features, GE Pro allows you to download high-resolution aerials, up to 4,000 pixels wide, depending on availability. This provides a great FREE solution to getting these hi-res aerials into SketchUp.
At the moment, there is no direct import of high-res aerials from GE Pro into SketchUp. Hopefully this will be added in a future SketchUp version (hint, hint to any SketchUp staff that might be reading…) But there is a workaround – read on.
The Process: Importing the High-Resolution Aerial
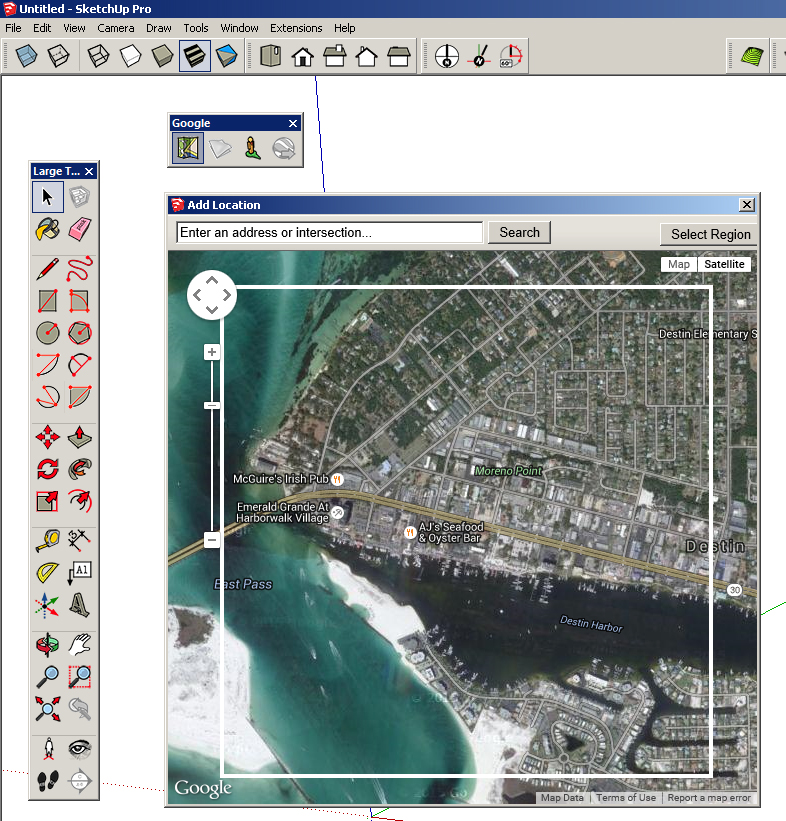
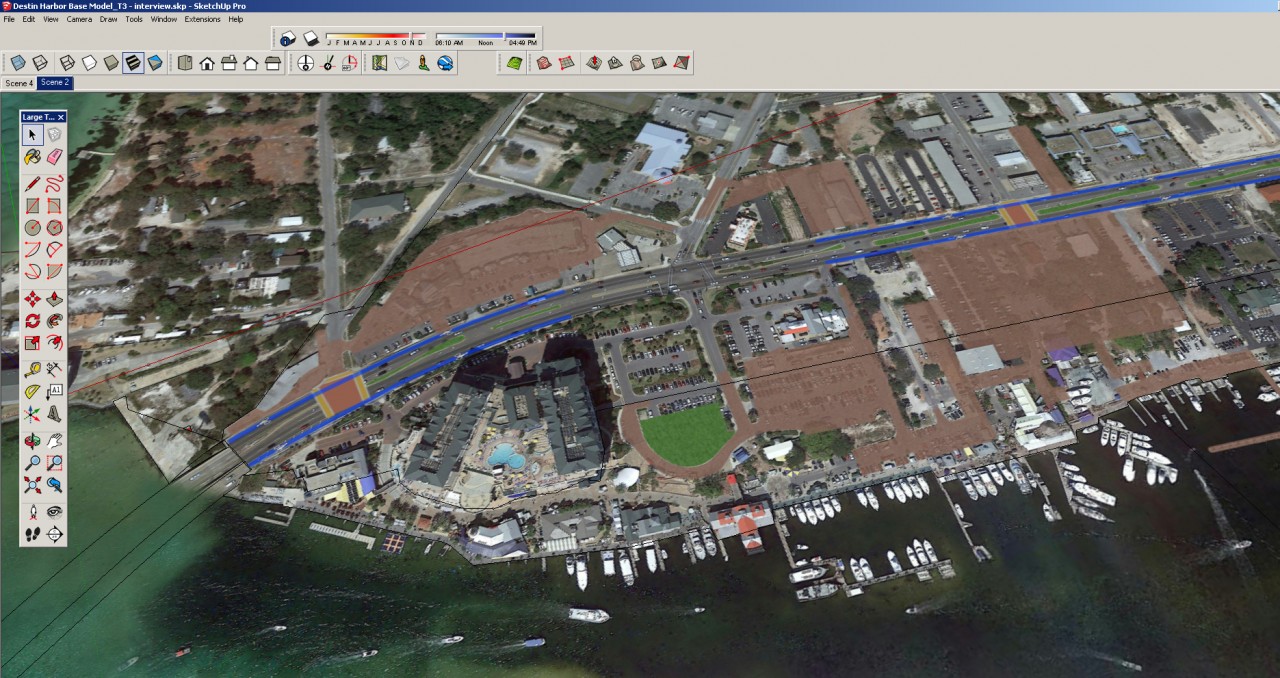
In SketchUp, use Add Location to find a spot in Google Earth. Adjust the region pins as needed, and click Grab to bring the Google Earth aerial into SketchUp. Make sure terrain is toggled off – this only works with the 2D, bird’s-eye view.
Part 1 of this series described how to edit a texture in your model, by right-clicking on it and choosing
Texture / Edit Texture Image. That method is a bit problematic here, because the aerial is inside a group, and that group is locked. This is by design – a locked layer can’t be
moved, and moving terrain, especially accidentally, can be disastrous in SketchUp. As a workaround, you could unlock the group temporarily, but that’s risky (you could forget to re-lock it). And anyway, there’s another way to edit the texture.
Click the Paint Bucket tool, and on the Materials (PC) or Colors (Mac) window, click the House icon to see your in-model materials. Find the aerial image, and double-click it to open the image for editing. Then click the Edit texture image icon, which opens the low-res aerial in Photoshop.
In Photoshop, you now need to adjust the size and resolution of the low-res image so that it can accommodate the high-res, GE Pro version you’ll get in the next step. To do this in Photoshop, resize the image using Image / Image Size. As a rule of thumb, increase the image height to 30 with resolution of 96. We’ll get back to this image in a bit.

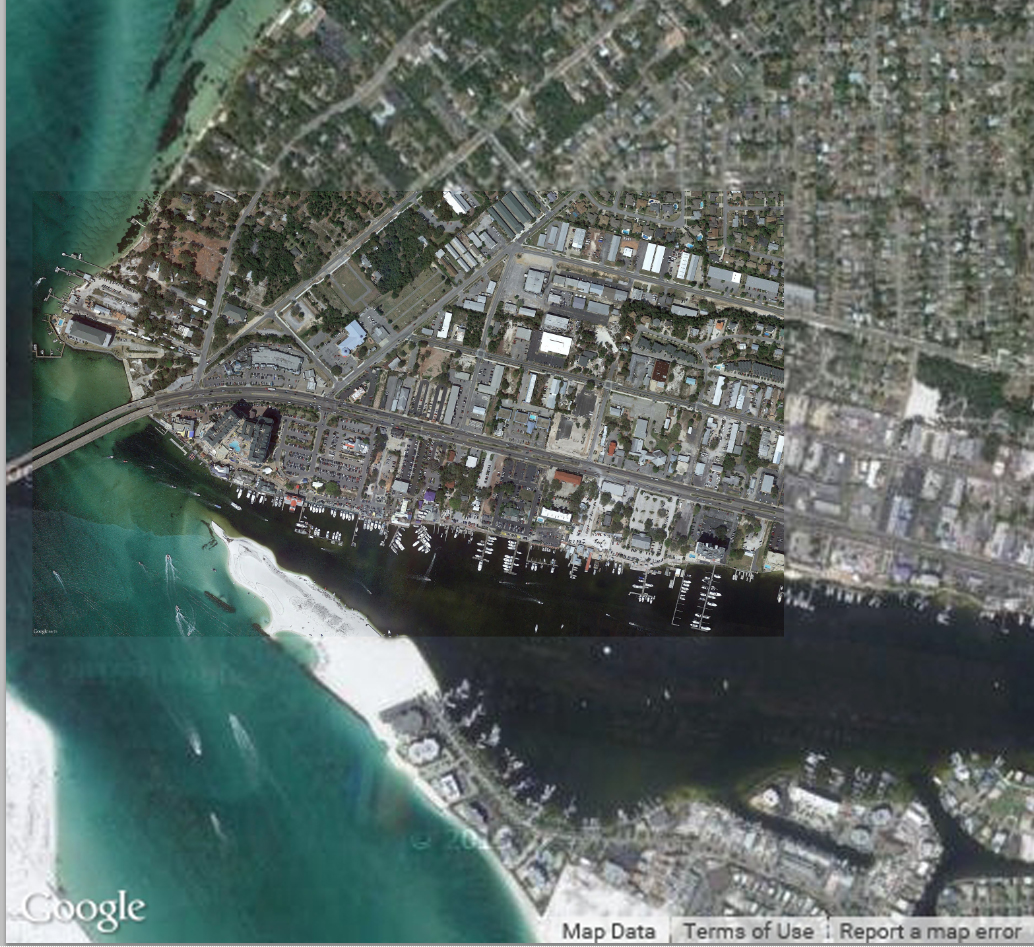
Open GE Pro and navigate to the same location you specified in SketchUp. Make sure that the north direction is straight up, and there’s no tilt in the view (press R to orient your view this way.) Make sure that terrain, roads, and other labels are turned off – this can distort the edges of the image.
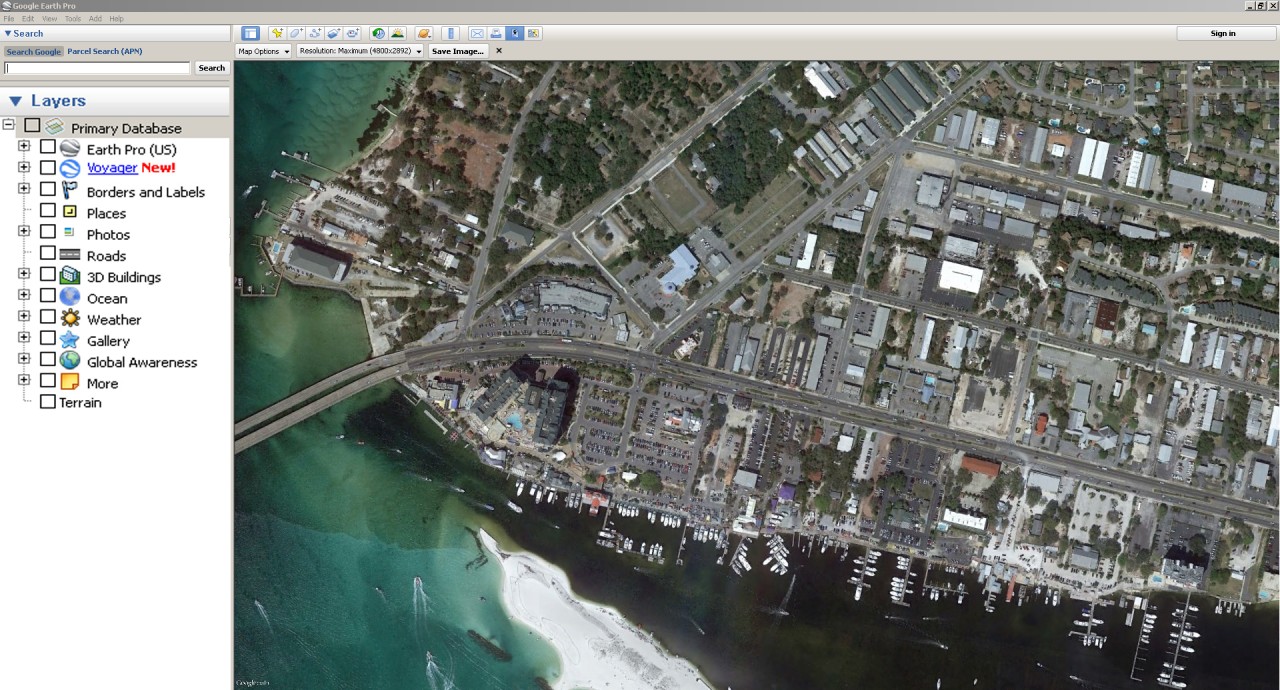
Choose File / Save Image. In the toolbar that comes up, select the pull-down menu and the resolution that you want. The largest is usually around 4k. Click Save Image, then open this high-res image in Photoshop.
Now you have two images open in Photoshop – the low-res one from SketchUp and the high-res one from GE Pro.
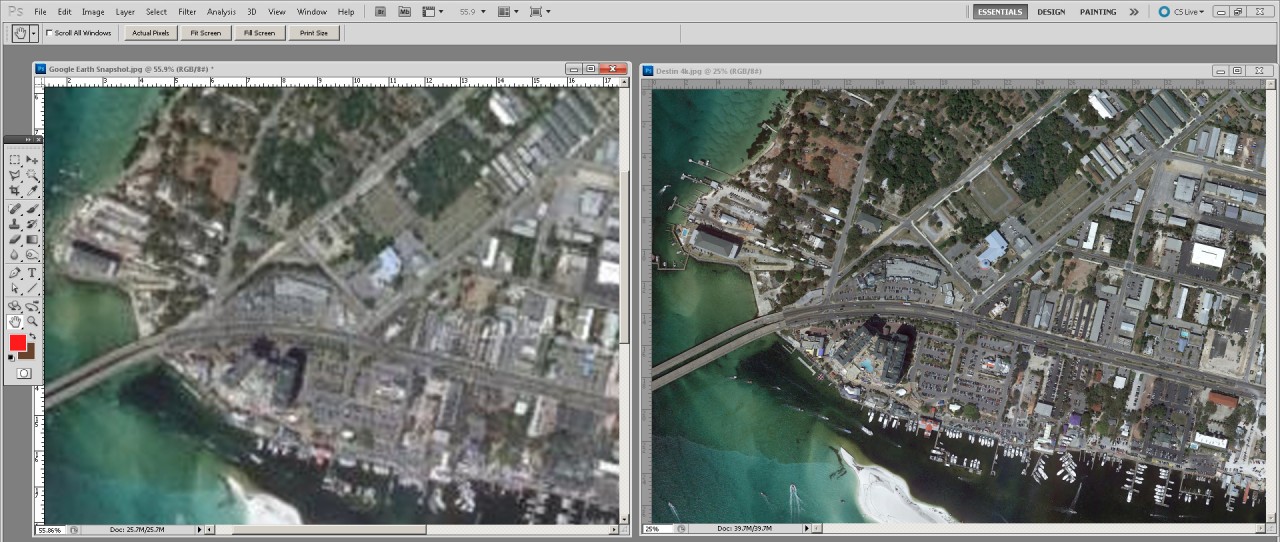
In Photoshop, copy and paste the high-res image onto the low-res one. The copy will be inserted as a new layer. Turn the layer opacity down and compare the images. If the image sizes seem too different, undo the paste and adjust the SketchUp lo-res image size up or down as needed to match the hi-res scale. It doesn’t have to match exactly, but the closer the better.
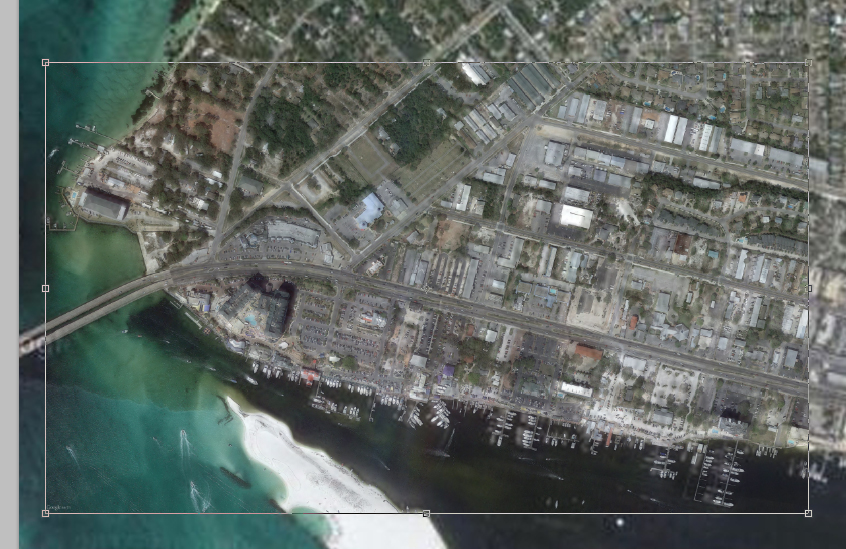
Next, using the Free Transform options in Photoshop, try to align the high-res image to match the low-res image underneath. This time you are looking for an almost-exact alignment, which can take some practice. I suggest that you don’t try to scale the image by maintaining the aspect ratio, but instead adjust the pins manually as needed to get the images to align as closely as possible. It took my 3D Studio team a couple of weeks to master the process but it’s worth the effort (thanks to my colleage Justin Clark).


Permalink
Hi Daniel–
This is very helpful. Thank you for posting this tip. Can you give some insight into what to expect when “Add More Imagery” is needed in SU? For example, with more than one GE image already in SU, should one of the lo-res images have high detail imagery added to it and saved? How are multiple lo-res images improved by this method? Also, doesn’t scale in SU get thrown out of whack when adjusting the lo-res image to fit the high-res image?
Permalink
This is a great question. We tile large areas of images and add high-rez versions as needed. In fact we sometimes add multuiple levels of higher resolutions to the site locations. It’s hard to explain but I just provided a presentation at SketchUp Basecamp on this topic. I will link the video once it is released (should be soon) and plan on seeing more blogs on this topic.
But generally speaking, we add high-rez aerials on a needed bases. The more you move away from the model focus and center, the less rez we add. Does this help?
Permalink
Thank you for this comprehensive tutorial
Permalink
Hi Daniel – Great Articles. Thank you. What other 3D terrain options are possible to import into sketchUp outside of Google Earth? I am concerned about the lack of accuracy in terms of the elevation / topography in GoogleEarth. I will be using SketchUp + Skelion to layout out Large ground mount solar arrays on variable terrain and the accuracy of elevation is important in order to meet the max slope tolerances of the racking systems.