In Part 1 of this series, I showed how to set up just the right camera view for this room interior. And in Part 2, I painted an autumn panoramic image onto a large billboard outside the room, to convey the view of the great outdoors offered by this wonderful room.
Here’s the interior view I left off with – not exactly terrible, but it could certainly be better with that lovely picture I imported.
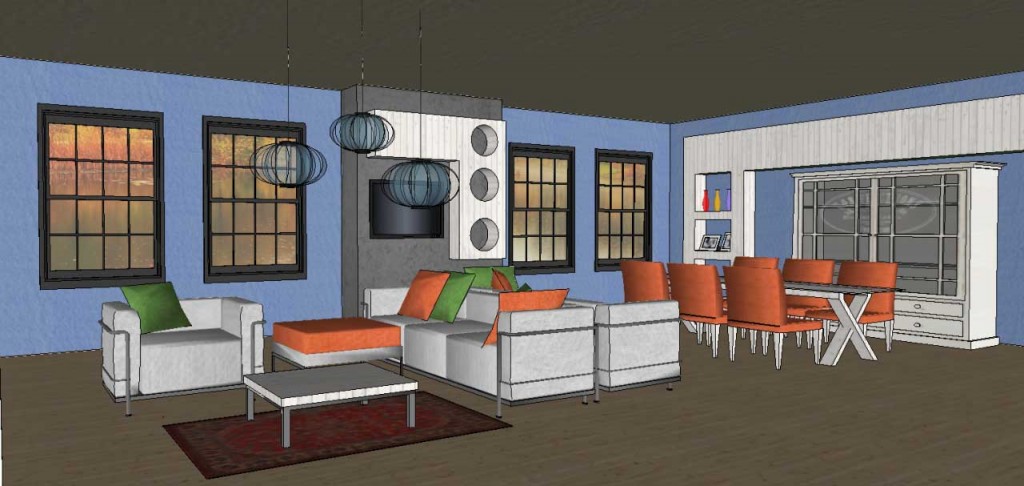
So I’ll edit the image to make the view more attractive.
Resize the Image
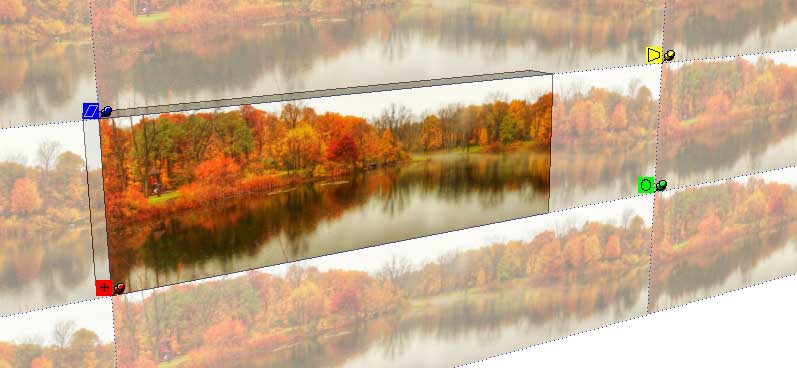
I suspected that the size of the image, relative to the size of the room, was too small. I used the Tape Measure to get a sense of tree height, and one measured about 7′ high. I’d expect these trees to be closer to 25′ or 30′. So this image needs to be quite a bit larger.
To adjust the image, right-click on the painted face of the wall and choose Texture / Position.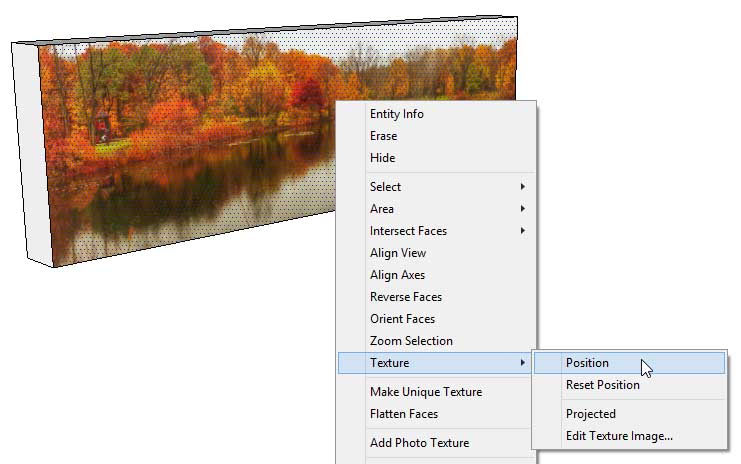
What I see now are several tiling images, with a set of four push-pins surrounding the center image. I have pins of four different colors – these are “Fixed” pins. If you see four all-yellow pins (“Free” pins), right-click and choose Fixed Pins.
Each colored pin has a specific purpose; I’m using only the green one for resizing.
First, I’m dragging the entire image downward, so that the lake doesn’t take up so much of the lower part of the wall.
Next, I’m dragging the green pin directly to the right, which increases the overall image size. (This pin can also rotate an image, which I don’t want in this case.) 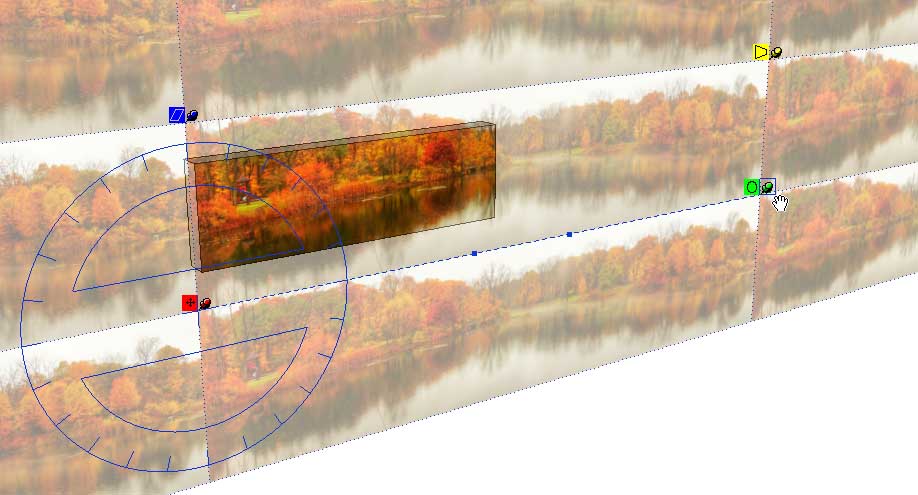
(If you’re interested, the blue pin stretches or squashes the image vertically, and the yellow one – which I’ve never found use for – skews it. The red pin is used for moving the image, though it’s not needed in this example because I’m just dragging to move.)
When the image seems right, right-click and choose Done.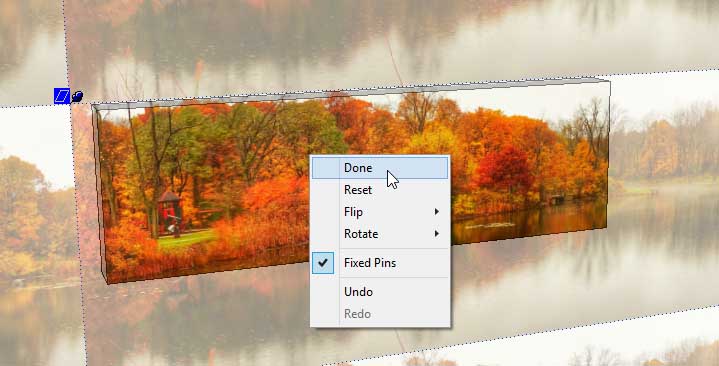
Better? Meh, not exactly. Now it looks like I’m seeing a bunch of overgrown orange weeds. 
Move the Image
So I’m adjusting once more – this time dragging the image to the right. There’s a little red building in the image – a playhouse maybe – that will look great from the window. True, I can see the seam between images in this view, but it should look OK from inside the room (I hope). 
Yes, much better. 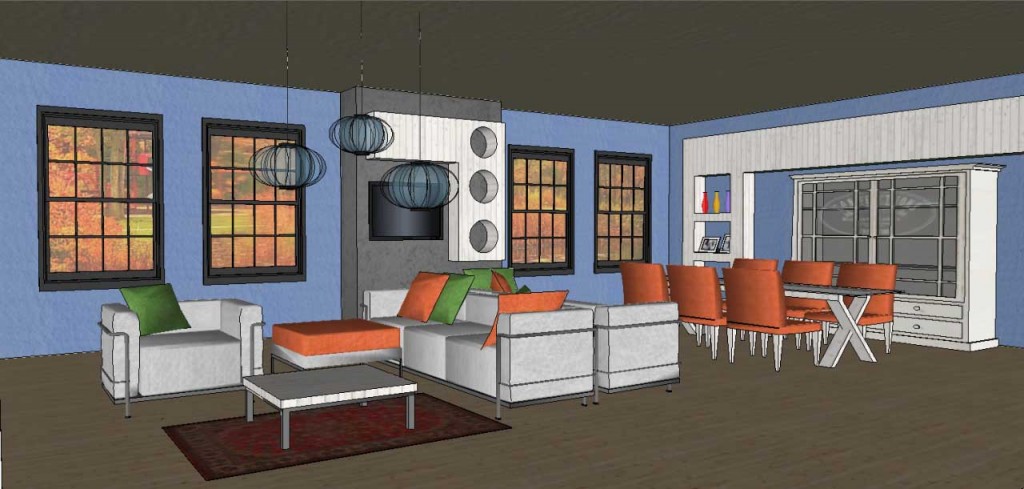
If you render your models, background images usually render quite nicely. (This is a model from SketchUp 2015 for which I used a great little rendering program called Visualizer, but that program is no longer supported and doesn’t work for SketchUp 2016, boo.)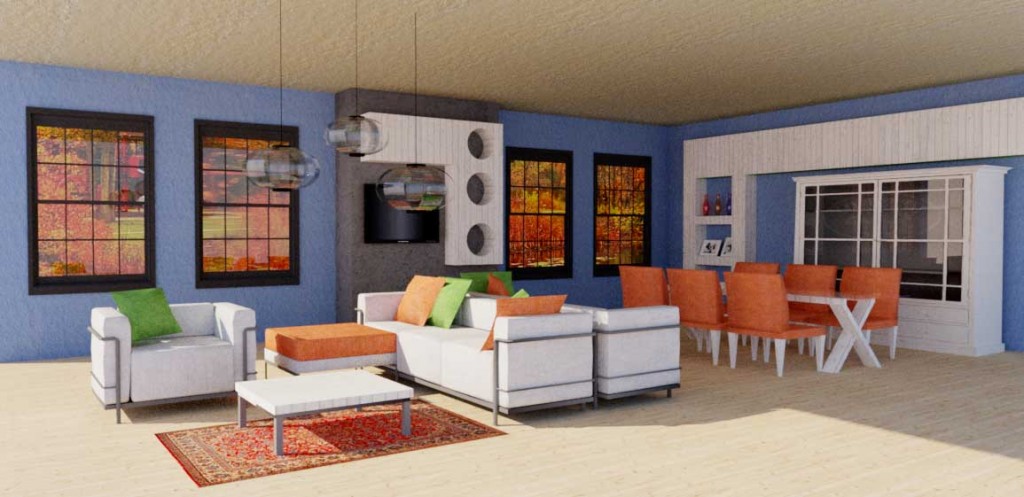
A similar technique, for when more than one view is needed, is to place your entire model inside a huge dome or cylinder, the inside face of which is painted with the same sort of panoramic image. I’ll show this in a future post.


Permalink
That’s neat, Bonnie, I wish I thought of that. But now I know, thanks.
Permalink
Really nice little feature….. fast, easy, productive….