In Part 1 of this series we started with a model of a bed covered with a rumpled blanket. When this blanket is painted with a texture, it comes in as a jumbled mess. To fix it, we learned how to project a texture, sample the texture, and apply the projected texture to the rest of the blanket.
In this post, I’ll show an easier way to do the same thing, which actually provides a bit more flexibility.
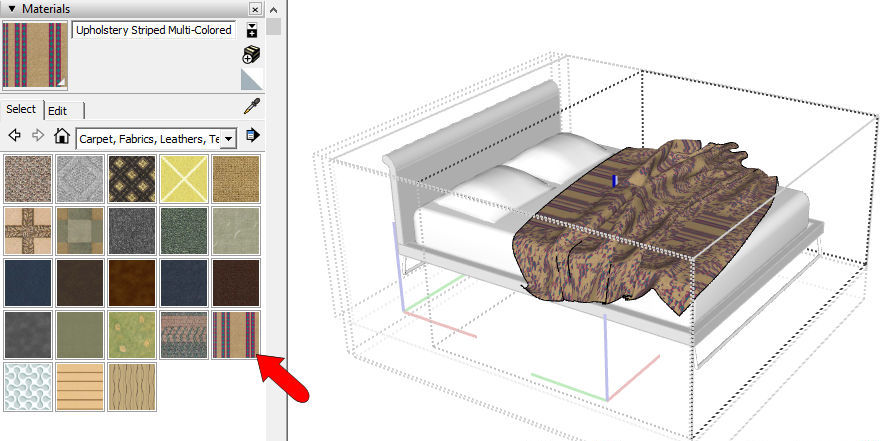
This is the bed model I’m using:
If you want to follow along the steps, click the 3D Warehouse logo on the image above, to open the model’s download page.
Fix the Blanket Material
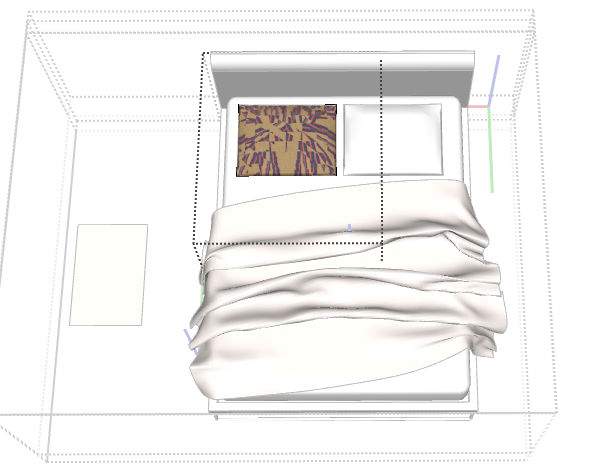
Like we did in Part 1, drill down into the nested components of the bed, until you reach the blanket. Paint the blanket with a striped material from the Materials or Colors window. As we saw in Part 1, you don’t exactly get the stripes you’re expecting.
To fix this, we used in Part 1 a relatively complex method of showing hidden edges, projecting, sampling, hiding, and painting. Here’s a much easier way to accomplish the same thing.
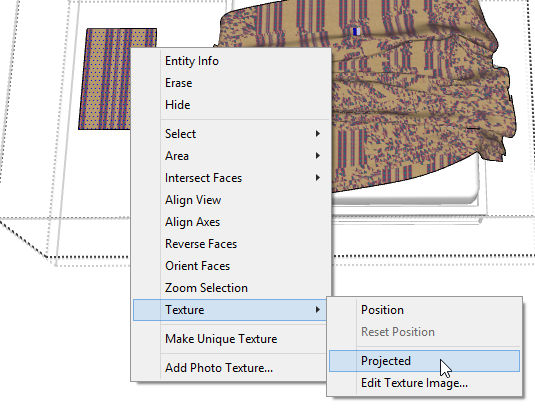
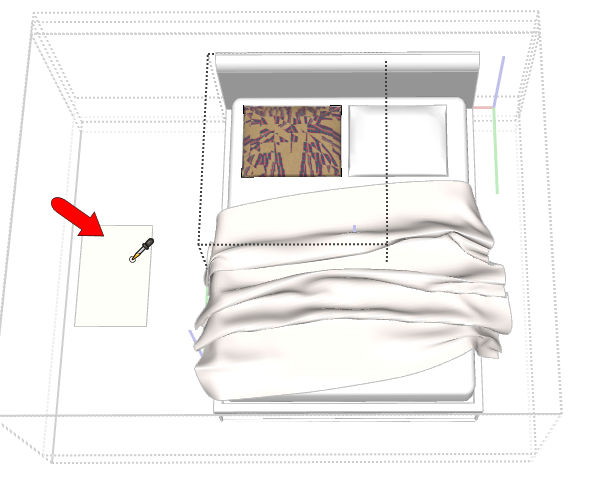
With the blanket component still open, draw a rectangle in blank space, and paint it with the same material.
For a material to be “sample-able” it must be projected. When you paint a rectangle, its material is not projected by default, but you can change that. Right-click on the rectangle and choose Texture / Projected.
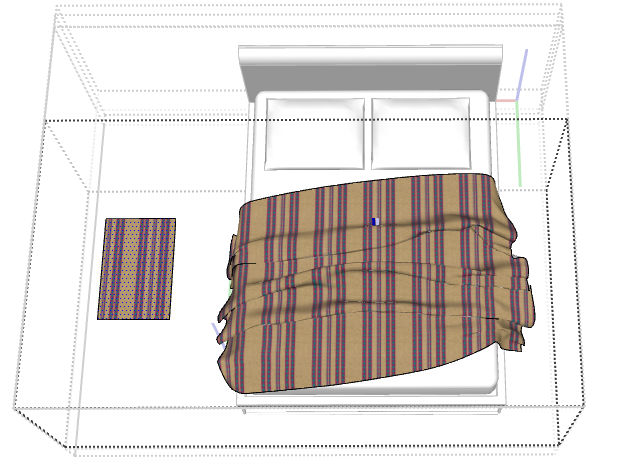
Now the material can be sampled. With the Paint tool active, press and hold the Alt key (PC) or the Cmd key (Mac), which turns the cursor into an eyedropper. Click the rectangle.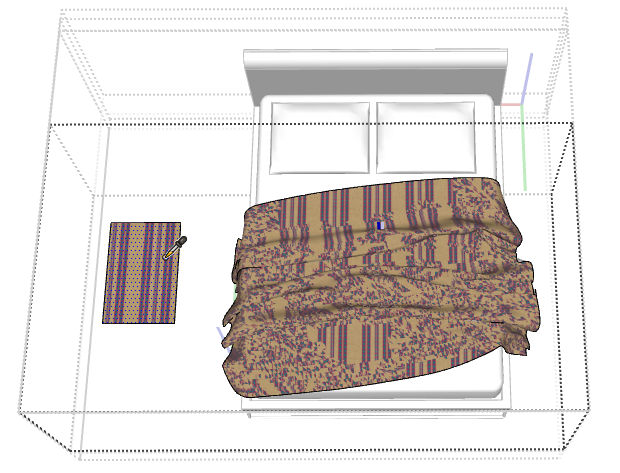
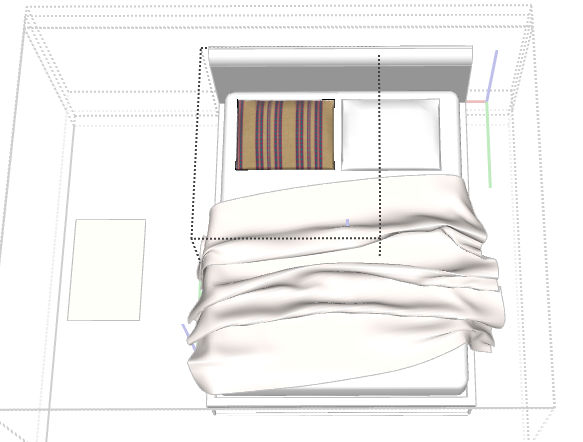
Then click the blanket to replace its material with the projected one. Perfect, at least when viewed from the top. (It’s a little wonky when you look at the sides of the blanket.)
Fixing the Pillow Material
Of course, this will work for the pillows too. Open one of them for editing. The component with the blanket and the painted square are now closed and faded in the background. If you paint the pillow with the stripes from the Materials or Colors window, here’s what you get:
But the painted square is still available for sampling. Click the eyedropper on it.
Then click the pillow to fix its material.
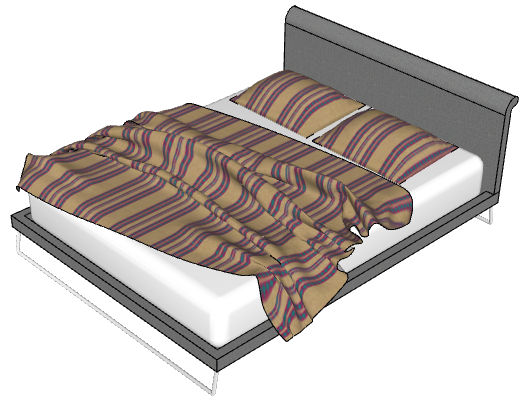
Here’s the bed with striped blanket and pillows, after erasing that temporary rectangle. I’m showing it from this side because the stripes on the other side don’t look quite as good.
Next up: Part 3, where I’ll show two more things. First, how to import your own image to use as a projected texture. And also, how to edit the projected material for a different look.

