Part 1 of this three-part series focused on the hardware you need to maximize SketchUp performance. In this part, I’ll discuss how to adjust SketchUp settings for the most efficient performance.
Here’s what I’ll cover:
- Edge Styles
- Shadows
- OpenGL
- Outliner
Edge Styles
These are the easiest setting to change, and can have a significant impact on performance. (In case you missed it, see my previous post on intro to styles.)
There are several types of edge styles, and all but one can cause major performance issues. You can access edge styles in the Styles window – click the Edit tab, and open the first page: the Edge settings.
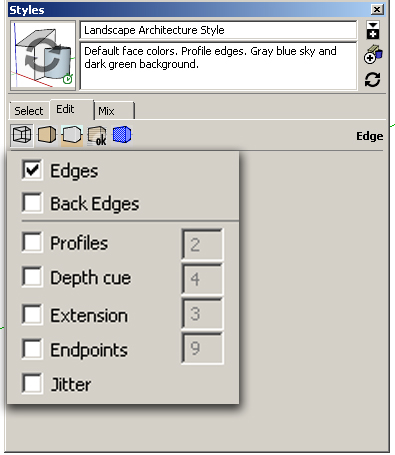
Checking Edges, and nothing else, means that all edges will be represented by a single, thin line. Profiles are thick edges that appear around the outsides of objects, or where there is an unclosed loop of edges. Depth Cue, Extensions, Endpoints, and Jitter are all settings that give an aesthetic, hand-drawn quality to edges. And all of these settings, with the exception of plain, boring edges, can inordinately tax your GPU (graphics card).
Imagine a model with lots of curved edges, which are actually made of many short line segments. The Endpoint setting places dots at each segment, so when you zoom out, each curve looks like a big, bold mess. And each time you orbit, SketchUp has to move those dots around. (Though the Endpoints setting can actually be handy for when you need to see where the segments are. )
If you really love the jittery edge look, like in the model shown below, turn them back on when the model is complete and you’re ready to export images. (Click the image to get a closer look.)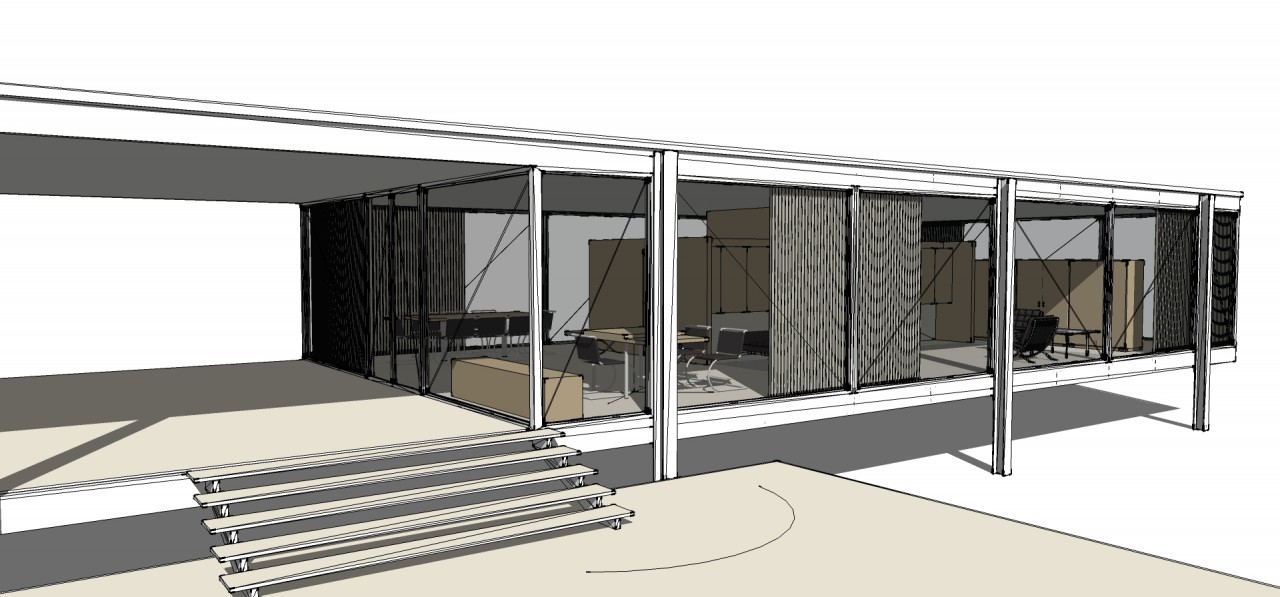
Shadows
SketchUp shadows look really cool. Everyone likes to see them. But even for relatively small models, shadows will severely impact performance. So keep shadows off while modeling (menu: View / Shadows).

If you need to save one or more particular shadow settings, like for a shadow study, take advantage of scenes. You can save one scene with shadows on, save another scene with shadows off, and click between the two. If you save a scene without including the camera location, you can switch shadows on and off from any viewpoint. (Look for a post on this in the future.)
But again, avoid working on your model with shadows displayed. Trying a few times to orbit around a shadowy model will convince you of this – the redrawing time can be painfully long. And, just like with the fancy edge styles, turn shadows back on only when ready to export images.
OpenGL
In the Preferences window (PC: Window / Preferences, Mac: SketchUp / Preferences), there’s a page called OpenGL. The settings here can dramatically affect performance. By default, these options are probably already set the way you want them, but you can still mess with them if you need.
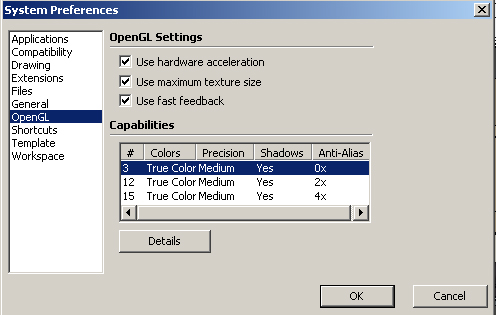
- Use Hardware Acceleration must be checked. This allows SketchUp to correctly process graphics through the GPU. If this box is unchecked and grayed out, that means your graphics card doesn’t support hardware acceleration. This will result in performance issues for even lightly detailed models, and limits your ability to model.
- Use Maximum Texture Size: When checked, SketchUp will process materials, textures, and images at their maximum size. This is great for high-resolution rendering, but will slow things down. While working on your model, using reduced-resolution images is usually just fine. So keep this unchecked until you’re ready to export images.
- Capabilities: For most video cards, you’ll have at least three options here. Look for Anti-Alias; the higher this value, the more crisp and smooth the appearance. But you’ll pay the price with reduced performance. I keep this value at 0. And you don’t even need to increase this setting when exporting images – SketchUp already renders views using your GPU’s highest Anti-Alias value.
I have a previous post on other Preferences settings – check it out if you missed it.
Outliner
This not-used-enough window is a must for staying organized. In the Outliner you can see all groups and components in the model, as an alphabetical list. It’s a powerful tool that allows for the high level of organization you’d need to create models, such as the amazing factories designed by Mitch Stangl.
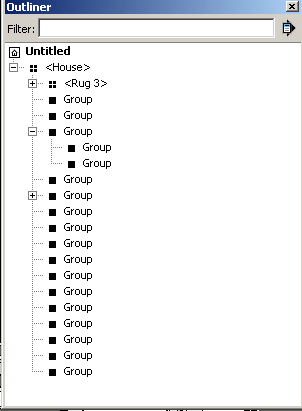
If you’ve been around the block with SketchUp, you already know that the ideal workflow involves heavy use of groups and components. (Expert modelers leave nothing ungrouped. Ever.) But when the Outliner window is open, performance will slow down because SketchUp refreshes the window each time a group or component is added or edited. This causes considerable lag when working with large models. So keep the Outliner hidden except when needed. You can create a shortcut key for it to toggle its visibility for quick access.
Next up in the series: Part 3 – how to maximize SketchUp performance with process, layers, and components.

