In Part 1 of this series, Bonnie discussed best practices of layer placement, and in Part 2 I showed some large-model case studies of layer organization.
In this last post of this series, I’ll demonstrate the power of combining SketchUp layers with scenes to make model presentation simple and efficient.
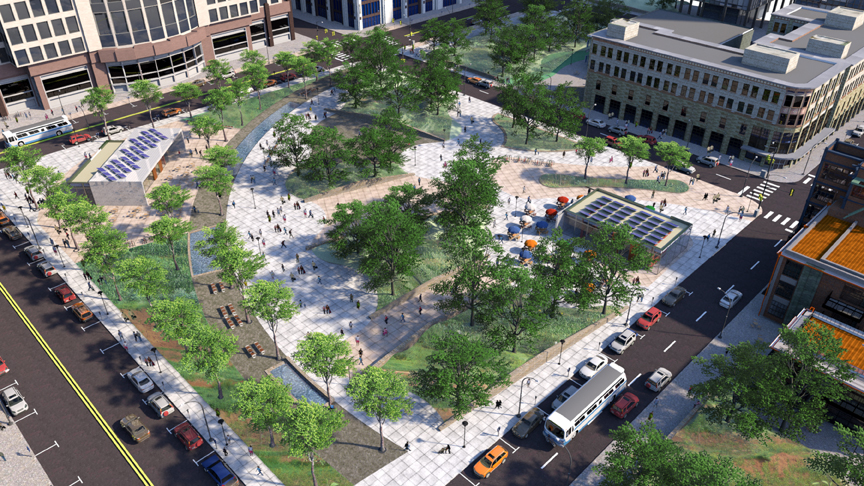
This complicated-looking project is a prime candidate for simplification using scenes and layers.
Creating Scenes
At its most basic level, the Scenes window is how you save a view in SketchUp. Simply click the Add Scene icon (the “plus” sign at the top of the Scenes window), and a scene tab is created at the top of the SketchUp window. Clicking that scene tab returns you to the saved view.
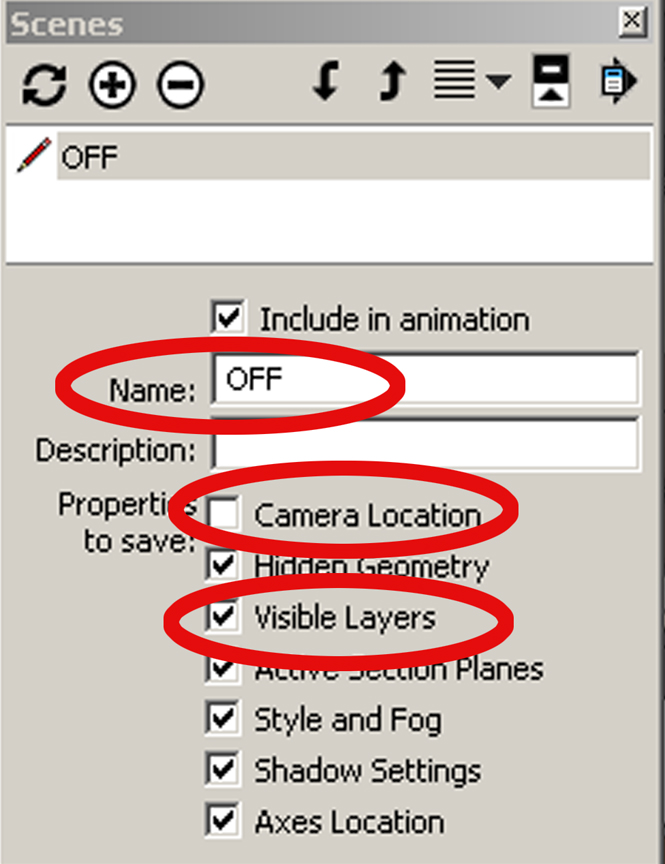
But saving views is not the only reason to use scenes. Take a look at all of the options you can save in a scene, such as shadows, axes, hidden geometry. Since this is a post about layers, the most relevant scene option here is Visible Layers. When this option is checked, as it should be be default, whatever layers are visible when the scene is saved, are the layers that will appear when you display that scene.
For the scene created below, named “OFF,” layers are saved, but Camera Location is not. Without a saved camera location, the current camera view is not saved with the scene. So clicking this scene tab won’t orbit you around anywhere, but it can change the displayed layers.
Utility Scenes
There are many uses for saving scenes with the above options; I’ll demonstrate here something called “utility scenes.” These scenes enable you to quickly turn off or on details, making it easier to work in the model. Of course, you can go into the Layers window and manually toggle layers on and off, but with dozens of layers, this can be time-consuming. Using a scene to toggle on or off multiple layers at once, means changing what’s displayed with one easy click.
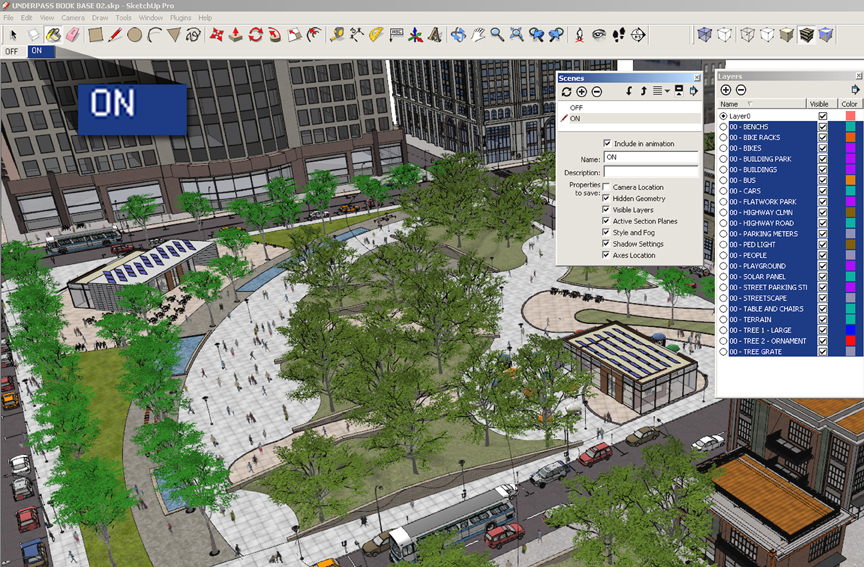
The two most common utility scenes I create are called simply “ON” and “OFF.” The “ON” scene displays all layers in the model. “OFF” toggles off high-polygon components whose display can slow SketchUp performance. Sometimes I create other utility scenes as needed for specific objects.
Here’s “ON” showing everything – notice that all layers are displayed:
And the “OFF” scene has no entourage – no trees, people, cars, street lights, etc. About half of the layers are turned off.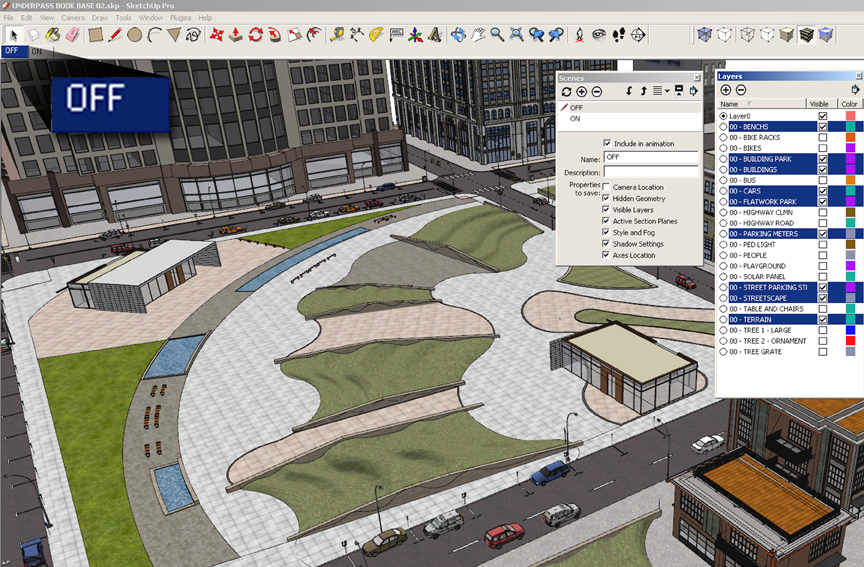
Creating Utility Scenes
It’s easy:
- First, go to View / Animation / Settings. Make sure there is no scene delay and that transition time is set to 0. This means that when you click on a utility scene, SketchUp will not “animate” its way to the scene – you’ll get to the scene instantly.
- In the Layers window, turn off the layers you want hidden.
- In the Scenes window, uncheck the Camera Location option. This means you’ll be able to use this scene to toggle off layers without orbiting to a different view.
- In the Scenes window, click the “plus” sign to save the scene. Change the default name to “OFF.”
- Go back to the Layers window and turn all layers on.
- In the Scenes window, Camera Location should still be unchecked. Create a new scene, renaming it “ON.”
It’s that simple.
Typically, all entourage is hidden in the “OFF” scene, removing clutter and improving performance. But really, any number of utility scenes can be created as long as your groups and components are organized on their proper layers. For example, you can create a scene with just trees, and another with everything but trees, as shown below.
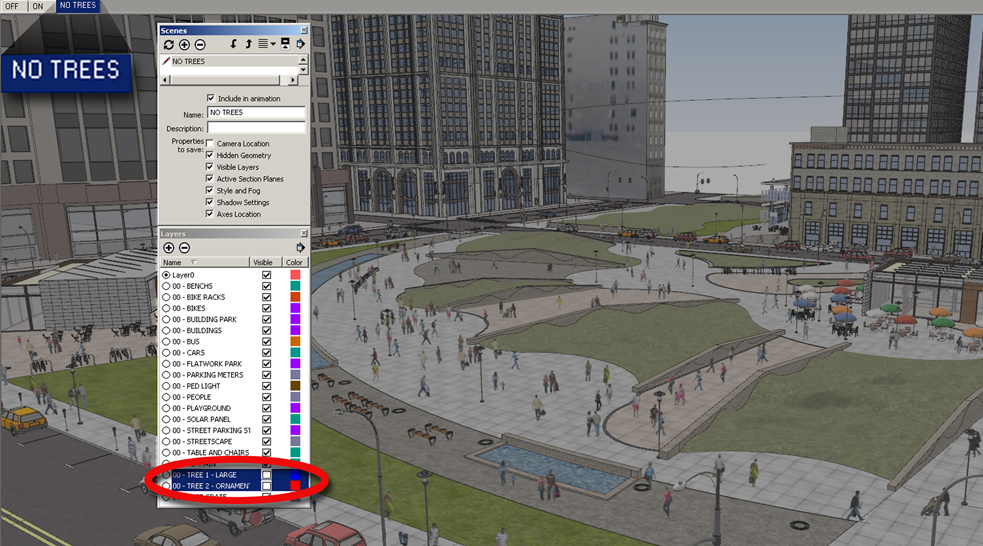
Or you can hide a layer containing windows if you want to show massings, or you can hide building walls to show interior views. The combinations are endless.
When you do need to save specific views, remember to go back to the Scenes window and check the Camera Location option.
Sequencing Scenes
Another reason to combine scenes and layers is to show construction sequencing. The building below is modeled with exacting detail, inside and out.

The model has a ton of layers and scenes.
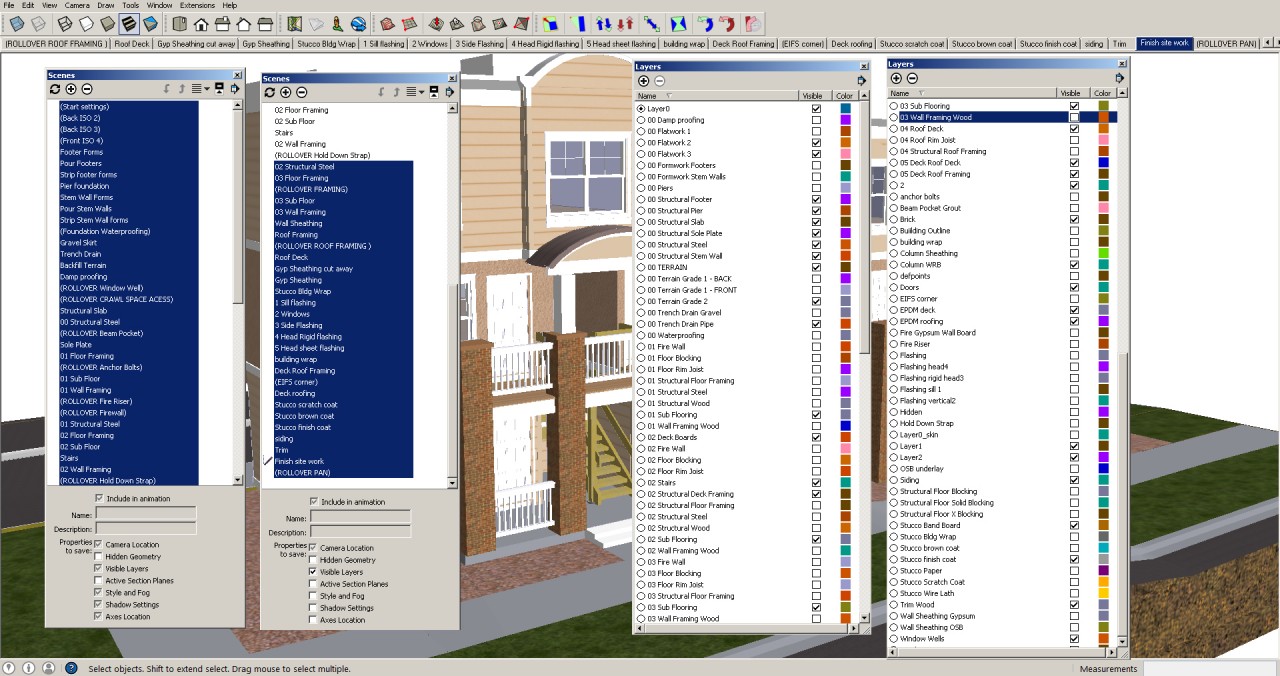
With scenes, you can demonstrate the construction sequence of the model, as shown in the animation below. Each scene was created to turn specific layers on, in a sequential order. The scene names are set up for maximum organization.
The ConDoc extension, developed by architect Mike Brightman, automates the creation of scenes and layers to make it even simpler to generate architectural and construction drawings. The pre-made scenes and layers in this extension are set up for export into Layout. This very clever extension basically uses the same methods described here, but has already done the legwork for you.
Scenes and layers are the backbone of SketchUp animations. I plan to cover animations in many future posts, but in the meantime check out the animation tutorials at www.danieltal.com.


Permalink
Thanks Daniel, this is about my level and I’m looking forward to getting much better at scenes and animations.
Permalink
The 3 part layer tutorials are very clear and easy to understand. Thanks a lot!!!!!
Permalink
I was suggested this blog by my cousin. I’m not sure whether this post is written by him as no one else know such detailed about my difficulty. You are wonderful! Thanks! dkgdcdcefdacadea