Layers – they seem simple enough. Place a SketchUp object on a layer, turn off the layer, hide the object. Each object sits on only one layer. What could go wrong?
Actually, quite a bit. When you model using groups and components (which all good modelers do), and start placing groups, components, or loose geometry onto different layers, things can get a little messy.
In this post I’ll discuss the fundamentals of layer placement. In Part 2 you’ll see some case studies of highly detailed models that follow the same principles. And Part 3 will cover scenes, which give you control over which layers are displayed.
Layer0 Fundamentals
Here’s the best practice rule for layers:
- Create all loose geometry (faces and edges) on Layer0, never anywhere else.
- Only move groups and components to different layers.
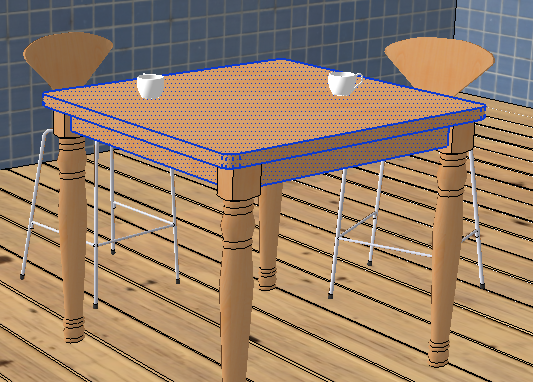
To illustrate the how’s and why’s, I’ll use this simple model of a kitchen set:
Loose Geometry
A perfect model consists entirely of groups and components – no loose geometry. But for purposes of demonstration, this kitchen set model consists almost entirely of groups and components. There is some loose geometry – some faces and edges that are not included in any groups or components.
The Outliner shows all groups and components in the model. I’ll focus on the table – the table components right now are just the four table legs. There’s no group or component for the table top or for the table as a whole.
The loose geometry consists of the faces and edges of the table top. If you can click a face to highlight just that face, you know it’s not part of a group or component. This is a modeling no-no.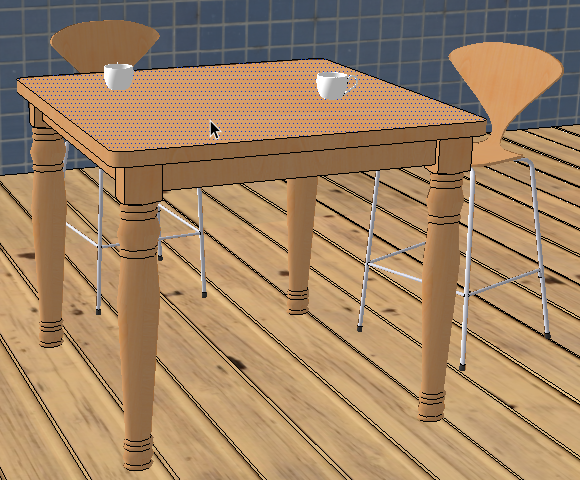
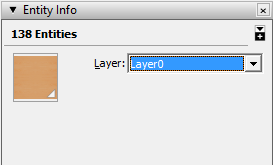
With just one layer in the model to start, “Layer0,” all objects currently sit on that layer. But I’m adding three new layers – one for just the table legs, one for just the table top, and one for the entire table.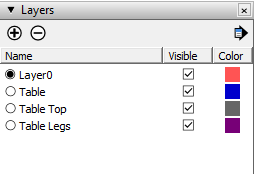
(Incidentally, the filled radio button to the left of “Layer0” means it’s the active layer. Which means anything you create sits on Layer0. While you can make another layer active, DON’T DO IT. It’s very easy to accidentally leave a layer active, create more objects on it than you intended, and later try helplessly to figure out why your layers aren’t making sense.)
Anyway. . .
Moving Objects onto Layers
As stated above, the best practice is to keep all loose geometry on “Layer0,” because it’s easy to make errors when loose geometry goes on other layers. (Remember, only groups and components should be moved to layers.) To show this, I’m selecting a few loose faces of the table top. No edges are selected, and a lot of faces that should be selected as part of the table top are not selected. (A common rookie error.)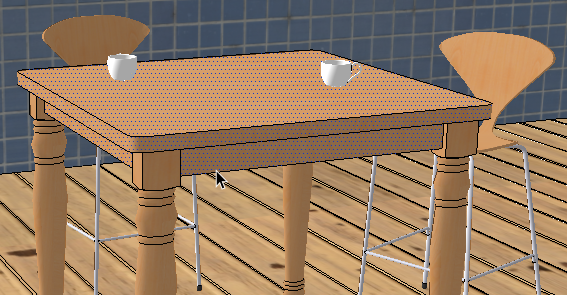
These selected, loose faces are (wrongly) placed on the “Table Top” layer, which is done via the Entity Info window. 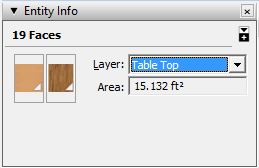
The four table leg components are now selected and (rightly) placed on the “Table Legs” layer. (Rightly, because it’s OK to move components.)
Now the entire table – legs and loose-geometry table top – are made into a group and placed on the “Table” layer.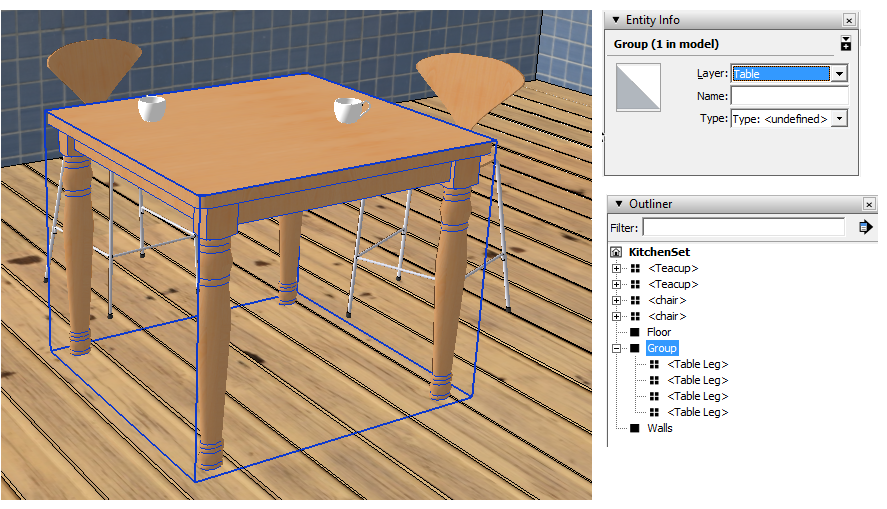
Why Loose Geometry on Layers is Problematic
Now comes the test. If I hide the “Table” layer, the entire table disappears from view. Good so far.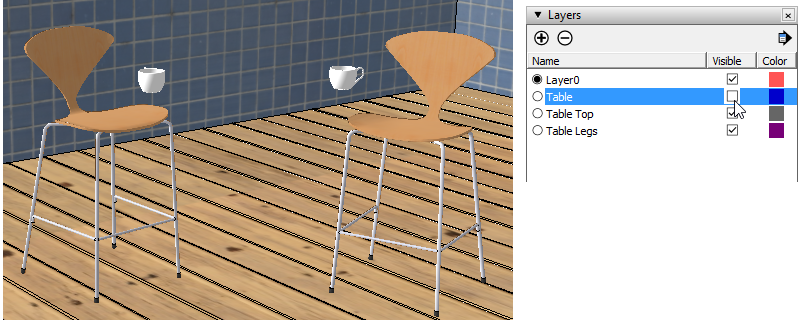
If I hide the “Table Legs” layer, the legs are gone. So even though an object (table legs, in this case) is supposed to reside on only one layer, a group or component can actually reside on more than one layer if it’s nested inside a larger group / component. In this example, the table legs are on both the “Table” and “Table Legs” layers.

Finally, here’s what happens when hiding the “Table Top” layer. Some of the faces disappear, but the rest of the faces and edges are still showing. A mess.
Clearly, this is an extreme example – you’d probably have the presence of mind to place all loose table top objects in the same place. But it’s quite easy to select only faces and not edges, or vice-versa. So stick with the “Layer0 for loose geometry” rule to prevent any problems like this. When models become complex, it gets much easier to place things where they have no business being.
The Right Way
Here’s how this model should be handled. All loose geometry of the table top stays on Layer0 . . .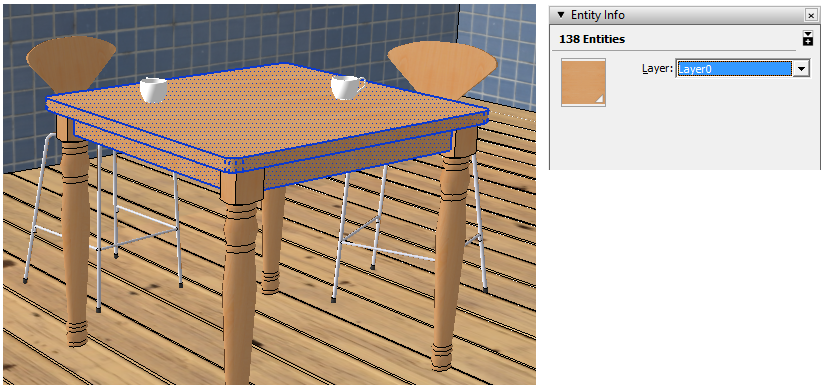
. . . and after you make a group of the entire table top, the group is moved to its layer.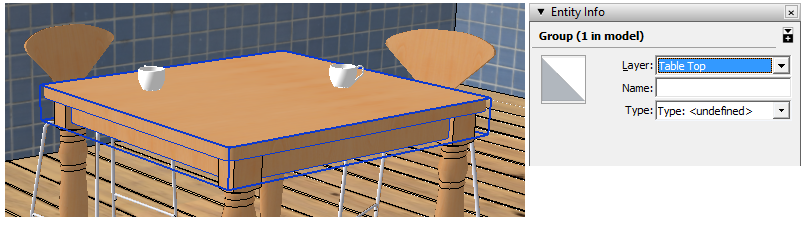
Next in Part 2, Daniel presents some case studies of layer use in highly detailed models.


Permalink
Bonnie, I’m quite disciplined about groups and layers now that I’ve been using Sketchup for a year now, but I still occasionally get some stray edges which didn’t end up on the intended layer. Do you think its a procedural or workflow lack on my part? I’ve noticed that there are plugins available to do this kind of cleaning up but haven’t tried them yet.
Permalink
There is an excellent plugin called Selection Toys on the SketchUp Extensions Warehouse. It allows you to select just edges (among other things). It’s a great way to select stray edges and faces and then use Entity Info to move them.
I will blog about that tool in the future. Its great.
I hope this helps.
Thanks
Daniel
Permalink
Hello. I have to agree with you mostly but having the contents inside of a group or component in another layer allows some variations when using layers for combination setups.
Thanks Michael
6+ Years using SU Pro
Permalink
I agree. Using Layered nested subgroups and components is also a must.